These no bake coconut bites are like a little burst of summer in your hand, perfect for when you need something sweet but don’t want to turn on the oven. I stumbled on this recipe during a chaotic weekend when I was craving something homemade but didn’t have the energy for baking. The moment I mixed coconut, honey, and a splash of vanilla, I knew I had something special—quick, simple, and utterly satisfying.
What I love about these bites is how forgiving they are. No fancy equipment or long waits, just a bowl, a spoon, and a bit of patience as they chill. They remind me of those childhood afternoons when snacks felt like treasures, but now with a grown-up twist of toasted coconut and rich sweetness. They’re my secret weapon for busy mornings or spontaneous get-togethers, a little treat that’s more than just dessert—it’s a reminder that simple ingredients can deliver big comfort.
This recipe is inspired by the chaotic mornings of my childhood, when quick, no-fuss snacks were all we had time for. I love how these coconut bites bring back that rush of nostalgia, but with a grown-up twist of rich coconut and a hint of vanilla. They’re my go-to for a little moment of calm in the middle of a busy day, a sweet reminder that simple can be deeply satisfying.
Nostalgic bites in minutes
- These bites remind me of lazy summer afternoons at my grandma’s house, where coconut was always a treat I looked forward to.
- I love how these are my quick fix on hectic mornings—no oven, no mess, just pure coconut goodness in minutes.
- Biting into one of these takes me back to childhood when simple snacks felt like real treasures, but now I savor the richer, toasted coconut flavor.
- Whenever I make these, I feel a tiny bit of pride—like I’ve created something wholesome and satisfying with just a few ingredients.
The story behind this recipe
- This recipe came from a lazy Sunday afternoon when I was rummaging through my kitchen looking for a quick sweet fix. I realized I had no time or energy for baking, but still wanted something satisfying. The idea of combining toasted coconut and honey hit me, and I threw everything together just to see if it would work. Turns out, it was a happy accident—crunchy, sweet, and totally addictive.
- I’ve always loved coconut treats, but I wanted something that felt more spontaneous and less fussy. These bites remind me that sometimes, the best recipes are born out of necessity—no oven, no fuss, just good ingredients and a bit of patience. Now, they’re my go-to when I need a quick pick-me-up or a little snack for friends dropping by unexpectedly.
- heading
- story_type
Historical and Cultural Roots
- These coconut bites draw inspiration from traditional tropical treats enjoyed by sailors and islanders for centuries, combining simple ingredients that kept well on long voyages.
- The idea of no-bake snacks gained popularity during wartime rationing when oven use was limited, leading to creative recipes like this one that rely on raw ingredients.
- Coconut has been a staple in many cultures’ cuisines for thousands of years, valued for its natural sweetness and long shelf life, making it perfect for quick, no-fuss snacks like these.
Ingredient breakdown: key components
- Coconut flakes: I prefer toasted for a deeper, nutty aroma that really fills the room; skip toasting if you want a softer bite.
- Honey: It’s the glue that holds everything together and adds natural sweetness; maple syrup can be a swap, but it’s milder and less sticky.
- Coconut oil: I like a touch of warmth from the oil, which helps the bites firm up; use melted butter if you’re out, but expect a different flavor.
- Vanilla extract: Just a splash enhances the coconut’s natural flavor with a gentle floral note; almond extract can add a nutty twist, but go easy.
- Salt: A pinch balances the sweetness and makes the coconut pop; don’t skip it, even if you think it’s too much, it’s crucial.
- Optional add-ins: Dried cranberries or chopped nuts can add texture and surprise; keep the quantities small so they don’t overwhelm the bites.
- Chilling time: Patience is key—at least 30 minutes in the fridge lets everything set and meld; don’t skip this step or they’ll be too soft.
Spotlight on key ingredients
Coconut flakes:
- I prefer toasted for a deeper, nutty aroma that really fills the room; skip toasting if you want a softer bite.
- Honey: It’s the glue that holds everything together and adds natural sweetness; maple syrup can be a swap, but it’s milder and less sticky.
Vanilla extract:
- Coconut oil: I like a touch of warmth from the oil, which helps the bites firm up; use melted butter if you’re out, but expect a different flavor.
- Just a splash enhances the coconut’s natural flavor with a gentle floral note; almond extract can add a nutty twist, but go easy.
Notes for ingredient swaps
- Coconut Flakes: I prefer toasted for a deeper, nutty aroma that really fills the room; skip toasting if you want a softer bite.
- Honey: It’s the glue that holds everything together and adds natural sweetness; maple syrup can be a swap, but it’s milder and less sticky.
- Coconut Oil: I like a touch of warmth from the oil, which helps the bites firm up; use melted butter if you’re out, but expect a different flavor.
- Vanilla Extract: Just a splash enhances the coconut’s natural flavor with a gentle floral note; almond extract can add a nutty twist, but go easy.
- Salt: A pinch balances the sweetness and makes the coconut pop; don’t skip it, even if you think it’s too much, it’s crucial.
- Optional Add-ins: Dried cranberries or chopped nuts can add texture and surprise; keep the quantities small so they don’t overwhelm the bites.
- Chilling Time: Patience is key—at least 30 minutes in the fridge lets everything set and meld; don’t skip this step or they’ll be too soft.
Equipment & Tools
- Skillet: To toast coconut flakes evenly and develop flavor.
- Mixing bowl: To combine ingredients thoroughly.
- Spoon or scoop: To shape the bites uniformly.
- Parchment paper: To prevent sticking and make cleanup easier.
- Refrigerator or freezer: To set the bites and develop texture.
Step-by-step guide to no bake coconut bites
- Gather your equipment: a mixing bowl, a spoon, a small baking tray or dish, and parchment paper. The tray is just for chilling the bites, so no need for a fancy mold.
- Toast the coconut: heat a dry skillet over medium-low (about 150°C / 300°F). Add coconut flakes and stir constantly. Look for a golden-brown color and a nutty aroma, about 3-4 minutes. If it starts to burn, reduce heat immediately.
- Mix the ingredients: in the bowl, combine toasted coconut, honey, melted coconut oil, vanilla extract, and a pinch of salt. Stir until evenly coated and sticky. If the mixture feels too dry, add a tiny splash more coconut oil or honey.
- Form the bites: scoop about a tablespoon of mixture and press it firmly into your palm or use a spoon to shape into small discs or balls. Place them on the parchment-lined tray. Keep them uniform for even setting.
- Chill to set: place the tray in the fridge for at least 30 minutes. During this time, the bites will firm up and the flavors will meld. If you’re in a rush, pop them in the freezer for 15 minutes but watch the texture.
- Check the texture: once chilled, the bites should be firm but still slightly chewy. They should crackle gently when bitten and hold their shape well. If they’re too soft, give them more time in the fridge.
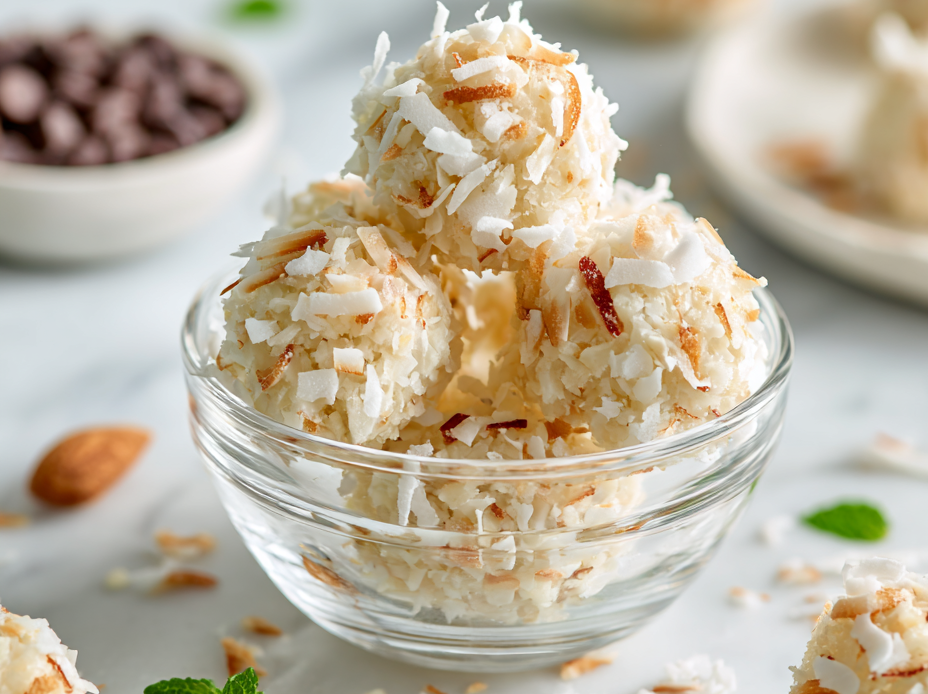
- Finish and serve: remove from fridge, optionally roll in extra toasted coconut or drizzle with dark chocolate. Serve immediately or store in an airtight container in the fridge for up to a week.
Chill the bites uncovered in the fridge for at least 30 minutes. Once firm, you can roll them in extra coconut or drizzle with chocolate for presentation. Serve straight from the fridge for best texture and flavor.
How to Know It’s Done
- Coconut is golden and fragrant before mixing.
- Mixture holds together when pressed, not too sticky or dry.
- Bites are firm and crackle when bitten after chilling.
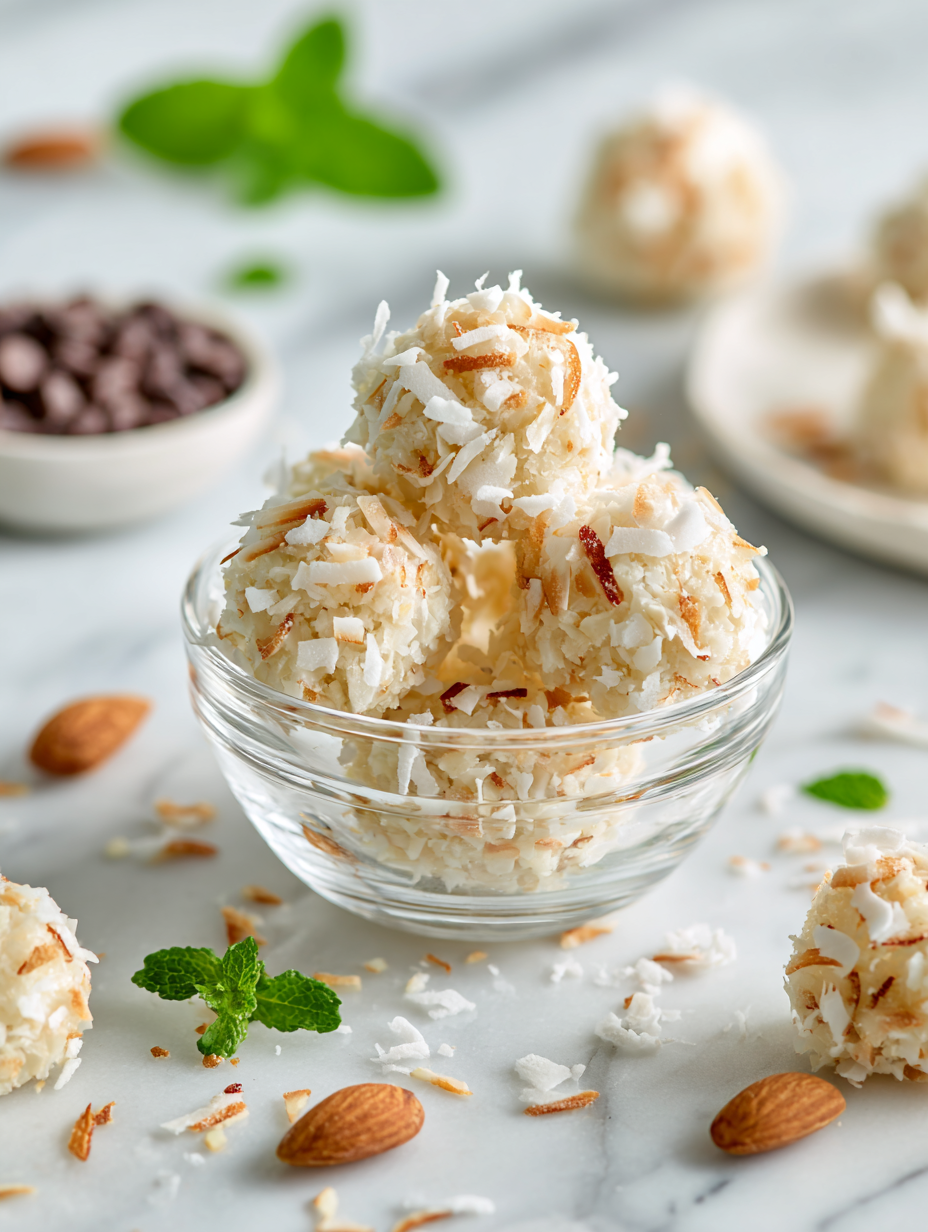
No Bake Coconut Bites
Ingredients
Equipment
Method
- Start by heating a dry skillet over medium-low heat. Add the shredded coconut flakes and toast, stirring constantly, until they turn golden brown and emit a warm, nutty aroma, about 3-4 minutes.
- Transfer the toasted coconut to a mixing bowl. Pour in the honey, melted coconut oil, vanilla extract, and a pinch of salt. Stir everything together until the mixture is evenly coated and sticky, with a slightly thick texture.
- Using a spoon or your hands, scoop about a tablespoon of the mixture and squeeze or press it firmly into a small round shape. Place each shaped bite onto a parchment-lined tray, spacing them evenly.
- Once all the bites are shaped, place the tray in the refrigerator and chill for at least 30 minutes. This allows the bites to firm up and the flavors to meld, giving them a satisfying chewy texture.
- After chilling, the bites should be firm and slightly crackle when bitten. If desired, roll them in extra toasted coconut or drizzle with melted chocolate for an extra touch.
- Enjoy these coconut bites straight from the fridge for the best chewy, crunchy texture. Store leftovers in an airtight container in the fridge for up to a week.
Notes
Pro tips for perfect bites
- Use finely shredded coconut for a smoother texture and easier mixing.
- Toast coconut slowly over medium-low heat until golden and fragrant—this enhances flavor.
- Slightly warming honey before mixing helps it coat the coconut more evenly.
- Chill the mixture before shaping—this makes it less sticky and easier to handle.
- Press bites firmly in your hands or with a spatula to ensure they hold together during chilling.
- Use a small cookie scoop for uniform-sized bites—quick and tidy shaping makes a difference.
- Store bites in an airtight container in the fridge; let them sit at room temp for 5 minutes before serving to soften slightly.
Common mistakes and how to fix them
- FORGOT to keep coconut mixture cold → Chill mixture for easier shaping.
- DUMPED too much honey → Use measured spoonfuls for consistency.
- OVER-TORCHED coconut → Lower heat and stir continuously to prevent burning.
- SKIPPED chilling step → Always refrigerate to set bites properly for firm texture.
Quick fixes and pantry swaps
- If mixture feels too sticky → Splash in a bit more shredded coconut to dry it out.
- When bites crackle excessively → Chill longer or reduce honey for a less sticky texture.
- Splash some warm water if coconut oil solidifies → Helps re-emulsify the mixture smoothly.
- Patch a cracked batch with a drizzle of honey and press together before chilling again.
- Shield delicate bites from stomach-shaking crunch → Store in an airtight container to retain softness.
Prep, store, and reheat tips
- You can prepare the mixture a day in advance; keep it covered in the fridge to prevent drying out.
- Store the assembled bites in an airtight container in the fridge for up to a week; the flavors deepen over time.
- For longer storage, freeze the bites in a single layer, then transfer to a zip-top bag; they’ll keep for about a month.
- Refrigerated bites will stay firm and chewy; if frozen, let them thaw at room temperature for 5 minutes for best texture.
- To reheat a chilled or frozen bite, briefly warm it in the microwave for 10-15 seconds—watch for melty edges and a fragrant coconut aroma.
Top questions about coconut bites
1. Can I make these vegan or dairy-free?
Yes, you can swap honey for maple syrup or agave nectar, which are slightly less sticky but still sweet.
2. Are these bites suitable for vegans?
Absolutely. Use coconut oil or melted coconut butter instead of butter for a dairy-free version.
3. Are these gluten-free?
Yes, using shredded dried coconut and honey makes them naturally gluten-free, but check labels to be sure.
4. My mixture is too sticky or too dry, what do I do?
If your mixture feels too wet, add a bit more toasted coconut. Too dry? Drizzle in a tiny bit more honey.
5. How long should I chill the mixture?
Chill the mixture for at least 30 minutes. Cold helps it firm up, making shaping much easier.
6. How long do these bites last?
Keep the bites in an airtight container in the fridge for up to a week. For longer storage, freeze for up to a month.
7. Can I add other ingredients like nuts or fruits?
Yes, you can add chopped nuts or dried fruits to introduce more texture and flavor variations.
8. How do I toast coconut properly?
Toast coconut until golden and fragrant, about 3-4 minutes on medium-low heat, stirring constantly.
9. How do I shape the bites?
Mix ingredients thoroughly, then press firmly to ensure the bites hold together after chilling.
10. Can I add chocolate or other toppings?
Yes, you can melt some dark chocolate and drizzle it over the bites for extra flavor and visual appeal.
These no bake coconut bites are a small reminder that simplicity can be quite delightful, especially when you’re craving something sweet without turning on the oven. They’re perfect for those busy days when you need a quick, satisfying treat that doesn’t require much fuss or clean-up.
Whenever I make these, I’m reminded that some of the best snacks are born from a bit of improvisation and a handful of pantry staples. They’re a little moment of calm, a quick escape into something rich, coconutty, and just a touch indulgent—no fuss needed.

Hi, I’m Madison Lane, the cook, recipe creator, and heart behind this kitchen. Food has been part of my life for as long as I can remember. Some of my earliest memories are of standing beside my dad while he cooked, watching him move comfortably around the kitchen, tasting sauces, and explaining why patience mattered just as much as seasoning.
