Radishes often get a bad rap as a crunchy, raw snack, but roasting them with garlic turns them into something entirely different. There’s a quiet magic in transforming these tiny roots into tender, smoky bites, especially when you let them sit in the oven long enough for their edges to caramelize just right. It’s a surprisingly simple change that makes a humble vegetable feel special.
I first stumbled on this trick during a busy week when I needed something quick but satisfying. The garlic, roasting alongside, infuses the radishes with a mellow, nutty flavor that balances their slight peppery bite. It’s one of those dishes that feels both rustic and elegant—perfect for a weeknight side or a small gathering where everyone’s looking for comfort in familiar flavors, just a bit elevated.
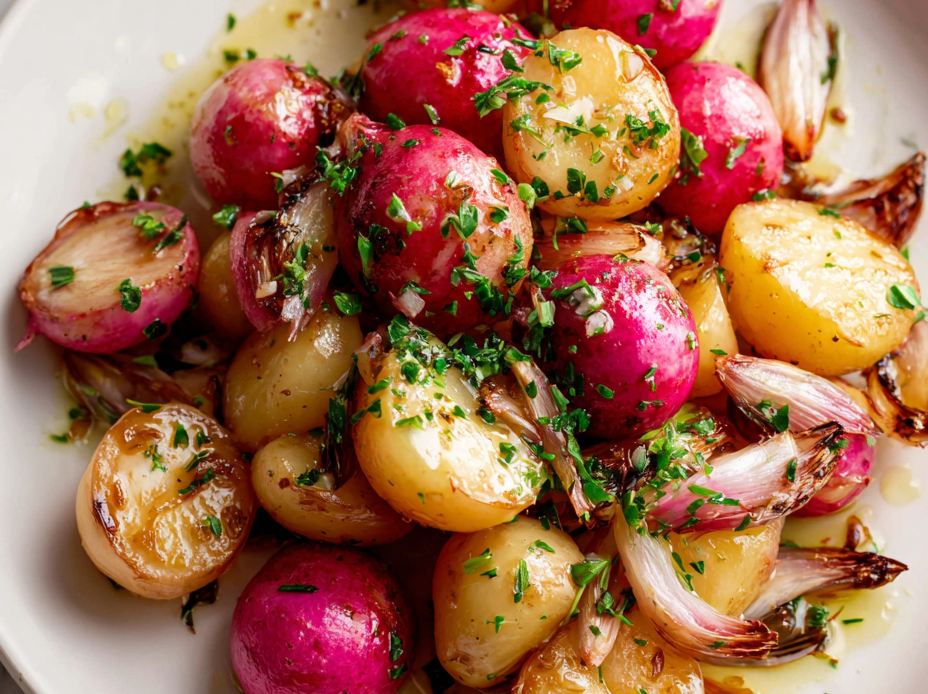
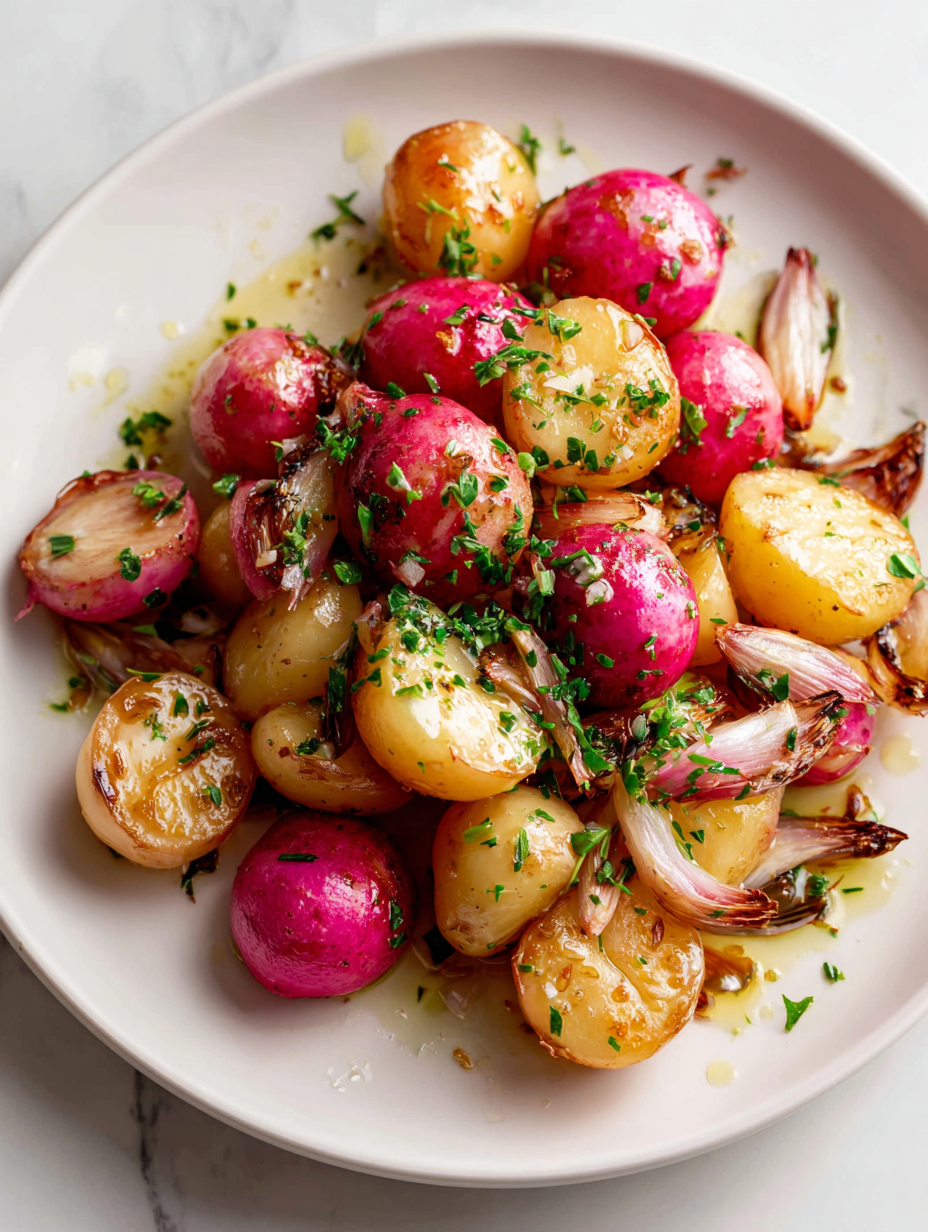
Transforming humble radishes into a rich, savory side by roasting them with garlic, revealing their mellow sweetness and smoky undertones—an unexpected way to celebrate this often-overlooked root.
The story behind this recipe
- I was skeptical the first time I roasted radishes—thought they’d turn bitter or lose their bite. But the way the garlic and heat mellow their sharpness surprised me, making me see them in a whole new light. Now, I keep a stash in the fridge just for these moments of crispy, smoky radish magic.
- One evening, I threw a handful of radishes on the tray without much thought, garlic slices piled on top. Watching them turn from bright white to golden with darkened edges was oddly satisfying. That little burst of caramelized flavor, coupled with the punch of raw garlic, made me realize how overlooked this veggie is—and how much it can shine roasted.
- heading: The story behind this recipe
Ingredient breakdown: key components
- Radishes: I love their crisp, peppery bite, but roasting mellows that out into a smoky sweetness—try a quick rinse and dry thoroughly before roasting for even caramelization.
- Garlic: Sliced thin, it roasts to a fragrant, slightly charred state that’s deeply savory—use plenty for a punch of flavor, or less if you prefer milder hints.
- Olive oil: Drizzle generously to help the radishes caramelize and to carry the garlic’s aroma—skip or reduce for a lighter, less crispy result.
- Salt: I prefer flaky sea salt sprinkled before roasting for a crunchy finish—if you’re sensitive to salt, start small and adjust after tasting.
- Pepper: Freshly cracked adds a subtle heat and depth—don’t skip it, but feel free to add chili flakes for an extra kick.
- Optional herbs (like thyme or rosemary): Toss a sprig or two in for a woody aroma—add towards the end if you want their fresh scent to stand out.
- Lemon juice or vinegar: Just a squeeze after roasting brightens the earthy, smoky flavors—skip if you want a more mellow, roasted profile.
Spotlight on key ingredients
Radishes:
- I love their crisp, peppery bite, but roasting mellows that out into a smoky sweetness—try a quick rinse and dry thoroughly before roasting for even caramelization.
- Garlic: Sliced thin, it roasts to a fragrant, slightly charred state that’s deeply savory—use plenty for a punch of flavor, or less if you prefer milder hints.
Garlic:
- When roasted, it transforms from sharp to sweet and nutty, infusing the dish with a rich aroma that fills the kitchen—don’t skimp on it for that deep, savory punch.
- Radishes: Their natural moisture helps them caramelize beautifully, turning golden and tender—be sure to dry them thoroughly to avoid steaming instead of roasting.
Notes for ingredient swaps
- Dairy-Free: Use olive oil or avocado oil instead of butter for roasting—still rich but plant-based.
- Vegan: Swap honey with maple syrup if you want a touch of sweetness in the glaze or seasoning.
- Low-Sodium: Opt for a fine sea salt or Himalayan salt for less sodium but still full flavor.
- Herb Variations: Fresh thyme or rosemary can replace dried herbs—adds a burst of aromatic freshness.
- Vinegar Options: Lemon juice gives brightness, but apple cider vinegar adds a subtle fruity tang.
- Garlic Alternatives: Shallots or roasted onion slices can mimic garlic’s savory depth if you prefer milder flavors.
- Radish Varieties: Watermelon radishes or French breakfast radishes can swap in—each brings their own visual flair and mild bite.
Equipment & Tools
- Baking sheet: For roasting the radishes evenly in the oven.
- Parchment paper or silicone mat: To prevent sticking and make cleanup easier.
- Chef’s knife: For trimming and cutting radishes into uniform pieces.
- Small bowl: To whisk olive oil and salt for coating.
- Spatula or tongs: To toss and turn the radishes during roasting.
Step-by-step guide to roasting radishes
- Preheat your oven to 220°C (430°F). Line a baking sheet with parchment or a silicone mat for easy cleanup.
- Wash the radishes thoroughly, then pat dry. Trim the tops and tails, cutting them into halves or quarters depending on size—aim for uniform pieces so they roast evenly.
- Peel and thinly slice 3-4 cloves of garlic. Keep the slices thin so they roast quickly and become fragrant, infusing the radishes with a nutty aroma.
- In a small bowl, whisk together 2 tablespoons of olive oil and a pinch of flaky sea salt. Toss the radishes and garlic slices in this mixture until well coated. Spread them out in a single layer on the prepared baking sheet.
- Roast in the oven for 20-25 minutes. Halfway through, give them a gentle stir or shake to promote even caramelization. Keep an eye on the edges—look for a deep golden brown with some darkened spots.
- Check the radishes: they should be tender when pierced with a fork, and the garlic should be toasted and fragrant. If they look pale or the garlic is not yet golden, give them a few more minutes.
- Remove from the oven. Let rest for 2-3 minutes—this allows flavors to settle and the radishes to firm up slightly. Finish with a squeeze of lemon or a drizzle of balsamic vinegar if desired.
Let the radishes rest for a couple of minutes to settle flavors and firm up slightly. Serve warm, garnished with a squeeze of lemon or a sprinkle of fresh herbs if desired.
How to Know It’s Done
- Edges are caramelized and dark golden, not burnt.
- Radishes are tender and easily pierced with a fork.
- Aroma of roasted garlic is fragrant and slightly smoky.
Roasted Garlic Radishes
Ingredients
Equipment
Method
- Preheat your oven to 220°C (430°F). Line a baking sheet with parchment paper or a silicone mat to ensure easy cleanup and prevent sticking.
- Wash the radishes thoroughly and pat them dry. Trim the tops and tails, then cut larger radishes into halves or quarters, aiming for uniform pieces so they roast evenly.
- Thinly slice the garlic cloves, aiming for even, delicate slices that will toast evenly and release their fragrant aroma during roasting.
- In a small bowl, whisk together the olive oil and a pinch of flaky sea salt. Toss the radish pieces and garlic slices in this mixture until they are well coated.
- Spread the coated radishes and garlic slices in a single, even layer on the prepared baking sheet. Make sure they are not overcrowded so they roast properly and caramelize at the edges.
- Place the baking sheet in the oven and roast for 20-25 minutes. During roasting, the radishes will turn golden brown and tender, while the garlic slices will become fragrant and slightly charred.
- Halfway through, carefully shake or use tongs to turn the radishes and garlic, promoting even caramelization and preventing sticking or burning.
- Once the edges are deep golden and the radishes are tender when pierced with a fork, remove the baking sheet from the oven and let it rest for a couple of minutes. The garlic should be toasted and fragrant, with a nutty aroma filling the kitchen.
- Squeeze fresh lemon juice over the roasted radishes and garlic for a bright, tangy finish that balances the smoky sweetness. Toss gently to combine.
- Serve warm, garnished with a sprinkle of additional flaky sea salt or fresh herbs if desired, and enjoy these tender, smoky radishes with their rich garlic aroma.
Pro tips for perfect roasted radishes
- Thin garlic slices roast evenly and develop a fragrant, nutty aroma—don’t skimp on the slicing.
- Toss radishes and garlic in oil thoroughly—this ensures crispy, caramelized edges without steaming.
- Roast at high heat (220°C/430°F) for 20-25 minutes—look for deep golden edges and tender centers.
- Shake or stir halfway—promotes even caramelization and prevents sticking or burning on one side.
- Keep an eye on garlic—if it darkens too quickly, remove early to avoid bitterness.
- Rest roasted radishes 2-3 minutes—this helps flavors settle and makes them easier to serve.
- Finish with a squeeze of lemon or a drizzle of vinegar—brightens smoky, roasted flavors and enhances depth.
Common mistakes and how to fix them
- FORGOT to preheat the oven → Always preheat for even roasting.
- DUMPED too much oil → Use just enough to coat, prevents sogginess.
- OVER-TORCHED garlic → Remove early if it darkens too quickly.
- MISSED resting time → Rest radishes 2-3 minutes to settle flavors.
Quick fixes and pantry swaps
- If radishes turn bitter, splash with lemon juice to brighten their flavor.
- When garlic burns, patch with a sprinkle of fresh herbs for added aroma.
- DUMPED too much oil? Use a paper towel to absorb excess and prevent sogginess.
- Over-torched garlic? Shield with foil for a quick rescue and even browning.
- If radishes stick, swap parchment for a silicone mat to prevent sticking and shizzle.
Prep, store, and reheat tips
- You can prepare the radishes and garlic slices a day ahead—store in an airtight container in the fridge, where they’ll stay fresh for up to 24 hours. The flavors will deepen slightly, making the roasting process even quicker.
- Roasted radishes are best enjoyed fresh, but leftovers can be stored in an airtight container in the fridge for up to 2 days. The texture will soften, and the smoky flavor may mellow, so reheat gently for best results.
- Reheating in a warm oven (around 180°C/350°F) for 5-7 minutes restores some crispness and aroma. Watch out for overcooking, which can make the radishes mushy and dull in flavor.
- For a quick reheat, microwave on medium power for 30-60 seconds—though you’ll lose some of that roasted aroma and crispness, it still makes a tasty snack or side.
Top questions about garlic roasted radishes
1. How does roasting change radishes?
Roasting mellows their peppery bite and adds a smoky, sweet flavor. The garlic becomes fragrant and nutty, creating a rich, savory profile.
2. What kind of garlic should I use?
Use fresh garlic sliced thin for even roasting and maximum aroma. Thinner slices toast quickly, infusing the radishes with garlic’s depth.
3. How long and at what temperature do I roast radishes?
Preheat your oven to 220°C (430°F). Roast for 20-25 minutes, shaking the pan halfway, until edges are dark golden and radishes are tender.
4. How do I know when the radishes are done?
Radishes should be crisp-tender with caramelized edges. The garlic should be toasted and fragrant, not burnt.
5. Can I substitute other vegetables?
Yes, you can swap radishes for watermelons or French breakfast radishes, which bring different colors, textures, and mild flavors.
6. What if the garlic burns?
If the garlic burns, remove it early or reduce oven temperature slightly. Keep an eye on the edges turning too dark too fast.
7. How do I ensure even roasting?
Use a sharp knife for even slices. Toss the radishes and garlic thoroughly with oil for crispy, caramelized edges.
8. Can I make this ahead?
Radishes can be roasted a day ahead, stored in the fridge for up to 24 hours. Reheat gently to maintain texture and flavor.
9. How should I store leftovers?
Leftovers can be stored in an airtight container for up to 2 days. Reheat in a warm oven or microwave, watching for over-softening.
10. How do I fix dull flavors?
If radishes are dull, squeeze lemon or drizzle vinegar after roasting. This brightens their smoky sweetness and enhances flavor.
Radishes might be underestimated, but roasting them with garlic transforms their sharpness into a smoky, tender sweetness that’s hard to resist. It’s a simple dish that’s perfect for turning humble ingredients into something memorable, especially when you want to add a bit of rustic elegance to your table.
This recipe feels like a little secret—something I turn to when I need a quick, satisfying side that still feels special. The aroma of garlic roasting and the contrast of crispy edges with soft centers keep me coming back, season after season, for that comforting, savory bite.

Hi, I’m Madison Lane, the cook, recipe creator, and heart behind this kitchen. Food has been part of my life for as long as I can remember. Some of my earliest memories are of standing beside my dad while he cooked, watching him move comfortably around the kitchen, tasting sauces, and explaining why patience mattered just as much as seasoning.
