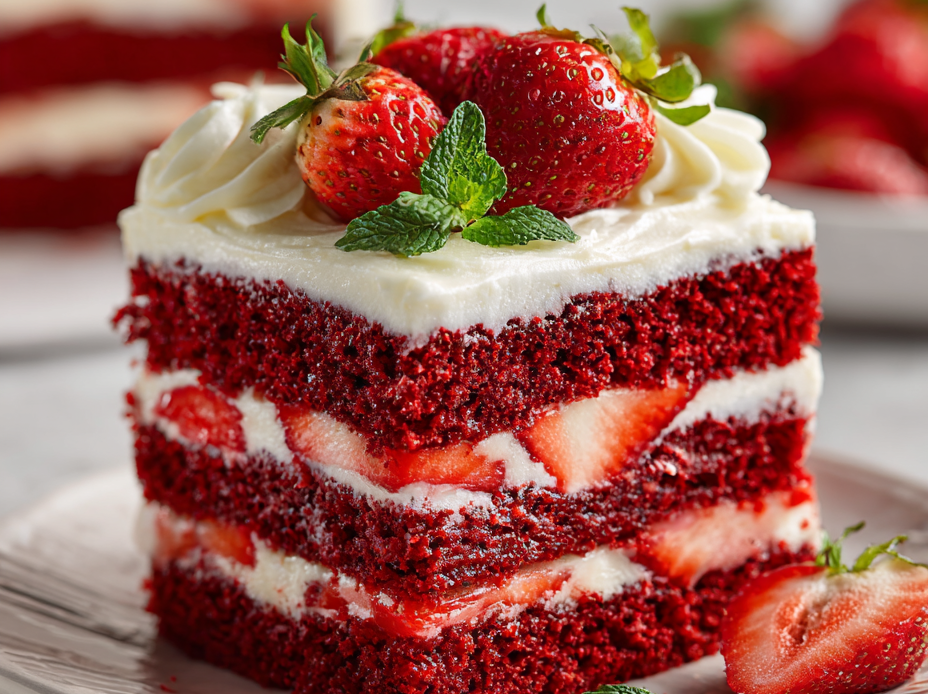
This Red Velvet Strawberry Cake is a real showstopper, not just because of its striking color but because of how fresh and bright it tastes. I love how the tangy sweetness of strawberries cuts through the rich cocoa flavor of the velvet cake, making each bite feel like a celebration. It’s one of those desserts that feels fancy but is surprisingly simple to put together, especially when you want something that looks as lively as it tastes.
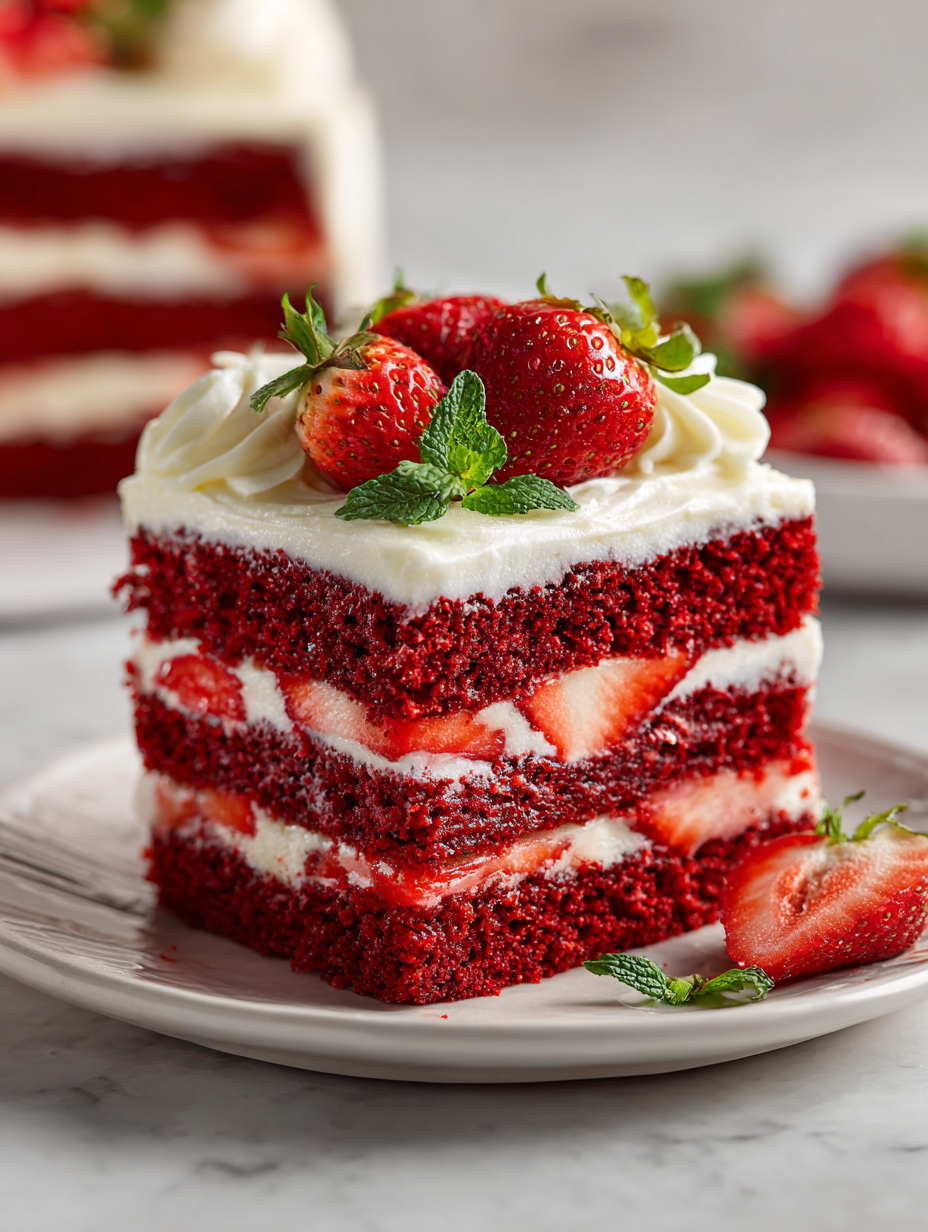
What draws me in every time is the contrast—deep red cake layers with the vibrant, juicy strawberries nestled inside. It’s perfect for springtime gatherings or whenever I want to add a pop of color and freshness to the table. Plus, the smell of cocoa and ripe berries baking together is just enough to make everyone’s mouth water from the moment it hits the oven.
Focusing on how the vibrant red of the velvet cake contrasts beautifully with the bright, juicy strawberries, this cake becomes a celebration of color and freshness, perfect for spring gatherings or when you want a dessert that looks as lively as it tastes.
The story behind this recipe
- This cake came about one spring when I found myself with a mountain of ripe strawberries and a craving for something both bright and comforting. I wanted a dessert that was celebratory but not overly complicated, something that captured the fleeting freshness of the season. Combining my love for vibrant colors and juicy fruit, I started tinkering, and this cake was the sweet result.
- I remember the first time I made it—watching the strawberries sink into the creamy layers, their juices mingling with the tender sponge, was pure joy. It’s become a go-to for me during strawberry season, a way to turn simple ingredients into a little celebration. Every slice reminds me that sometimes, the most straightforward ideas make the most memorable desserts.
- heading: ‘The story behind this recipe’
Ingredient breakdown: key components
- Cream Cheese: I love how its tangy richness makes the frosting creamy and lush—if you want less tang, soften it well first.
- Strawberries: Juicy, bright, and just a bit sweet—use ripe berries for that explosion of flavor in every bite, or freeze-dried for a concentrated punch.
- Red Food Coloring: I prefer gel for deep, vibrant color without altering batter consistency—if you skip it, the cake loses its signature hue.
- Cocoa Powder: Unsweetened, of course—sift it to avoid lumps and boost that deep chocolate aroma that really grounds the cake.
- Buttermilk: Adds moisture and tang—if you don’t have it, a splash of plain yogurt or milk with a dash of vinegar works, but the flavor will shift slightly.
- Cake Flour: I find it gives a tender crumb—if you only have all-purpose, add a little cornstarch to mimic that lightness, but don’t overmix.
- Sugar: Fine granulated is best—if you want less sweetness, cut back a touch, but beware, it balances the tang and cocoa beautifully.
Spotlight on key ingredients
Cream Cheese and Strawberries:
- Cream Cheese: I love how its tangy richness makes the frosting creamy and lush—if you want less tang, soften it well first.
- Strawberries: Juicy, bright, and just a bit sweet—use ripe berries for that explosion of flavor in every bite, or freeze-dried for a concentrated punch.
Notes for ingredient swaps
- Dairy-Free: Swap cream cheese for coconut cream or dairy-free cream cheese. Expect a slightly sweeter, coconut-forward frosting.
- Gluten-Free: Use almond or rice flour instead of cake flour. The texture will be denser, but still delicious.
- Sugar Alternatives: Replace granulated sugar with honey or maple syrup. Adjust liquids slightly to compensate for moisture.
- Vegan Version: Use plant-based butter and a flaxseed or chia seed egg substitute. The cake will be a bit more tender and moist.
- Fresh vs. Freeze-Dried Strawberries: Fresh berries bring juiciness and bright flavor; freeze-dried add concentrated strawberry punch without extra moisture.
- Color Boost: Use natural beetroot powder instead of artificial food coloring for a more earthy, vibrant hue—less intense but more natural.
- Sweetener Strength: Reduce sugar if you prefer a less sweet cake, but keep in mind it balances the acidity of the strawberries and tang of cream cheese.
Equipment & Tools
- 9-inch round cake pan: For baking the cake evenly.
- Electric mixer: To beat the batter smoothly and incorporate air.
- Spatula: For folding ingredients and smoothing the batter.
- Cooling rack: To cool the cake evenly and prevent sogginess.
- Serrated knife: For leveling the cake layers if needed.
Step-by-step guide to making the cake
- Equipment & Tools: Gather a 9-inch round cake pan (for even baking), an electric mixer (for smooth batter), a spatula (for folding), a cooling rack (for steady cooling), and a serrated knife (for leveling).
- Preheat your oven to 175°C (350°F). Grease the cake pan and line the bottom with parchment paper. Set aside.
- Sift together 1 1/2 cups cake flour, 1 tablespoon cocoa powder, and 1/2 teaspoon baking soda into a bowl. This ensures no lumps and even distribution.
- In a large bowl, cream 1/2 cup softened butter and 1 1/4 cups sugar until light and fluffy—about 3-4 minutes. Scrape sides often.
- Add 2 large eggs one at a time, beating well after each. Incorporate 1 teaspoon vanilla extract. The mixture should look smooth and slightly airy.
- In another bowl, mix 1/2 cup buttermilk, 2 tablespoons red gel food coloring, and 1 teaspoon vinegar. This brightens and stabilizes the batter.
- Alternate adding dry ingredients and the buttermilk mixture to the creamed butter, starting and ending with dry. Fold gently with a spatula.
- Pour batter into the prepared pan, smoothing the top with a spatula. Tap the pan on the counter to release air bubbles.
- Bake for 25-30 minutes. Check doneness by inserting a toothpick—if it comes out clean, the cake is ready. The edges should be slightly pulled away from the pan.
- Let the cake cool in the pan for 10 minutes, then transfer to a cooling rack. Cool completely before frosting to prevent melting.
- While cooling, prepare the frosting: beat 8 oz cream cheese with 1/4 cup softened butter until creamy. Gradually add 2 cups powdered sugar and 1 teaspoon vanilla until smooth.
- Slice strawberries thinly. Once the cake is cool, spread a layer of frosting, then arrange strawberries over it. Top with another cake layer and repeat if layering.
- Finish with a dusting of cocoa powder or a drizzle of melted white chocolate for extra flair. Chill the assembled cake for at least 30 minutes before serving.
Allow the cake to cool completely on a rack. Chill in the fridge for 30 minutes before slicing. Serve with fresh strawberries for a lively finish. Keep leftovers refrigerated for up to 2 days; bring to room temp for best flavor.
How to Know It’s Done
- Cake edges are slightly pulled away from the pan and a toothpick comes out clean.
- Cake feels firm but springy when gently pressed in the center.
- Strawberries are vibrant and juicy, not soggy or mushy, after assembly.
Red Velvet Strawberry Cake
Ingredients
Equipment
Method
- Preheat your oven to 175°C (350°F). Grease a 9-inch round cake pan and line the bottom with parchment paper.
- Sift together the cake flour, cocoa powder, and baking soda into a bowl to ensure even mixing and prevent lumps.
- In a large mixing bowl, beat the softened butter and sugar with an electric mixer until the mixture is light, fluffy, and pale, about 3-4 minutes. This helps aerate the batter for a tender crumb.
- Add eggs one at a time, beating well after each addition, then mix in vanilla extract until combined.
- In a small bowl, combine the buttermilk, red gel food coloring, and vinegar, stirring until evenly mixed.
- Alternately add the dry ingredients and the colored buttermilk mixture to the creamed butter, starting and ending with the dry ingredients. Fold gently with a spatula to keep the batter airy.
- Pour the batter into the prepared pan, smoothing the top with a spatula. Tap the pan gently on the counter to release any trapped air bubbles.
- Bake for 25-30 minutes, or until a toothpick inserted into the center comes out clean and the edges slightly pull away from the pan.
- Allow the cake to cool in the pan for 10 minutes, then transfer it to a cooling rack. Cool completely before frosting to prevent melting.
- While the cake cools, beat the softened cream cheese and butter together until creamy, then gradually add powdered sugar and vanilla, mixing until smooth and fluffy.
- Once cooled, slice the strawberries thinly. Spread a layer of frosting over the first cake layer, arrange strawberries on top, then add the second layer and repeat the process.
- Finish by frosting the top and sides of the cake, then garnish with additional strawberries or a dusting of cocoa powder if desired. Chill the cake for at least 30 minutes before serving.
Pro tips for perfect cake
- Bolded mini-head: Use gel food coloring for a vibrant, consistent red—liquid dyes can make the batter too thin.
- Bolded mini-head: When creaming butter and sugar, aim for a light, fluffy mixture—this aerates the batter for a tender crumb.
- Bolded mini-head: Fold dry ingredients gently into the wet to keep the batter airy and avoid a dense cake.
- Bolded mini-head: Bake until the edges are just pulling away from the pan and a toothpick comes out clean—don’t overbake.
- Bolded mini-head: Let the cake cool completely before frosting—this prevents melting and sliding of layers.
- Bolded mini-head: When icing, apply a thin crumb coat first, chill for 15 minutes, then add the final layer for a smooth finish.
- Bolded mini-head: For strawberries, slice thinly for even layering—thick slices can make the cake uneven and harder to assemble.
Common mistakes and how to fix them
- FORGOT to check oven temperature → Use an oven thermometer for accuracy.
- DUMPED strawberries too early → Wait until they release juices before spreading.
- OVER-TORCHED cake edges → Cover with foil if edges brown too fast.
- MISSED mixing dry ingredients thoroughly → Sift well to avoid lumps and uneven color.
Quick fixes for cake mishaps
- When batter is too thick → Splash with a teaspoon of milk to loosen it.
- If frosting is runny → Chill it for 10 minutes until it firms up.
- DUMPED strawberries too early → Wait until they release juices before spreading.
- Over-torched edges → Cover with foil mid-bake to prevent burning.
- Splash a little vanilla or lemon juice into frosting for a fresh, bright lift.
Prep, store, and reheat tips
- Prepare the frosting and slice strawberries a day in advance; store in airtight containers in the fridge. The frosting stays creamy, and strawberries stay juicy for up to 24 hours.
- Bake the cake layers a day ahead, wrap tightly in plastic wrap, and keep at room temperature or refrigerated if in a humid climate. The flavors meld overnight, making the cake even better.
- Assemble the cake a few hours before serving or the night before. Keep it refrigerated, covered loosely with foil, to maintain freshness; bring to room temp for 30 minutes before slicing for optimal texture.
- Leftovers can be refrigerated for up to 2 days. For best sensory experience, let the cake sit at room temperature for 15-20 minutes before serving—notice the aroma of strawberries and cocoa intensify.
Top questions about Red Velvet Strawberry Cake
1. What strawberries are best for this cake?
Choose ripe, fragrant strawberries for maximum flavor and juiciness. Fresh berries give the best bright, sweet-tart punch.
2. Can I use liquid food coloring instead of gel?
Use gel food coloring to get that deep, vibrant red without thinning the batter. Liquid dyes can make it too runny.
3. Why is my frosting melting or sliding off?
Allow the cake to cool completely before frosting to prevent melting or sliding layers. Patience ensures a neat finish.
4. Can I make this dairy-free?
For a dairy-free version, swap cream cheese with coconut cream. The flavor shifts toward tropical, but it’s still creamy and tangy.
5. How do I know when the cake is done?
Bake the layers until a toothpick comes out clean and the edges are slightly pulled away from the pan, about 25-30 minutes at 175°C (350°F).
6. How should I prepare strawberries for layering?
Slice strawberries thinly for even layers. Thick slices can make the cake uneven and harder to assemble smoothly.
7. How long can I store the cake?
Keep the assembled cake refrigerated for up to 2 days. Let it sit at room temperature for 15-20 minutes before serving for the best flavor.
8. My batter is too thick. What do I do?
If batter is too thick, splash in a teaspoon of milk and gently fold. It should flow smoothly but not be runny.
9. The frosting is runny, how can I fix it?
When frosting is too runny, chill it for 10 minutes. It will firm up and be easier to spread smoothly.
10. How do I prevent over-baking?
Over-baking can cause dry edges. Cover with foil during baking if edges brown too fast, and check doneness early.
Baking this cake is like capturing a burst of spring in every slice, with that perfect balance of sweet strawberries and rich cocoa. It’s messy, joyful, and totally worth the effort when you see the smiles and hear the compliments. Sometimes, the simplest ingredients create the most memorable moments around the table. Keep it relaxed, and let the flavors do the talking.
In the end, it’s less about perfection and more about the process—embracing the little quirks and enjoying the sweet chaos. Whether for a special occasion or just because, this cake brings a little brightness and a lot of flavor to any day. Happy baking, and don’t forget to taste as you go—those fresh strawberries are the real stars.

Hi, I’m Madison Lane, the cook, recipe creator, and heart behind this kitchen. Food has been part of my life for as long as I can remember. Some of my earliest memories are of standing beside my dad while he cooked, watching him move comfortably around the kitchen, tasting sauces, and explaining why patience mattered just as much as seasoning.
