When I first tried making sugar cookie frosting, I was aiming for that bakery-perfect glossy finish. Turns out, it’s all about the technique—getting that smooth, shiny surface isn’t just about ingredients, but patience and a little finesse. It’s surprisingly simple once you get the hang of it, and the difference it makes on cookies is like night and day.
This frosting isn’t just for looks—it’s that kind of finish that makes you want to stare, then dive right in. I’ve spent years tweaking my method, chasing that mirror-like gloss that stays shiny and smooth without cracks or cracks, and I finally nailed it. Now, I keep a batch ready for those moments when cookies need a little extra something.
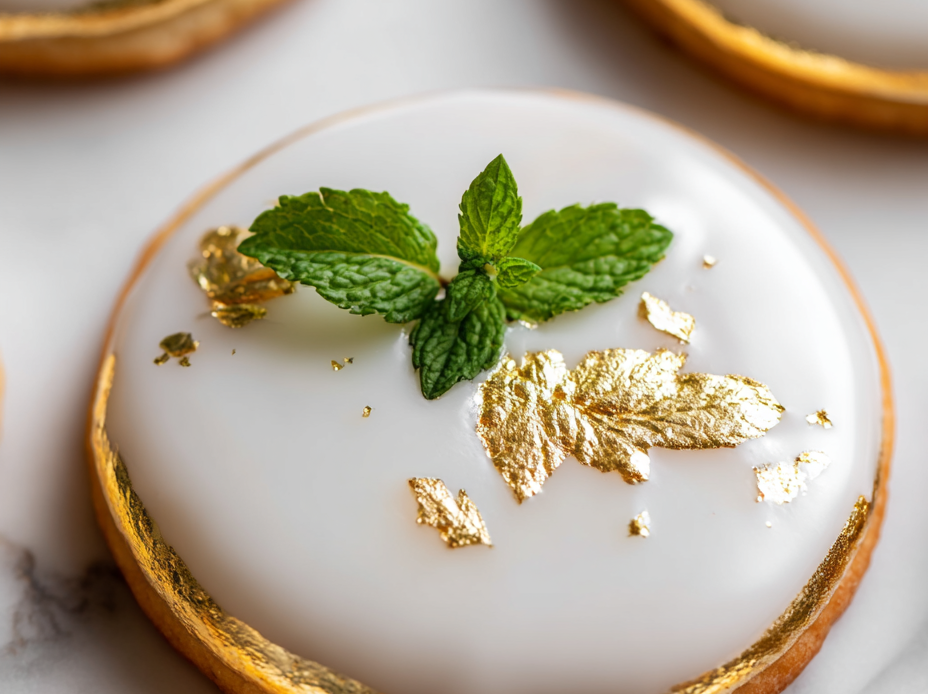
Focusing on the unexpectedly simple yet transformative technique of achieving a perfectly smooth and glossy finish that elevates basic sugar cookie frosting into a show-stopping, Instagram-worthy topping.
The story behind this recipe
- I remember the first time I tried to make sugar cookie frosting, I was frustrated by how quickly it would crack or lose its sheen. It felt like a secret I just couldn’t crack, until I started paying closer attention to the minute details—like how long to beat the butter or the exact temperature of the powdered sugar. That little bit of patience made all the difference.
- Over the years, I’ve tweaked the recipe based on what I notice when I spread it—how it reacts to warmth, how it catches the light, and how it sets just right. It’s become my go-to for decorating, especially when I want a glossy, smooth finish that looks as good as it tastes. This frosting isn’t fancy, but it’s honest—and it works every time.
- heading: The story behind this recipe
Ingredient breakdown
- Powdered sugar: I prefer a finely sifted variety to avoid lumps, giving that silky, smooth frosting—skip the gritty feel. You can swap in coconut sugar for a slightly different sweetness, but it may alter the gloss.
- Unsalted butter: I use softened, almost melting butter to help the mixture come together seamlessly—warm but not greasy. For dairy-free, try coconut or vegan butter, though the sheen might be a touch less shiny.
- Heavy cream: Adds that luscious, pourable quality—think of it as the secret to a glaze-like finish. Almond or cashew milk works in a pinch, but expect a slightly thinner, less glossy result.
- Vanilla extract: Just a splash boosts flavor and depth—brightens the sweet base with a warm, floral note. You could substitute almond or lemon extract for a twist, but keep the amount modest to avoid overpowering.
- Salt: A pinch enhances sweetness and prevents the frosting from tasting flat—don’t skip it! Sea salt flakes give a subtle crunch, but regular fine salt works just as well for a balanced finish.
- Lemon juice (optional): I add a few drops for brightness, especially if the frosting feels too sweet or dull. Lime or orange juice can work if you want a different citrus note, but use sparingly to keep the flavor balanced.
- Food coloring (optional): A tiny drop can transform your frosting into a vibrant masterpiece—just be sure to mix thoroughly. Gel colors won’t thin out the frosting, unlike liquid dyes, which might dilute the shine.
Spotlight on key ingredients
Powdered sugar:
- I sift it to avoid lumps, creating a silky, glossy surface. Skip the grit for smoothness.
- Vanilla extract: I use a splash for warmth and depth, but a few drops of almond or lemon can add a bright twist.
Heavy cream:
- Unsalted butter: Softened, almost melting, helps the frosting spread smoothly and develop a shiny finish. Slightly warm butter works best.
- Adds that luscious, pourable quality—think of it as the secret to a glaze-like finish. Almond or cashew milk can substitute, but expect less gloss.
Notes for ingredient swaps
- Dairy-Free: Use coconut or vegan butter instead of traditional butter. Expect a slightly less shiny finish, but still smooth and tasty.
- Sugar Alternatives: Swap powdered sugar with finely ground erythritol or monk fruit sweetener for a lower-sugar version. Texture may be a bit grainier, but still workable.
- Cream Variations: Replace heavy cream with full-fat coconut milk or cashew cream. Adds richness with a hint of coconut flavor or nutty undertones.
- Flavor Boost: Use almond or lemon extract instead of vanilla to add a different aroma. Keep the amount small to avoid overpowering the frosting.
- Coloring: Opt for natural food colorings like beet juice or turmeric powder. Use sparingly to avoid altering the frosting’s consistency or sheen.
- Salt: Substitute sea salt flakes with fine table salt if needed. Slight difference in texture but maintains flavor balance.
- Lemon Juice: Fresh lemon juice brightens the frosting with zing—skip or substitute with lime or orange juice for a different citrus note.
Equipment & Tools
- Heatproof mixing bowl: To combine ingredients smoothly without melting or overheating.
- Spatula: For mixing and spreading the frosting evenly.
- Fine sieve: To sift powdered sugar, removing lumps for a silky texture.
- Offset spatula: To smoothly spread frosting onto cookies for an even surface.
Step-by-step guide to frosting
- Gather your equipment: a heatproof mixing bowl, a spatula, a fine sieve, and an offset spatula for spreading.
- In the bowl, whisk together 2 cups of powdered sugar and a pinch of salt to ensure even distribution.
- Add 1/2 cup of softened, room temperature unsalted butter. Mix with a spatula until smooth and creamy, about 2 minutes.
- Pour in 2 tablespoons of heavy cream and 1 teaspoon of vanilla extract. Whisk until glossy and smooth, about 1-2 minutes.
- If you want vibrant color, add a tiny drop of gel food coloring now. Mix thoroughly until the color is evenly dispersed.
- Check the frosting: it should be silky and spreadable, with a slight sheen. If too thick, add a drop more cream; if too thin, sprinkle in a little more powdered sugar.
- Once the frosting reaches the right consistency, spread it on cooled sugar cookies using an offset spatula in gentle, sweeping strokes.
- Let the frosting rest for about 10 minutes at room temperature to settle and develop a mirror-like gloss.
- Finish by lightly tapping the decorated cookies to remove any air bubbles and smooth the surface further if needed.
- Allow the decorated cookies to set for at least 30 minutes, or until the frosting is firm and glossy to the touch.
Allow the frosted cookies to rest at room temperature for 30 minutes. This helps the frosting set and develop a shiny, smooth finish. Serve once firm and glossed, or store in an airtight container for up to 2 days.
How to Know It’s Done
- Frosting is glossy and smooth, with a mirror-like shine.
- Spreads evenly without tearing or cracking.
- Frosting holds its shape when spread, not too runny or stiff.
Mirror Gloss Sugar Cookie Frosting
Ingredients
Equipment
Method
- Place your sifted powdered sugar into a heatproof mixing bowl. Add a pinch of salt and whisk together to evenly distribute.
- Add the softened butter to the bowl and begin mixing with a spatula until the mixture is smooth and creamy, about 2 minutes. You should see a pale, fluffy texture forming.
- Pour in the heavy cream and vanilla extract, then continue mixing until the frosting becomes glossy and smooth, about 1-2 minutes. This helps develop that beautiful sheen.
- If you'd like to add color, mix in a tiny drop of gel food coloring now. Stir thoroughly until the color is evenly dispersed and the frosting is vibrant.
- Check the consistency; it should be silky and spreadable with a slight shine. If it’s too thick, add a tiny splash more cream and mix again. If too thin, sprinkle in a bit more sifted powdered sugar and stir to combine.
- Use an offset spatula to spread a thin, even layer of frosting over cooled sugar cookies, smoothing the surface gently for a mirror-like finish.
- Allow the frosted cookies to rest at room temperature for about 10 minutes. This helps the frosting set and develop that glossy, reflective surface.
- Once the frosting is shiny and firm to the touch, serve your cookies immediately or store in an airtight container for up to 2 days. Enjoy the stunning, bakery-quality finish!
Pro tips for perfect frosting
- Use room temperature butter for a silky, smooth frosting that spreads evenly.
- Sift your powdered sugar to avoid lumps and achieve that glossy finish.
- Add a tiny splash of heavy cream at a time—too much and it thins out the shine.
- Mix until just combined—overmixing can cause cracks and dullness in the gloss.
- For vibrant colors, use gel food coloring—liquids dilute the frosting and reduce shine.
- Rest the frosting for 10 minutes after spreading—this helps develop that mirror-like gloss.
Common mistakes and how to fix them
- FORGOT to sift powdered sugar → Add sifted sugar for a silky finish.
- DUMPED in all ingredients at once → Mix gradually for smooth, glossy frosting.
- OVER-TORCHED the frosting → Stop mixing once shiny and smooth, not cracked or dry.
- SCRAPED the bowl too early → Let frosting rest 10 minutes for perfect gloss and spreadability.
Quick fixes and pantry swaps
- If frosting cracks, splash in a tiny bit of hot water to rehydrate and smooth it out.
- When frosting is too thick, gently patch by stirring in a splash of cream or milk.
- Splash chilled frosting with a little vanilla or lemon for a quick flavor lift and shimmer.
- Patch dull spots with a thin layer of fresh frosting for a glossy, even finish.
- Shield cracked frosting with a quick five-second rescue: rewarm briefly over low heat, then stir.
Prep, store, and reheat tips
- Prepare the frosting a day in advance by mixing all ingredients until smooth. Cover tightly and refrigerate; it firms up slightly, but still spreads easily after a quick stir.
- Store the frosting in an airtight container in the fridge for up to 3 days. Expect it to darken a bit in color, but still glossy and tasty.
- For longer storage, freeze the frosting for up to 1 month. Thaw overnight in the fridge, then stir vigorously to restore smoothness and shine.
- Reheating isn’t necessary—just stir the chilled or thawed frosting well. If it’s too thick, add a tiny splash of cream or milk until it’s silky again. Watch for a shiny, smooth texture before spreading.
Common questions about sugar cookie frosting
1. Can I make sugar cookie frosting shinier?
Yes, adding a teaspoon of corn syrup or glycerin helps keep the frosting shiny and prevents cracking. It adds a slight sweetness, but it’s worth it for that glossy finish.
2. Why is my frosting grainy?
If your frosting feels grainy, it’s probably due to lumps in the powdered sugar. Sifting it thoroughly before mixing usually fixes this.
3. How do I get vibrant colors in my frosting?
You can color the frosting with gel food coloring for vibrant hues without thinning it out. Liquid dyes can dilute and dull the gloss, so use gels sparingly.
4. Why does my frosting crack?
To prevent cracks, don’t overmix once the frosting is glossy. It should be smooth and shiny, not stiff or dry-looking. Rest the frosting for 10 minutes to help set the sheen.
5. My frosting is too thick or too thin, how do I fix it?
If your frosting is too thick to spread, add a tiny splash of heavy cream or milk and stir until it’s silky smooth. If it’s too runny, mix in a bit more powdered sugar.
6. How can I revive dull frosting?
For a quick fix if the frosting is dull, gently warm it over low heat for a few seconds, then stir vigorously until shiny again. Don’t overheat or it’ll melt.
7. Does butter temperature matter?
Use softened, room temperature butter for a smooth, glossy finish. Cold butter will make your frosting lumpy and less shiny.
8. Can I make frosting ahead of time?
You can prepare the frosting up to 2 days in advance. Keep it covered tightly in the fridge, then stir well before using to restore gloss and smoothness.
9. My frosting is too sticky to spread, what should I do?
If your frosting is too sticky to spread, chill it in the fridge for 15-20 minutes. It firms up enough to spread smoothly without losing shine.
10. Why should I sift powdered sugar?
Use a fine sieve to sift powdered sugar and avoid lumps. Lumps can cause cracks or dull spots on your frosting surface.
This frosting isn’t just about the shiny finish—it’s about the quiet satisfaction of a perfect spread, every time. It’s a small act that elevates a simple cookie into something memorable, especially during the holidays when everyone appreciates a little extra effort.
In the end, it’s the little details—like that glossy sheen and smooth texture—that turn good cookies into a display of care. No matter the occasion, this frosting reminds me that sometimes, simple techniques make the biggest difference, and that’s what keeps me coming back to it.

Hi, I’m Madison Lane, the cook, recipe creator, and heart behind this kitchen. Food has been part of my life for as long as I can remember. Some of my earliest memories are of standing beside my dad while he cooked, watching him move comfortably around the kitchen, tasting sauces, and explaining why patience mattered just as much as seasoning.
