This no-bake chocolate crunch bars recipe is my go-to when I need a quick fix of something sweet and satisfying. It’s like a little secret stash of nostalgia, all pressed into one crunchy, gooey bar that takes no time at all to make. Honestly, I keep these in the fridge for those afternoons when I want a treat without the fuss.
What I love most is how versatile it is—you can swap in different nuts or even add a sprinkle of sea salt on top for a flavor kick. It’s one of those recipes that feels almost too simple, but every bite reminds me why I keep coming back. Perfect for busy days, lazy weekends, or just when a chocolate fix hits hard and fast.
This recipe is my secret weapon for quick, nostalgic treats during busy weeks when I crave something sweet but don’t want to spend hours baking.
The story behind this recipe
- This recipe came together during a chaotic weekend when I needed something quick, chocolatey, and satisfying without turning on the oven. I remembered those childhood days when my grandma’s kitchen was filled with the smell of melted chocolate and toasted cereals, and I wanted to recreate that simple joy. It’s funny how some of the best recipes are born out of necessity and a bit of nostalgia.
- I often keep a stash of these bars in the fridge because they’re my emergency sweet, especially when I’m running late or just need a little comfort. Over time, I’ve tweaked the ingredients to make them more flexible—adding nuts, swapping cereals, or even sprinkling sea salt on top for a salty-sweet contrast. They’re honestly more of a mood than a recipe—a little bit chaotic, a lot delicious, and always reliable.
- heading: The story behind this recipe
Ingredient breakdown: key components
- Dark chocolate: I love using a rich, slightly bitter chocolate that melts smoothly and coats everything with a deep cocoa aroma. If you prefer it sweeter, add a touch of milk chocolate, but keep in mind it’ll soften the crunch a bit.
- Crispy cereal: I usually go for puffed rice or cornflakes—they bring that satisfying crunch I crave. For a nuttier flavor, try adding some toasted rice cereal or even crushed graham crackers for extra flavor.
- Butter: I opt for unsalted butter for control over salt levels, and the melt-in-your-mouth richness it gives. If you’re dairy-free, coconut oil works but won’t have quite the same creamy effect.
- Sweetener: I stick with golden honey or light corn syrup, which helps everything stick together and adds a subtle sweetness. For a vegan version, maple syrup is a good swap, though it’s a tad more liquid.
- Nuts or seeds: I like tossing in chopped almonds or sunflower seeds for texture and a nutty boost. Toast them lightly before mixing for a deeper flavor and aroma that fills the kitchen.
- Salt: Just a pinch of sea salt on top makes the chocolate pop and balances the sweetness. If you’re into contrast, sprinkle a tiny bit of flaky sea salt after pressing the bars into the pan.
- Optional extras: Sometimes I add dried fruit, shredded coconut, or a drizzle of white chocolate on top—whatever suits my mood. Keep it flexible, but don’t skip the crunch factor!
Spotlight on key ingredients
Dark chocolate:
- I love using a rich, slightly bitter chocolate that melts smoothly and coats everything with a deep cocoa aroma. If you prefer it sweeter, add a touch of milk chocolate, but keep in mind it’ll soften the crunch a bit.
- Crispy cereal: I usually go for puffed rice or cornflakes—they bring that satisfying crunch I crave. For a nuttier flavor, try adding some toasted rice cereal or even crushed graham crackers for extra flavor.
Crispy cereal:
- I usually go for puffed rice or cornflakes—they bring that satisfying crunch I crave. For a nuttier flavor, try adding some toasted rice cereal or even crushed graham crackers for extra flavor.
- ingredient
Notes for ingredient swaps
- Dairy-Free: Swap butter for coconut oil or a neutral-flavored vegan butter. Expect a slightly different mouthfeel and coconut aroma.
- Chocolate: Use milk chocolate instead of dark for a sweeter, creamier flavor. White chocolate can add a sweet, mellow note but softens the crunch.
- Sweetener: Maple syrup or agave nectar can replace honey for a vegan option, though they might make the mixture a tad more sticky.
- Cereal: Cornflakes can be replaced with toasted rice cereal or crushed graham crackers for a richer, nuttier crunch.
- Nuts: Swapping in roasted pistachios or hazelnuts adds a different flavor profile. Toast nuts beforehand for extra aroma and crunch.
- Salt: Flaky sea salt on top is best for contrast, but if you prefer less salt, just omit or use fine salt sparingly.
- Add-ins: Dried fruit or shredded coconut can be mixed in or sprinkled on top to customize flavor and texture.
Equipment & Tools
- Square baking dish: Holds the mixture and shapes the bars.
- Saucepan: Melts chocolate and butter evenly.
- Spatula: Mixes ingredients and presses the mixture into the dish.
- Parchment paper: Prevents sticking and makes removal easy.
- Sharp knife: Cuts the set bars cleanly.
Step-by-step guide to no bake bars
- Gather your equipment: a square baking dish (8×8 inches), a saucepan, a spatula, and parchment paper for easy removal.
- Line your dish with parchment paper, leaving some overhang for easy lifting.
- Chop the dark chocolate into small pieces to help it melt evenly—about 1 cm chunks.
- In a saucepan over low heat (about 50°C / 122°F), melt the butter and chocolate together, stirring constantly until smooth and glossy, about 3-5 minutes.
- Remove from heat and stir in the honey or maple syrup until fully incorporated—this will add stickiness and flavor.
- Add the crispy cereal and nuts to the chocolate mixture. Mix gently but thoroughly, ensuring every piece is coated.
- Pour the mixture into your prepared dish. Press down firmly with the back of a spatula or your fingers to create an even layer. Don’t be gentle—firm pressure makes a cleaner crunch.
- Optional: sprinkle a pinch of flaky sea salt or a handful of extra nuts on top for added flavor.
- Place the dish in the fridge for at least 2 hours, or until set and firm to the touch. For quicker setting, freeze for 1 hour.
- Once firm, lift out the slab using the parchment overhang. Cut into bars or squares with a sharp knife, wiping it clean between cuts to keep edges neat.
- Serve immediately or store in an airtight container in the fridge—these stay good for up to a week, or freeze for longer storage.
Chill the bars in the fridge until firm, about 2 hours. Slice with a sharp knife, serve directly from the fridge or at room temperature for a softer bite. Store leftovers in an airtight container in the fridge for up to a week.
How to Know It’s Done
- Chocolate mixture is smooth and shiny after melting.
- Pressing the mixture into the dish creates an even, compact layer with no gaps.
- Bars are firm and hold shape after chilling, with a satisfying crunch.
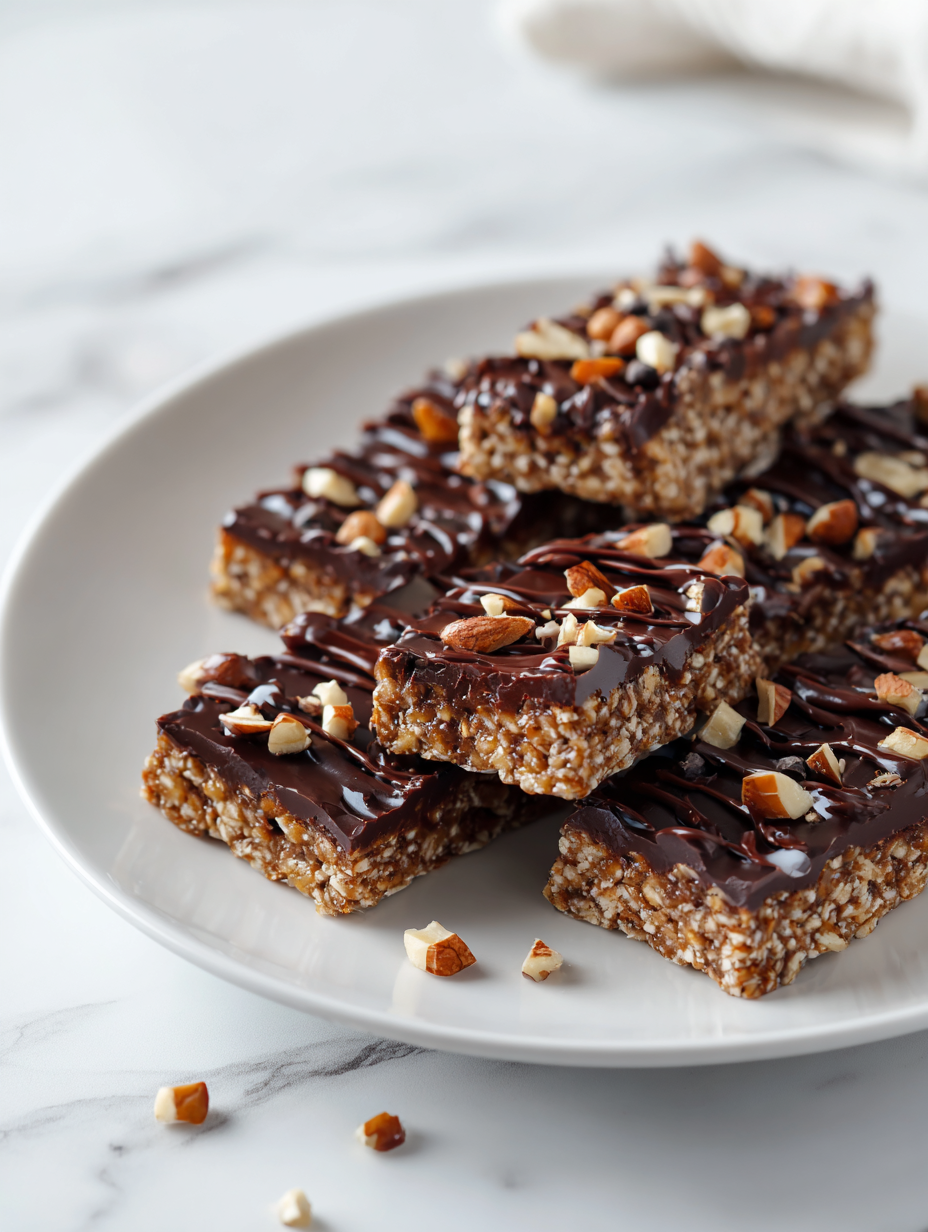
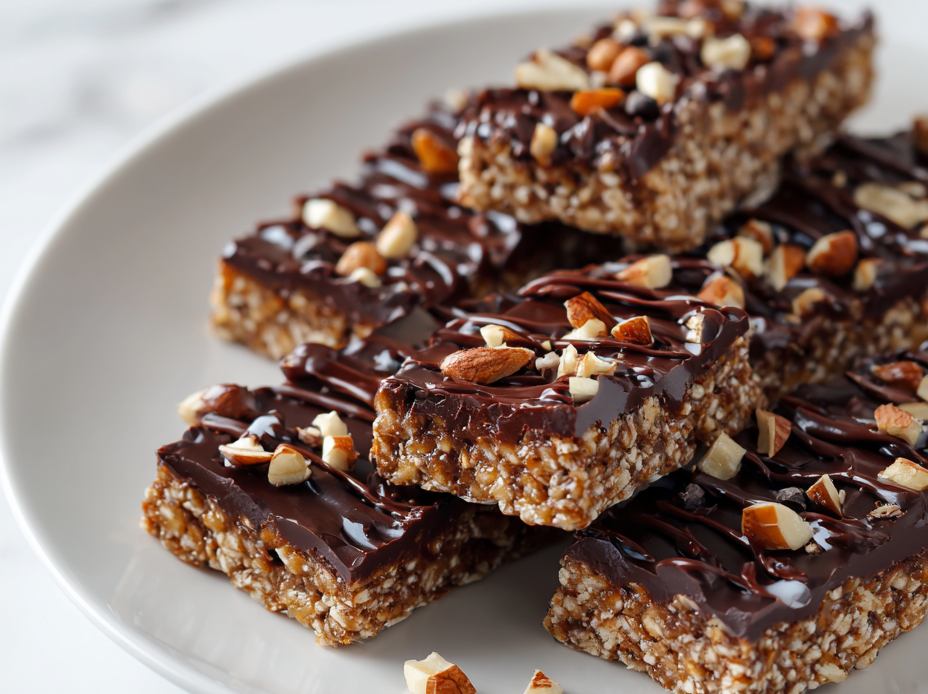
No-Bake Chocolate Crunch Bars
Ingredients
Equipment
Method
- Line your square baking dish with parchment paper, leaving some overhang for easy removal.
- Place the chopped dark chocolate and butter into a saucepan over low heat, gently melting while stirring constantly. You’ll notice a glossy, smooth mixture forming after about 3-5 minutes.
- Remove the saucepan from heat and stir in the honey until fully incorporated, creating a sticky, fragrant chocolate mixture.
- Add the puffed rice cereal and chopped almonds into the chocolate mixture, folding gently with a spatula until everything is evenly coated and sticky.
- Pour the mixture into your prepared dish, then press down firmly with the back of a spatula or your fingers to create an even, compact layer. Hear the satisfying crunch as you press.
- Sprinkle a tiny pinch of sea salt on top for contrast, or leave it plain for pure chocolate flavor.
- Place the dish in the fridge and chill for at least 2 hours, or until the bars are firm and set. You’ll see the chocolate glistening and the mixture holding its shape.
- Once chilled, lift the set slab out using the parchment overhang. Use a sharp knife to cut into 12 even bars, wiping the blade clean between cuts for sharp, neat edges.
- Serve immediately or store in an airtight container in the fridge for up to a week. Enjoy the satisfying crunch and rich chocolate flavor in every bite!
Notes
Pro tips for perfect crunch bars
- Bolded mini-head: Use a low heat setting when melting chocolate to prevent scorching and clumping.
- Bolded mini-head: Stir constantly during melting to achieve a glossy, smooth mixture without graininess.
- Bolded mini-head: Press the mixture firmly into the pan to ensure a tight, even crunch in every bite.
- Bolded mini-head: Chill the bars in the fridge for at least 2 hours for optimal setting and clean cuts.
- Bolded mini-head: Wipe your knife clean between cuts to maintain sharp, neat edges.
Common mistakes and how to fix them
- FORGOT to evenly distribute chocolate → Temper chocolate to prevent blooming.
- DUMPED ingredients too quickly → Gently fold in cereal for better crunch.
- OVER-TORCHED the chocolate → Use low heat; remove from stove as soon as melted.
- MISSED chilling time → Chill at least 2 hours; don’t rush the setting process.
Quick fixes and pantry swaps
- When mixture is too thick, splash in a teaspoon of hot water to loosen it.
- If bars crack when cutting, patch with a tiny dab of melted chocolate and smooth over.
- When chocolate seizes, dump in a little warm coconut oil to restore smoothness.
- Over-torched chocolate? Shield it with a pinch of baking soda and stir gently.
- Splash a little more salt if the chocolate isn’t popping enough for your taste.
Prep, store, and reheat tips
- You can prepare the chocolate mixture and press it into the pan a day in advance; keep covered in the fridge for fresh flavor and firm texture.
- Store the bars in an airtight container in the fridge for up to a week. The cool environment keeps them firm and crunchy, with a rich chocolate aroma.
- For longer storage, freeze the bars wrapped tightly in plastic wrap and then in foil; they’ll keep well for up to a month. Thaw in the fridge before serving.
- Reheating isn’t necessary—these are best served cold or at room temperature. If you want softer bars, let them sit out for 10 minutes, and enjoy the melty chocolate scent.
Top questions about no bake bars
1. Can I use different types of chocolate?
Use high-quality dark chocolate for a rich, smooth melt that coats the cereal nicely. Cheaper chocolates can seize or feel waxy.
2. Can I substitute the honey?
Yes, you can swap honey for maple syrup or agave. It might change the texture slightly but still holds everything together.
3. How long do I need to chill the bars?
Make sure the bars are chilled for at least 2 hours until firm. If they’re still soft, they’ll crumble instead of hold shape.
4. What if my mixture is too dry?
If the mixture feels too dry, add a splash more melted butter or a tiny bit of warm water to loosen it up.
5. How do I cut the bars cleanly?
Use a sharp knife and wipe it clean between cuts for neat, clean edges that won’t crack or crumble.
6. How should I store the bars?
Store leftovers in an airtight container in the fridge. They keep well for about a week, staying crunchy and chocolatey.
7. Can I add extra toppings?
To add more crunch, sprinkle extra cereal or nuts on top before chilling. It’s a good way to customize each batch.
8. What if my melted chocolate seizes?
If your chocolate seizes or becomes grainy, add a small spoon of warm coconut oil and stir until smooth again.
9. Should I toast my nuts or cereal first?
Using toasted nuts or cereal enhances aroma and flavor, adding a deeper, richer crunch in every bite.
10. Can I freeze these bars?
Yes, you can freeze the bars for up to a month. Wrap tightly and thaw in the fridge to keep the texture intact.
These no-bake chocolate crunch bars are more than just a quick treat; they’re a little reminder that simple ingredients can create moments of comfort. Whenever I make them, I think about how a handful of cereal and melted chocolate can turn into something nostalgic and satisfying in no time.
They’re perfect for last-minute cravings or when you need a batch of something sweet that’s honest and unpolished. No matter the season, these bars keep a little bit of childhood joy close, ready to be enjoyed whenever you need a quick escape into crunch and chocolate.

Hi, I’m Madison Lane, the cook, recipe creator, and heart behind this kitchen. Food has been part of my life for as long as I can remember. Some of my earliest memories are of standing beside my dad while he cooked, watching him move comfortably around the kitchen, tasting sauces, and explaining why patience mattered just as much as seasoning.
