In the chaos of busy days, there’s something about mixing peanut butter, sugar, and oats that feels like a small act of rebellion against time. These cookies come together in a flash, no oven needed, just a sturdy spoon and a moment of quiet. They’re my go-to when I need a quick fix of something familiar and satisfying, without the fuss of baking or waiting.
There’s a nostalgic charm in the way the peanut butter melts slightly into the sweet syrup, creating a sticky, rich bite that’s both comforting and oddly uplifting. It’s almost like a tiny, edible hug, especially when life’s feeling a little hectic. These cookies remind me that sometimes, the simplest treats are the most rewarding, especially when you’re short on time but long on craving.
Focusing on the nostalgic simplicity and quick relief of craving that only a no-bake peanut butter cookie can provide, especially during hectic weeks when time and energy are low but comfort is needed.
A Quick Comfort Bite
- I love how these cookies come together in under 15 minutes, saving me from the oven’s heat and the wait.
- Crushing a batch of these during a hectic afternoon feels like a small victory, a moment of calm in chaos.
- There’s a nostalgic rush when the peanut butter scent hits the air, instantly transporting me to childhood kitchens.
- Sharing these with friends always sparks spontaneous smiles, their surprise at how easy and delicious they are.
- Making these cookies reminds me that sometimes, simple ingredients and a little patience create the best comfort food.
The story behind this recipe
- This recipe comes from a moment of pure laziness and a need for instant comfort. I remember rummaging through my pantry after a long day, craving something sweet but not wanting to turn on the oven or fuss with dough. These cookies were born out of that need for quick satisfaction, with ingredients I always keep handy.
- Over the years, they’ve become a little ritual—my go-to for when I need a sweet fix without any planning. There’s something about the sticky, peanutty aroma that instantly triggers memories of simpler times, when a handful of ingredients could create a moment of joy. No frills, just honest, quick, and deeply satisfying.
- heading:
Historical & Cultural Tidbits
- These cookies gained popularity during the Great Depression when oven space and ingredients were scarce, making no-bake treats a clever solution.
- The combination of peanut butter and oats was a savvy way to add protein and fiber, turning a simple snack into a more satisfying, energy-boosting bite.
- In the 1950s, recipes like this spread through community cookbooks, often passed down as casual family secrets, cherished for their quick assembly.
- Some believe these cookies originated from school bake sales, where the no-bake method kept ingredients fresh and preparation fast.
- Today, they’re a nostalgic reminder of resourcefulness and simplicity, still loved for their straightforward, no-fuss approach to dessert.
Key Ingredients Breakdown
- Creamy peanut butter: I prefer a smooth, natural peanut butter for that rich, oozing texture. Skip the chunky kind unless you like extra crunch.
- Granulated sugar: The classic sweetness, but if you want a less sweet version, try coconut sugar for a caramel note that’s less sharp.
- Old-fashioned oats: They give the cookies their chewy base. Steel-cut oats are too coarse; quick oats work fine but less rustic.
- Butter: I always use unsalted here, but if you only have salted, just cut back a pinch to avoid overly salty cookies. Melts into the mixture with a nutty aroma.
- Vanilla extract: Adds warmth and depth. A splash brightens the flavor, but feel free to skip if you want a more straightforward peanut punch.
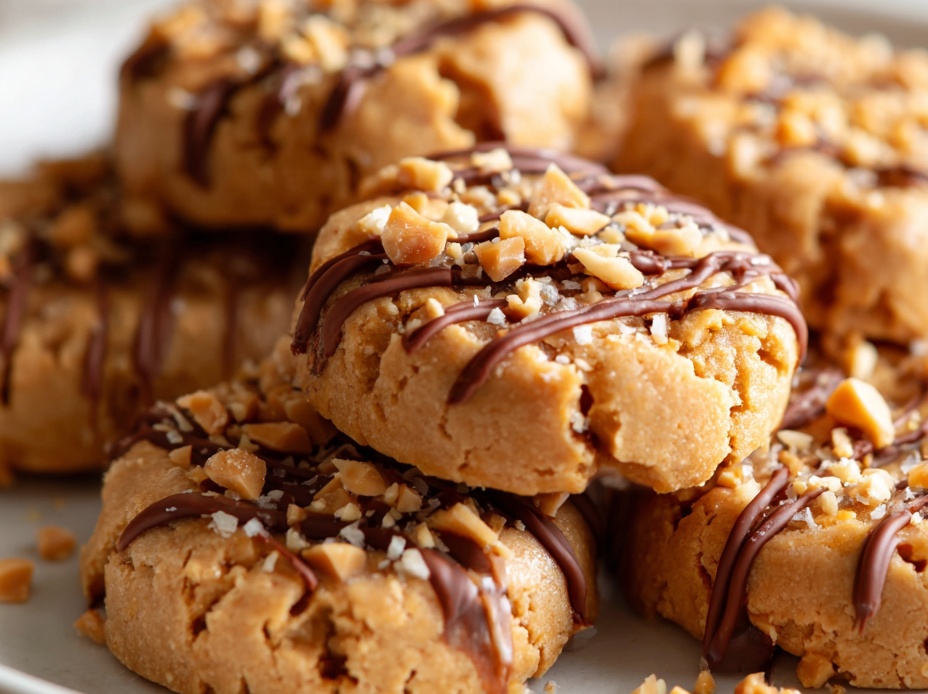
- Chocolate chips (optional): I love adding a handful for melty pockets, but dark or milk chocolate works equally well. They turn these simple bites into a little indulgence.
- Sprinkles or sea salt flakes (for topping): A pinch of flaky sea salt on top enhances the peanutty richness, and sprinkles add a playful crunch.
Spotlight on key ingredients
Peanut Butter:
- Creamy peanut butter: I prefer a smooth, natural peanut butter for that rich, oozing texture. Skip the chunky kind unless you like extra crunch.
- It melts slightly into the sugar and oats, creating a sticky, fragrant base that’s unmistakably peanutty and inviting.
Oats:
- Old-fashioned oats: They give the cookies their chewy, rustic bite. When heated, they soften but retain a bit of chew, adding texture.
- During mixing, oats absorb the warm, sweet mixture and become slightly glossy and sticky, helping the cookies hold together.
Notes for ingredient swaps
- Dairy-Free: Use coconut or almond butter instead of peanut butter. Expect a slightly different nutty flavor and less creamy texture.
- Sugar Alternatives: Swap granulated sugar with honey, maple syrup, or agave nectar for a softer, more caramelized sweetness.
- Oats: Replace old-fashioned oats with quick oats for a finer, less chewy cookie or use gluten-free oats if needed.
- Butter: Substitute with coconut oil or a neutral oil like vegetable oil. The cookies may be slightly less rich but still hold together.
- Chocolate Chips: Use carob chips or dried fruit pieces for a different flavor burst, though they won’t melt as much.
- Flavor Enhancers: Add a pinch of cinnamon or espresso powder to deepen the peanut butter flavor without altering the texture.
- Add-ins: Mix in chopped nuts or dried cranberries for texture and a hit of extra flavor, adjusting the amount for balance.
Equipment & Tools
- Medium saucepan: To melt and combine ingredients evenly.
- Sturdy spoon: For stirring and mixing the hot ingredients smoothly.
- Parchment paper: To prevent sticking and make cleanup easier.
- Baking sheet or flat surface: For placing cookies to cool and set.
Step-by-step guide to no bake peanut butter cookies
- Equipment & Tools: Gather a medium-sized saucepan (for melting), a sturdy spoon (for mixing), parchment paper (for setting), and a baking sheet or flat surface (for cooling).
- Combine 1 cup of peanut butter, 1 cup of sugar, and 1 teaspoon of vanilla in the saucepan. Heat over medium-low (about 150°C/300°F).
- Stir constantly with the spoon until the mixture is smooth, shiny, and starting to bubble around the edges, about 2-3 minutes. Watch for a crackling sound and a glossy appearance.
- Remove from heat. Quickly stir in 1 ½ cups of oats and, if using, ½ cup of chocolate chips. Mix until evenly coated and gooey.
- Drop spoonfuls (about 1-2 tablespoons each) onto parchment paper. Flatten slightly with the back of the spoon if you like a more uniform cookie.
- Let the cookies cool at room temperature for 20-30 minutes, or until firm and set. If needed, refrigerate for 10-15 minutes to speed up setting.
- Once cooled, they should be chewy yet hold their shape. If they’re too sticky, pop in the fridge for 10 minutes before handling.
- Finish by adding a sprinkle of sea salt or extra chocolate chips on top if desired. Serve once completely cooled and firm.
Allow cookies to cool completely at room temperature for 20-30 minutes. For quicker setting, refrigerate for 10-15 minutes. Serve once firm and slightly chewy.
How to Know It’s Done
- The mixture should be shiny and just starting to bubble around the edges.
- Cookies should be firm but chewy when cooled, with a slight crackle on the surface.
- Oats should be well coated and slightly sticky but not runny.
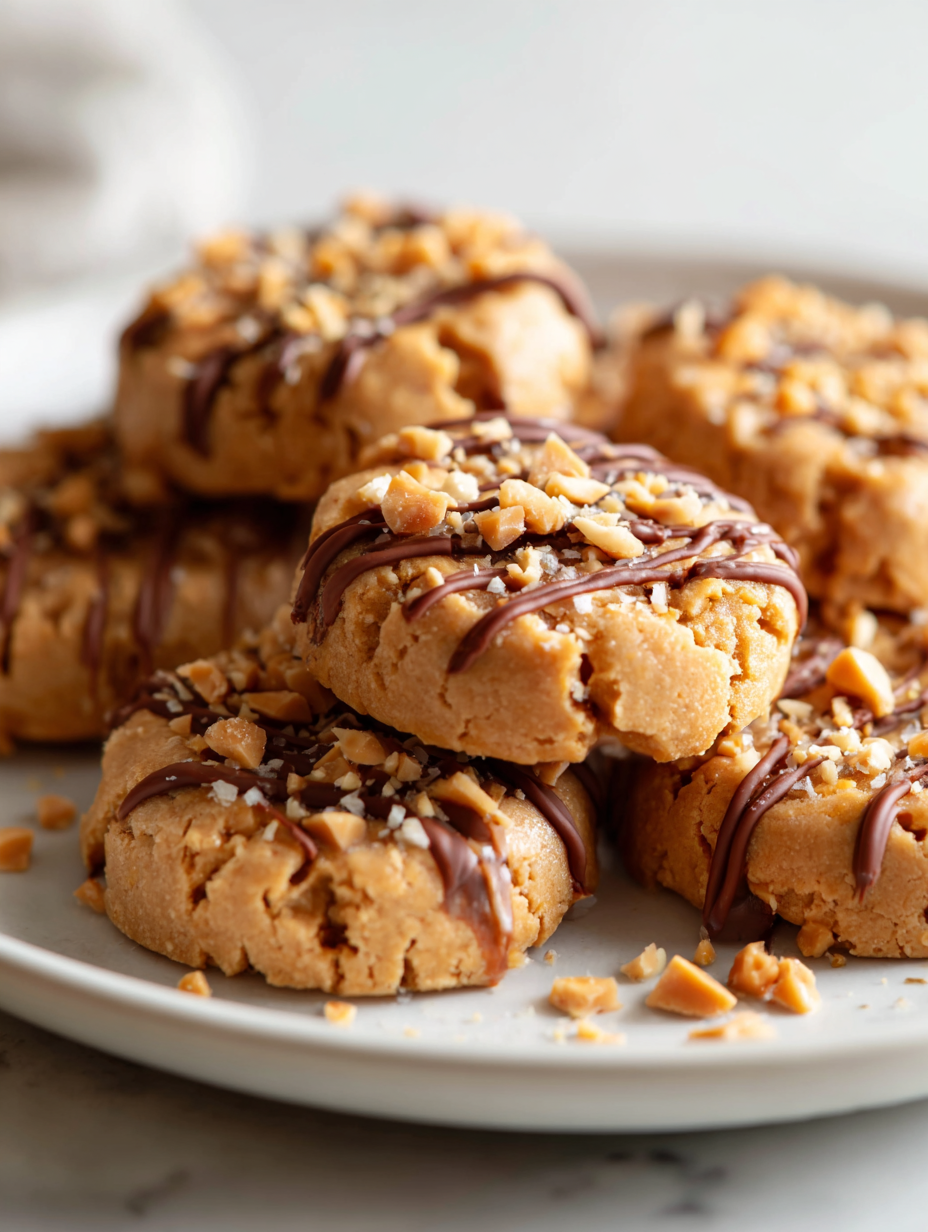
No-Bake Peanut Butter Cookies
Ingredients
Equipment
Method
- Gather a medium saucepan, sturdy spoon, parchment paper, and a baking sheet to prepare for mixing and setting the cookies.
- Add the peanut butter, sugar, and vanilla extract to the saucepan. Place over medium-low heat and stir constantly with the spoon until the mixture is smooth, shiny, and begins to bubble around the edges, about 2-3 minutes. You’ll hear a gentle crackling sound and see the mixture turn glossy.
- Remove the saucepan from heat and quickly stir in the oats and chocolate chips, if using. Mix thoroughly until all ingredients are evenly coated and the mixture is thick and sticky.
- Using a spoon, drop about 1 to 2 tablespoons of the mixture onto the parchment-lined baking sheet. Slightly flatten each scoop with the back of the spoon for a more uniform shape. The cookies will be soft and sticky but will firm up as they cool.
- Let the cookies cool at room temperature for 20-30 minutes, or refrigerate for 10-15 minutes to speed up the setting process. They should become firm yet chewy with a glossy, slightly crackled surface.
- Once cooled and set, enjoy these rich, chewy, no-bake peanut butter cookies as a comforting treat. Store leftovers in an airtight container at room temperature for up to 3 days or refrigerate for longer freshness.
Notes
Pro tips for perfect no-bake cookies
- Use room temperature peanut butter: It melts more evenly, creating a smooth, glossy mixture without lumps.
- Stir constantly during melting: Keeps the sugar and peanut butter from scorching and ensures a uniform texture.
- Drop cookies onto cold parchment: Prevents sticking and makes it easier to handle the sticky blobs.
- Add oats gradually: Helps control the consistency; too much at once can make the mixture stiff and hard to scoop.
- Chill the mixture if too soft: Refrigerate for 10 minutes if it’s too runny, making it easier to shape and set.
- Use a cookie scoop: For uniform size and shape, making cleanup simpler and cookies look tidy.
- Don’t overheat the mixture: Just until it’s smooth and shiny; overheating can cause the oils to separate and make the cookies greasy.
Common mistakes and how to fix them
- FORGOT to stir continuously → Stir constantly to prevent burning and ensure smooth mixture.
- DUMPED in all ingredients at once → Add ingredients gradually for even mixing and better control.
- OVER-TORCHED the mixture → Remove from heat immediately if bubbling turns dark or smells burnt.
- MISSED the cooling step → Let cookies firm up at room temperature to prevent sticking or crumbling.
Quick fixes and pantry swaps
- When mixture is too soft → Splash in a few more oats to firm it up.
- If cookies are sticky → Patch with a quick chill in the fridge for 5 minutes.
- Splash cold water on hands → Shield sticky dough from sticking to your fingers.
- When mixture looks greasy → Rescue with a pinch of extra oats or a quick refrigerate.
- Pan smokes or smells burnt → Swap to a lower heat and stir constantly for 5 seconds.
Make-Ahead & Storage Tips
- You can prep the cookie mixture a day ahead; keep it covered in the fridge to prevent drying out, and it will stay fresh and sticky for easy scooping later.
- Store the finished cookies in an airtight container at room temperature for up to 3 days, where they develop a slightly chewier texture and the peanut butter aroma deepens.
- If refrigerating for longer, place cookies between layers of parchment paper to prevent sticking; they’ll firm up but may lose some softness.
- Reheat cookies briefly in the microwave at 15-20 second intervals until just warm and slightly softening, releasing a warm, nutty scent—perfect for a quick snack.
Top questions about peanut butter cookies
1. Can I use chunky peanut butter?
Yes, using natural or crunchy peanut butter will change the texture, making cookies a bit chunkier and less smooth.
2. Can I add extras like nuts or chocolate chips?
Absolutely. Just chop any add-ins like nuts or dried fruits finely so they distribute evenly and don’t alter the texture too much.
3. My mixture is too stiff, what do I do?
If the mixture feels too dry, add a tiny splash of milk or a little more peanut butter to loosen it up before scooping.
4. How do I know when they’re ready?
Cookies are done when they’re firm enough to lift without breaking, usually after about 20-30 minutes at room temp.
5. How long do these cookies last?
Store cookies in an airtight container at room temp for up to 3 days, or freeze for longer storage.
6. Can I refrigerate or freeze them?
Refrigerate the cookies if you want them firmer or if your kitchen is hot. They’ll stay fresh for several days.
7. Can I prepare these in advance?
Yes, they can be made a day ahead. Keep the mixture covered in the fridge, and they’ll set nicely once cooled.
8. My cookies are greasy or too soft, what’s wrong?
If cookies turn out greasy, chill the mixture slightly or stir in a bit more oats to absorb excess oil.
9. How do I get evenly sized cookies?
Use a cookie scoop or two teaspoons for uniform size. Flatten slightly for even setting and a better texture.
10. The mixture is too sticky, how can I fix it?
If the mixture is too runny, chill it in the fridge for about 10 minutes, or add a few more oats.
These no-bake peanut butter cookies are more than just a quick fix; they’re a reminder that simple ingredients can create real comfort, even in a rush. Whenever I need a little nostalgic treat that doesn’t demand oven time, they’re my first choice, fragrant with peanut and vanilla, chewy yet firm.
Sharing them with friends or just keeping a batch in the fridge makes hectic days a little sweeter. Sometimes, it’s those small, honest bites that give us just enough pause to breathe and enjoy a moment of genuine, uncomplicated satisfaction.

Hi, I’m Madison Lane, the cook, recipe creator, and heart behind this kitchen. Food has been part of my life for as long as I can remember. Some of my earliest memories are of standing beside my dad while he cooked, watching him move comfortably around the kitchen, tasting sauces, and explaining why patience mattered just as much as seasoning.
