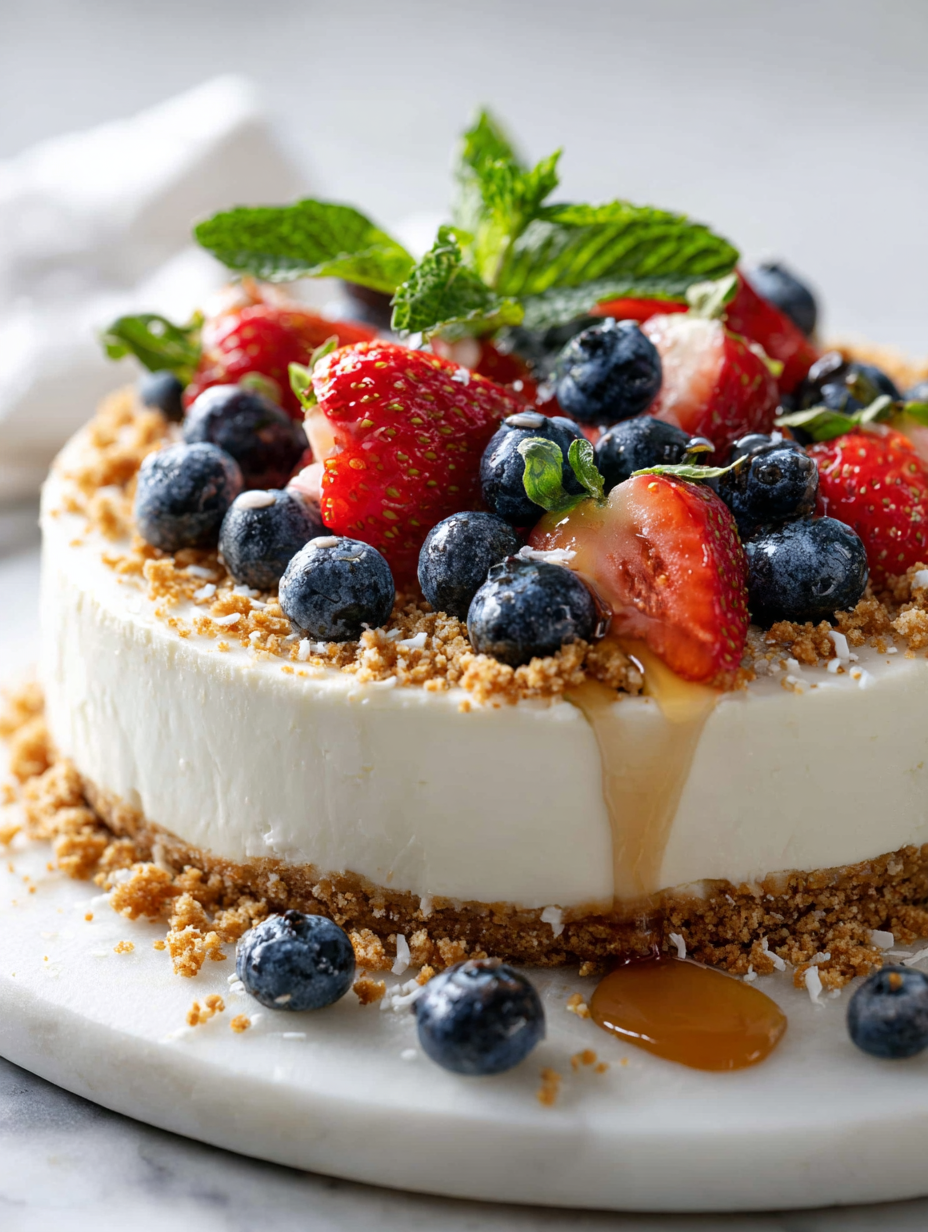
This no bake Greek yogurt cheesecake is my go-to when I want something cool, tangy, and effortless. It’s like a little rebellion against the heat, especially on those sticky summer days when oven time feels unbearable. The Greek yogurt gives it a bright, fresh punch, making it feel almost like a savory-sweet compromise that’s just right for hot weather.
I love how forgiving this recipe is—no need for fancy equipment or lengthy baking steps. It’s honest, simple, and honest about what a dessert should be: creamy, satisfying, and a little bit unexpected. Plus, it’s a small victory in my kitchen, proof that sometimes less really is more, especially when you’re craving something both light and indulgent.
This cheesecake is a testament to how simplicity in the kitchen can yield something surprisingly elegant. I love that it requires no oven, making it perfect for those hot summer days when turning on the stove feels like a crime. Plus, the tangy Greek yogurt adds a fresh, creamy twist that feels like a little rebellion against overly sweet desserts.
A Fresh Take on No Bake Cheesecake
- This cheesecake feels like a small act of rebellion against the heat, especially on sticky summer days when oven time feels unbearable.
- I love how forgiving this recipe is—no need for fancy equipment or lengthy baking steps, just honest, simple ingredients.
- There’s a quiet joy in mixing creamy Greek yogurt with a crisp biscuit base, it’s honest comfort with a tangy twist.
- Sometimes, I make this just to surprise my friends; it’s a little unexpected delight that’s light yet satisfying.
- Biting into it, I’m reminded how simple ingredients can come together to create something refreshingly elegant.
The inspiration behind this cheesecake
- This recipe came about during a stretch of hot summer afternoons when I was craving something cool and creamy, but didn’t want to turn on the oven. I was also tired of the usual cheesecake routines—baking, waiting, fussing. So I started playing with Greek yogurt, thinking, why not lean into its tangy, thick qualities for a no-bake version that’s simple and satisfying.
- One afternoon, I mixed up a batch and took it out to the patio, where the breeze made everything feel a little easier. The first slice was a revelation—light, tart, with just enough sweetness. It’s become a go-to for easy dinners, unexpected guests, or just a quick treat to keep in the fridge for when the craving hits.
- heading: A Little Kitchen Experiment
Trivia & Historical Notes
- This recipe taps into the Mediterranean tradition of using Greek yogurt for its tangy, creamy texture, dating back to ancient dairy practices.
- It’s a modern spin on traditional no-bake desserts that were popularized in the mid-20th century, especially in warm climates where oven use was impractical.
- Greek yogurt’s rise to global popularity in the 2000s made recipes like this more accessible, highlighting its versatility beyond breakfast or dips.
Component insights for this cheesecake
- Greek yogurt: I love how it adds that velvety, tangy richness, almost like a creamy whisper. Swap with sour cream if you prefer a milder flavor, but the tang really makes this stand out.
- Digestive biscuits: They make a buttery, crisp base that stays firm. You can substitute graham crackers or graham cracker crumbs—just watch the butter amount, it’s key for that satisfying crunch.
- Butter: It’s the glue that holds the crust together. Use unsalted for control, but salted butter works fine if you prefer a slightly more seasoned base.
- Honey or maple syrup: Just a touch for sweetness that doesn’t overpower. If you want a more neutral flavor, replace with a little agave or skip entirely, but the subtle sweetness balances the tang.
- Lemon juice: Brightens everything with that zing. Fresh lemon juice is best, but bottled works in a pinch—just add a splash for that lively shimmer of citrus.
- Gelatin (optional): If you want a firmer slice, dissolve a bit in warm water. Skip if you prefer a softer, more mousse-like texture—this dessert is flexible.
- Vanilla extract: Adds a whisper of warmth. Vanilla bean paste is a fancy swap that gives tiny specks and extra richness, but plain vanilla works just as well.
Spotlight on key ingredients
Greek yogurt:
- I love how it adds that velvety, tangy richness, almost like a creamy whisper. Swap with sour cream if you prefer a milder flavor, but the tang really makes this stand out.
- Greek yogurt’s thick texture: It creates a luscious, creamy filling that’s not too heavy. If you’re using a thinner yogurt, consider draining some whey first.
Digestive biscuits:
- They form a buttery, crisp base that stays firm. You can substitute graham crackers or similar digestives—just watch the butter amount, it’s key for that satisfying crunch.
- Crushed until fine: The texture should be like damp sand, not chunky. Too coarse and it’ll break apart, too fine and it won’t hold together well.
Notes for ingredient swaps
- Dairy-Free: Swap Greek yogurt for coconut or almond yogurt. Expect a slightly thinner texture and a more subtle tang.
- Gluten-Free: Use gluten-free digestive biscuits or graham crackers. Keep in mind, the crust may be a bit less crisp.
- Sweetener Options: Replace honey or maple syrup with agave nectar or coconut sugar. Adjust sweetness to taste, as these can be more or less sweet.
- Butter Alternatives: Substitute with coconut oil or dairy-free margarine. This slightly alters the richness and flavor profile.
- Citrus Zest: Add orange or lime zest instead of lemon for a different bright, aromatic note. This shifts the overall flavor complexity.
- Gelatin-Free: Omit gelatin for a softer, mousse-like texture. You’ll need to serve it sooner before it softens too much.
- Flavor Variations: Mix in fresh herbs like basil or mint into the filling for a savory twist, or fold in fruit preserves for added sweetness.
Equipment & Tools
- Springform pan: To hold the crust and filling, and allow easy removal.
- Food processor or zip-top bag & rolling pin: To crush biscuits into fine crumbs.
- Mixing bowl: To combine and whisk the filling ingredients.
- Spatula: To spread the filling evenly and smooth the surface.
- Measuring cups and spoons: To measure ingredients accurately.
- Refrigerator: To chill and set the cheesecake.
Step-by-step Guide to No Bake Cheesecake
- Prepare your equipment: a 20cm (8-inch) springform pan, a mixing bowl, a spatula, and a food processor or a zip-top bag with a rolling pin for crushing biscuits.
- Crush the digestive biscuits: place them in the food processor or bag, and crush until fine crumbs form. Measure about 150g (1 1/4 cups).
- Melt the butter: heat about 75g (about 1/3 cup) of unsalted butter in a small saucepan or microwave until just melted, around 30 seconds.
- Combine crumbs and butter: in the bowl with biscuit crumbs, pour melted butter and stir until evenly coated. If the mixture feels too dry, add a splash of extra melted butter.
- Press into the pan: transfer the crumb mixture into your springform pan. Use the bottom of a glass or your fingers to press it evenly across the base and slightly up the sides. Chill for 15 minutes to set.
- Mix the filling: in a large bowl, whisk together 400g (about 1 3/4 cups) Greek yogurt, 100g (1/2 cup) honey or maple syrup, 2 tablespoons lemon juice, and 1 teaspoon vanilla extract until smooth and creamy.
- Optional gelatin: if you prefer a firmer cheesecake, dissolve 1 teaspoon powdered gelatin in 2 tablespoons warm water, then stir into the yogurt mixture thoroughly.
- Pour the filling: over the chilled crust, spreading it evenly with a spatula. Tap the pan gently on the counter to smooth out the top and remove air bubbles.
- Chill to set: cover the pan loosely with plastic wrap and refrigerate for at least 4 hours, preferably overnight. The cheesecake should be firm and slightly jiggly in the center.
- Check for doneness: the edges should be set and slightly pulling away from the sides of the pan, with a gentle wobble in the center. The surface may develop a slight sheen, indicating it’s ready.
Let the cheesecake rest in the fridge undisturbed for at least 4 hours, preferably overnight. When ready to serve, gently run a knife around the edges before releasing the springform. Slice with a sharp knife, wiping it clean between cuts for neat pieces.
How to Know It’s Done
- Crust feels firm when pressed and holds shape after chilling.
- Filling is smooth, with no liquid pools or separation.
- Surface is slightly shiny but no jiggle in the center when fully chilled.
No Bake Greek Yogurt Cheesecake
Ingredients
Equipment
Method
- Place the digestive biscuits in a food processor or inside a zip-top bag. Crush them until they resemble fine sand, with no large chunks remaining.
- Melt the butter gently in a microwave or on the stovetop until just liquid and fragrant.
- Pour the melted butter over the crushed biscuits and stir with a spatula until evenly coated and crumbly.
- Transfer the mixture into a springform pan, pressing it firmly into the bottom and slightly up the sides to form an even crust. Use the bottom of a glass to help pack it down smoothly.
- Refrigerate the crust for about 15 minutes to firm up as you prepare the filling.
- In a large bowl, whisk together the Greek yogurt, honey, lemon juice, and vanilla extract until smooth and creamy. The mixture should be bright, with a slight tang and no lumps.
- If you'd like a firmer cheesecake, dissolve the gelatin powder in a tablespoon of warm water, then stir it into the yogurt mixture until fully combined.
- Pour the creamy filling over the chilled crust, smoothing the top with a spatula and gently tapping the pan on the counter to level the surface and remove air bubbles.
- Cover loosely with plastic wrap and refrigerate for at least 4 hours, preferably overnight, until the cheesecake is set and firm to the touch.
- Once set, run a warm knife around the edges of the cheesecake before unlocking and removing the springform pan. Slice with a sharp knife, wiping clean between cuts for neat pieces. Serve chilled and enjoy the refreshing tang and creamy texture!
Pro tips for perfect texture
- Bolded mini-head: Chill the crust thoroughly—this ensures it stays firm when you pour in the filling.
- Bolded mini-head: Use full-fat Greek yogurt for a rich, velvety texture that won’t turn runny in the fridge.
- Bolded mini-head: Mix the filling gently—over-whisking can make it airy and less creamy, so fold instead.
- Bolded mini-head: Slightly warm the honey or syrup before mixing—this helps it incorporate smoothly without lumps.
- Bolded mini-head: When pressing the crust, use the bottom of a glass to get an even, compact base that slices cleanly.
- Bolded mini-head: Let the cheesecake sit at room temperature for 10 minutes before slicing—this softens the edges for cleaner cuts.
- Bolded mini-head: If your cheesecake cracks, run a warm knife around the edges before serving—this smooths out surface imperfections.
Common mistakes and how to fix them
- FORGOT to chill crust; fix by refrigerating for 15 minutes before filling.
- DUMPED too much gelatin; reduce amount or skip for softer texture.
- OVER-TORCHED the crust; bake at 180°C (350°F) for 8 minutes, watch for golden edges.
- FAILED to set; increase chilling time to overnight for firm slices.
Quick fixes and pantry swaps
- If the crust crumbles, splash in a little extra melted butter and press again.
- When the filling is too runny, patch with a little more Greek yogurt and chill longer.
- DUMPED too much lemon juice? Balance with a touch more honey or yogurt to mellow acidity.
- OVER-TORCHED the crust? Shield with foil and lower oven temp to 160°C (320°F) for gentle baking.
- Splash a little cold water on the knife before slicing to prevent sticking and get cleaner cuts.
Prep, store, and reheat tips
- Prepare the crust and make the filling mixture a day in advance; keep covered in the fridge to save time on serving day.
- Store the assembled cheesecake, uncovered or loosely covered, in the refrigerator for up to 2 days; the flavors meld and stay fresh.
- This cheesecake is best enjoyed within 48 hours; after that, the crust may soften and the texture decline slightly.
- Reheat slices briefly in the microwave—about 10 seconds—until slightly warmer and the crust regains some crispness, but don’t overdo it to avoid melting the filling.
- For optimal texture, serve straight from the fridge, where the coolness enhances the tangy creaminess and firm crust.
Top questions about Greek yogurt cheesecake
1. Can I use low-fat Greek yogurt?
Use full-fat Greek yogurt for that rich, creamy texture. Skim yogurt makes it less luscious, but still works.
2. Can I substitute regular yogurt?
Yes, but it will be less creamy and might be a bit tangier. Drain excess whey for better texture.
3. Can I replace Greek yogurt with sour cream?
Absolutely. Use sour cream for a milder flavor or coconut yogurt for dairy-free options.
4. How long should I chill it?
Chill the cheesecake for at least 4 hours, preferably overnight, until it’s firm and slightly jiggly in the center.
5. Is gelatin necessary?
Yes, adding gelatin helps it set firmer. Skip if you prefer a softer, mousse-like dessert.
6. My crust is crumbly, what can I do?
If the crust crumbles, press it again firmly, or add a bit more melted butter to hold it together.
7. How do I get neat slices?
Use a sharp knife warmed under hot water to get clean slices and prevent cracking.
8. Can I customize the sweetness?
Add a splash of lemon juice for brightness, or swap honey with maple syrup for a different sweetness.
9. How long does it keep?
Store leftovers in the fridge for up to 2 days. Cover loosely to prevent drying out.
10. What if it cracks or melts?
If it cracks or melts, chill it longer or serve slightly softer. Refrain from overmixing to keep it smooth.
This no bake Greek yogurt cheesecake feels like a little summer secret—cool, bright, and unexpectedly elegant. It’s a reminder that sometimes simplicity in the kitchen can deliver the most satisfying results, especially when the weather’s hot and turning on the oven seems like a crime.
Sharing this dessert during the warm months always sparks a feeling of relief—no fuss, no wait, just creamy tang and crisp crust. It’s a go-to when I want something light but still crave that rich, homemade touch, and it never disappoints.

Hi, I’m Madison Lane, the cook, recipe creator, and heart behind this kitchen. Food has been part of my life for as long as I can remember. Some of my earliest memories are of standing beside my dad while he cooked, watching him move comfortably around the kitchen, tasting sauces, and explaining why patience mattered just as much as seasoning.
