This no bake chocolate rice bar recipe is my go-to whenever I need something sweet but don’t want to mess with hot stoves or oven timers. It’s like holding onto a little piece of childhood chaos—messy, sticky, but somehow still comforting. There’s a joy in the simplicity of throwing everything together in one bowl, then waiting for it to set while I do something else.
I love how flexible it is, too. You can swap in different cereals or add a handful of nuts or dried fruit if you feel like it. It’s honest, unpolished, and perfect for those lazy weekends or last-minute cravings that hit when you least expect. No fuss, no fuss, just good, honest chocolatey crunch whenever you want it.
This recipe is inspired by childhood chaos—when Mom would toss everything into a bowl and call it dinner, but I’ve refined that messy instinct into a simple, no-fuss treat. It’s about embracing the imperfect, sticky process of making something sweet and satisfying without turning on the stove, perfect for lazy weekends or last-minute cravings.
The story behind this recipe
- This recipe sprouted from a messy weekend in my childhood kitchen. My mom would toss together whatever cereal and chocolate she had, no fuss, no fuss, just pure spontaneity. Those sticky, chaotic moments stuck with me, especially the smell of melting chocolate filling the house with a warm, sweet aroma.
- Years later, I realized how much I missed that simplicity—no oven, no complicated steps, just something quick and satisfying. It’s the kind of treat that reminds me how sometimes, the best desserts are the ones made with a little chaos and a lot of love.
- heading
- story_type
Ingredient breakdown
- Rolled oats: I love the chewiness they add, but if you want them softer, try quick oats. They melt into the mix more easily.
- Chocolate chips: Using good quality chips makes a difference—melts smoothly and gives that rich, deep flavor I crave. Feel free to swap for chopped dark chocolate for a more intense hit.
- Honey or syrup: It’s my secret to stickiness. If you want a less sweet version, cut back or substitute with a mashed banana—less glossy, more natural sweetness.
- Butter or coconut oil: The richness makes all the difference, but if you’re dairy-free, coconut oil works just as well, adding a subtle tropical note.
- Rice cereal: The classic crunch, but you can swap in millet or puffed quinoa for a nuttier or lighter texture—just keep the proportions consistent.
- Vanilla extract: Adds warmth and depth, but a splash of almond or coconut extract can bring a fun twist—just don’t overdo it, a little goes a long way.
Spotlight on key ingredients
Chocolate chips:
- I love how they melt into a glossy, oozy mess, giving that rich, deep flavor. Use good quality for best results. Feel free to swap for chopped dark chocolate for a more intense hit.
- Rice cereal: The classic crunch, it’s light and airy, providing that satisfying snap. You can try millet or puffed quinoa if you want a nuttier or lighter texture—just keep the proportions consistent.
Butter or coconut oil:
- Honey or syrup: It’s my secret to sticky, cohesive bars that hold together. It’s sweet, slightly floral, and adds a glossy sheen. For a less sweet version, try mashed banana—less shiny, more natural sweetness.
- The richness makes all the difference, adding a smooth, melt-in-your-mouth feel. If you’re dairy-free, coconut oil works just as well, with a subtle tropical aroma.
Notes for ingredient swaps
- Dairy-Free: Swap butter with coconut oil. It’ll add a subtle tropical aroma and keep the bars dairy-free.
- Sweetener: Use maple syrup instead of honey for a slightly richer, caramel-like flavor that’s vegan-friendly.
- Chocolate: Dark chocolate chips can be replaced with dairy-free or 70% cacao for a less sweet, more intense chocolate punch.
- Cereal: Quinoa puffs or millet can stand in for rice cereal, offering a nuttier or lighter crunch—just adjust the weight accordingly.
- Add-ins: Nuts, dried fruit, or seeds can be swapped based on what you have; they add texture and flavor variety.
- Binder: If honey isn’t your thing, mashed banana or date paste can add sweetness and help bind everything together.
- Flavor Extracts: Almond or coconut extract can replace vanilla for a different aromatic twist—use sparingly to avoid overpowering.
Equipment & Tools
- 20x20cm (8×8 inch) baking dish: Holds the mixture and helps shape the bars.
- Large mixing bowl: Contains and combines all ingredients.
- Spatula: Stirs and presses mixture evenly.
- Microwave-safe bowl: Melts honey, butter, and chocolate.
- Parchment paper: Prevents sticking and aids removal.
- Knife: Slices the set bars cleanly.
Step-by-step guide to no bake rice bars
- Gather your equipment: a 20x20cm (8×8 inch) baking dish, a large mixing bowl, a spatula, and a microwave-safe bowl. The dish will hold your bars, the bowl mixes everything, and the spatula helps spread.
- Line the baking dish with parchment paper, leaving a slight overhang for easy removal later. This prevents sticking and makes cleanup a breeze.
- In the microwave-safe bowl, combine 1/2 cup (120ml) honey or maple syrup, 1/4 cup (60g) unsalted butter or coconut oil. Microwave on high in 30-second bursts, stirring in between, until melted and smooth, about 1-2 minutes.
- Add 2 cups (160g) of chocolate chips to the melted mixture. Stir until they’re shiny and fully melted—this should take about 30 seconds in the microwave or a quick stir with a spatula if melted over warm (not boiling) water.
- Pour the melted chocolate mixture into your large bowl. Add 3 cups (90g) of rice cereal and 1 cup (90g) of rolled oats. Toss with the spatula until everything is evenly coated and sticky.
- If you’re adding extras like chopped nuts, dried fruits, or a pinch of sea salt, fold them in now. Be quick to keep the mixture from setting too soon.
- Transfer the mixture into your prepared dish. Use the spatula or the back of a spoon to press it down firmly and evenly—don’t be gentle; you want it compacted.
- Let it rest at room temperature for about 30 minutes to set, or chill in the fridge for about 15-20 minutes if you’re in a hurry. The bars should feel firm but still slightly chewy when ready.
- Once set, lift the slab out of the dish using the parchment overhang. Slice into 12 equal squares or rectangles with a sharp knife.
- Store the bars in an airtight container at room temperature for up to 3 days, or in the fridge for a week. Wrap individually if you want to keep them fresh longer.
Once sliced, let the bars rest at room temperature or in the fridge until firm. Serve directly from the fridge for a cooler, chewier bite, or at room temp for softer, more gooey texture. Wrap individually for portability or store in an airtight container.
How to Know It’s Done
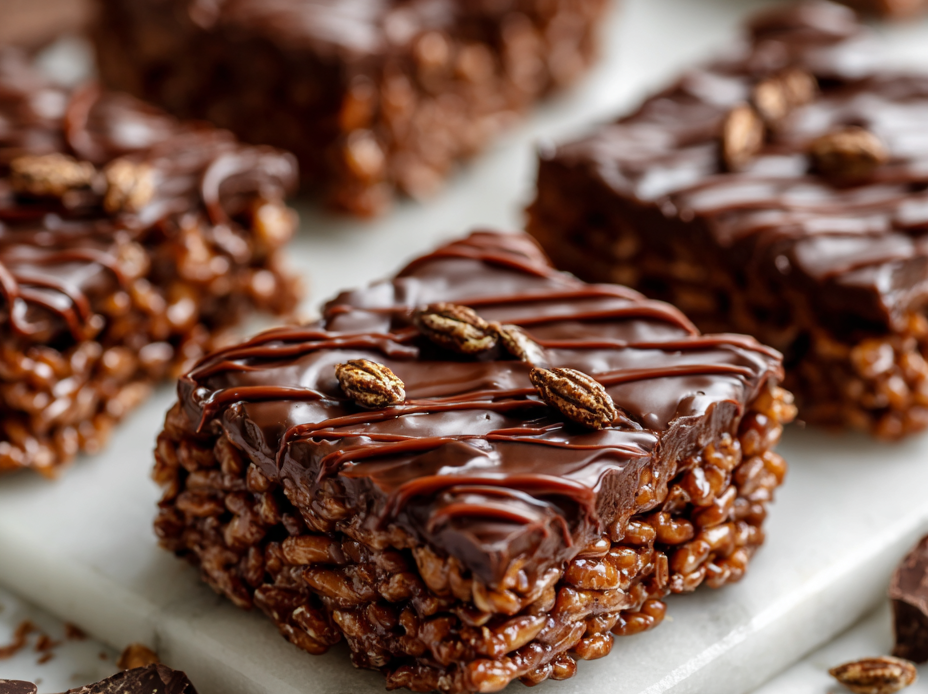
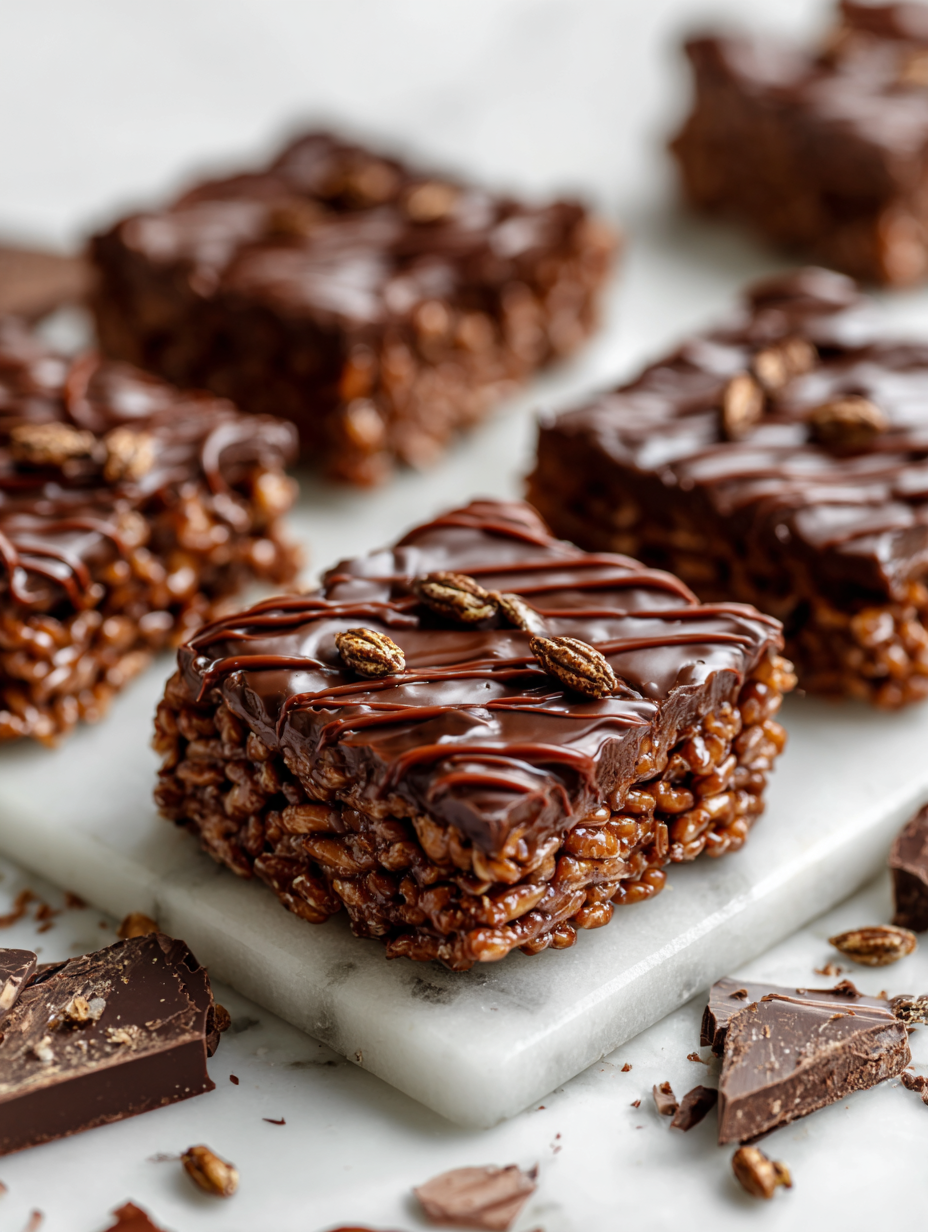
- Bar feels firm and holds shape when pressed gently.
- Chocolate is shiny and fully melted without streaks.
- Edges are set and slightly crisp, with a chewy center.
No Bake Chocolate Rice Bars
Ingredients
Equipment
Method
- Line your baking dish with parchment paper, leaving a slight overhang for easy lifting later.
- In a microwave-safe bowl, combine honey or maple syrup with butter or coconut oil. Microwave in 30-second bursts, stirring in between, until the mixture is smooth and bubbling, about 1-2 minutes. The aroma of melting butter and sweet syrup will fill your kitchen.
- Add the chocolate chips to the warm mixture and stir until they’re fully melted and the mixture is glossy and smooth.
- Pour the melted chocolate mixture into a large mixing bowl. Add the rice cereal and rolled oats, then fold everything together with a spatula until the cereal is evenly coated and sticky.
- If desired, fold in nuts or dried fruit for extra texture and flavor. Mix quickly to keep the cereal crunchy and prevent it from setting too soon.
- Transfer the mixture into your prepared dish. Use the back of a spatula or your fingers to press it down firmly and evenly, creating a compact layer.
- Let the bars set at room temperature for about 30 minutes, or place in the fridge for 15-20 minutes if you’re in a hurry. You’ll see the mixture firming up and becoming glossy as it cools.
- Once firm, lift the slab out of the dish using the parchment paper overhang. Place it on a cutting board and slice into 12 even squares or rectangles with a sharp knife.
- Serve immediately or store the bars in an airtight container at room temperature for up to 3 days, or in the fridge for a week. Wrap individual bars for portable snacks.
Pro tips for perfect rice bars
- Bolded mini-head: Use fresh chocolate chips—they melt more smoothly and create a glossy coating.
- Bolded mini-head: Mix ingredients quickly—stir until just combined to keep the cereal crunchy.
- Bolded mini-head: Press firmly into the dish—compact the mixture well to prevent crumbling later.
- Bolded mini-head: Chill thoroughly—30 minutes in the fridge helps bars set up properly.
- Bolded mini-head: Work with room temperature ingredients—cold honey or syrup can make mixing sticky and tough.
- Bolded mini-head: Use parchment paper—this prevents sticking and makes removal easier without mess.
Common mistakes and how to fix them
- FORGOT to level ingredients → Use measuring cups for accuracy.
- DUMPED too much chocolate → Stick to the recipe to avoid overly rich bars.
- OVER-TORCHED the chocolate → Melt on low power, stir often to prevent burning.
- MISSED the pressing step → Press firmly to ensure bars hold together.
Quick fixes and pantry swaps
- When the chocolate seizes, splash in a teaspoon of hot water to smooth it out.
- If the bars crumble, patch with a tiny drizzle of melted chocolate and press gently.
- Overcooked the mixture? Drape with a damp towel and stir to cool quickly.
- Dumped too much cereal? Add a bit more melted chocolate to balance the texture.
- When the mixture is sticky and hard to spread, lightly oil your spatula for easier handling.
Prep, store, and reheat tips
- You can prepare the mixture a day ahead; store covered in the fridge to keep it fresh and firm.
- Once set, the bars can be kept in an airtight container at room temperature for up to 3 days, maintaining their chewy texture.
- For longer storage, wrap individual bars in parchment or plastic wrap and freeze for up to 2 weeks. Thaw at room temperature before serving.
- Refrigerate the bars for at least 15 minutes before serving if you prefer them firmer. Bring to room temp for a softer, gooey bite.
- Reheating isn’t necessary, but if you want a melty chocolate experience, microwave for 10-15 seconds until warm and glossy—watch for over-melting.
Top questions about no bake rice bars
1. Can I make these gluten-free?
Yes, using gluten-free rice cereal makes the bars safe for gluten sensitivities while keeping the crunch. Just check the cereal label for cross-contamination.
2. Are these dairy-free?
Absolutely. You can substitute coconut oil for butter for a dairy-free version that still melts smoothly and adds a subtle tropical aroma.
3. Can I substitute honey?
Yes, you can swap honey for maple syrup or agave nectar. The texture stays sticky, but the flavor shifts slightly to a richer, caramel tone.
4. My chocolate isn’t melting properly. What do I do?
If your chocolate isn’t melting smoothly, gently warm it over a double boiler and stir constantly. Avoid overheating to prevent seizing.
5. Can I add dried fruit?
Yes, adding dried fruits like cranberries or raisins can introduce chewy bursts of flavor. Keep the overall moisture balanced to prevent sogginess.
6. How do I know when they’re ready?
The bars are done when they feel firm, glossy, and hold their shape without cracking. A slight press should leave a gentle bounce.
7. The mixture is too sticky or dry—what now?
If your mixture is too sticky to spread, lightly oil your spatula or hands. If too dry, add a teaspoon of melted chocolate or syrup to moisten.
8. How should I store leftovers?
Store the bars in an airtight container at room temperature for up to 3 days or in the fridge for a week. Wrap individually if you want to extend freshness.
9. How can I make the bars softer or chewier?
If you want softer bars, let them sit at room temperature for 10-15 minutes before serving. For chewier texture, keep in the fridge.
10. Chocolate cracks or dulls—how fix it?
When the chocolate cracks or gets dull, re-melt with a splash of hot water or milk, stirring until glossy and smooth again.
These no bake chocolate rice bars are a little piece of childhood chaos with a modern twist. They’re quick, honest, and a little messy—just like the best treats should be. Whenever I make them, I remember how simple joy can come from a handful of ingredients and a bit of patience in the fridge.
They’re perfect for last-minute cravings or when I want a sweet, satisfying bite without turning on the stove. Plus, they remind me that sometimes, the best desserts are the ones that embrace imperfection and a little bit of chaos.

Hi, I’m Madison Lane, the cook, recipe creator, and heart behind this kitchen. Food has been part of my life for as long as I can remember. Some of my earliest memories are of standing beside my dad while he cooked, watching him move comfortably around the kitchen, tasting sauces, and explaining why patience mattered just as much as seasoning.
