This no-bake chocolate bar recipe is my go-to when I want something sweet without the fuss of turning on the oven. It’s like a little rebellious act in the kitchen — melting, mixing, and setting without any heat. Honestly, it’s the kind of treat that feels like a small victory, especially on busy afternoons or when I need a quick pick-me-up.
What makes these bars special isn’t just their rich, glossy chocolate layer but also how adaptable they are. I’ve tweaked the recipe over the years, adding a pinch of sea salt or tossing in some chopped nuts for texture. It’s simple enough to make with kids or as a last-minute gift, and they always disappear faster than I expect.
Every time I make these, I think of the little moments — a quick break in the middle of chaos, or a quiet weekend afternoon. The smell of melting chocolate fills my kitchen, grounding me in the small, sweet victories of everyday life. It’s honest, unpolished, and just really good — that’s all I need sometimes.
This recipe is inspired by my late grandmother’s secret trick: adding a pinch of smoky sea salt to intensify the chocolate flavor and cut through the sweetness. It’s a simple tweak that transforms these bars from ordinary to addictive, and it’s a little nod to her culinary finesse that I carry into my own kitchen.
The story behind this recipe
- This recipe came from a lazy afternoon in my kitchen, where I was craving something sweet but didn’t want to turn on the oven. I remembered my childhood, sitting at my grandma’s table, watching her whip up no-bake treats in minutes. That nostalgic feeling of simple, honest ingredients coming together still pulls me back to this recipe whenever I need comfort or a quick fix.
- One day, I experimented by swapping out store-bought ingredients for some raw, natural options, and it changed the whole vibe. It’s become my little ritual to tweak it here and there, making it perfect for spontaneous gatherings or solo indulgence. It’s a reminder that sometimes, the best recipes are born out of moments of chaos and creativity.
- heading: The story behind this recipe
Ingredient breakdown
- Unsweetened cocoa powder: I love the deep, earthy aroma it releases when mixed. For a richer flavor, sift it to avoid lumps, and feel free to try dark cacao for a more intense chocolate punch.
- Sweetened condensed milk: It’s the glue in this recipe, making everything gooey and smooth. If you want a less sweet version, swap half for coconut cream, but be prepared for a subtler sweetness.
- Butter: I melt it directly with the chocolate, and it adds a velvety richness. Use salted butter if you want a slight salty contrast or unsalted for a cleaner taste.
- Crushed graham crackers or cookies: They give crunch and texture, like little bursts of nostalgia. For a gluten-free version, try gluten-free cookies, but watch the texture — they can get softer over time.
- Vanilla extract: Just a splash, but it brightens everything up with a warm, floral note. Skip it if you prefer a more straightforward chocolate flavor or add a pinch of sea salt instead.
- Optional toppings: I sprinkle flaky sea salt or chopped nuts on top for extra contrast. Feel free to mix in dried fruits or crispy rice for more texture, but keep it simple if you want classic bars.
Spotlight on key ingredients
Cocoa Powder:
- Unsweetened cocoa powder: I love the deep, earthy aroma it releases when mixed. For a richer flavor, sift it to avoid lumps, and feel free to try dark cacao for a more intense chocolate punch.
- Sweetened condensed milk: It’s the glue in this recipe, making everything gooey and smooth. If you want a less sweet version, swap half for coconut cream, but be prepared for a subtler sweetness.
Crushed Cookies:
- Butter: I melt it directly with the chocolate, and it adds a velvety richness. Use salted butter if you want a slight salty contrast or unsalted for a cleaner taste.
- Crushed graham crackers or cookies: They give crunch and texture, like little bursts of nostalgia. For a gluten-free version, try gluten-free cookies, but watch the texture — they can get softer over time.
Notes for ingredient swaps
- Dairy-Free: Swap regular butter for coconut oil or vegan butter — expect a slightly different richness and a hint of coconut aroma.
- Vegan Chocolate: Use dairy-free chocolate chips or bars instead of regular dark chocolate — it melts just as smoothly, with a different cocoa intensity.
- Sweetener Variations: Replace condensed milk with coconut condensed milk or a thick maple syrup — these bring a different sweetness and texture, so adjust quantities accordingly.
- Crunch Add-ins: Instead of graham crackers, try crushed pretzels or crispy rice cereal — they add crunch and contrast, with unique salty or airy notes.
- Flavor Boosts: Toss in a pinch of cinnamon, chili powder, or espresso powder — these intensify the chocolate flavor and add unexpected depth.
- Nut-Free Option: Skip nuts or swap with toasted seeds (like pumpkin or sunflower) — keep the texture without the allergy concern, but expect a different nutty aroma.
- Salt Toppings: Use smoked sea salt or flavored finishing salts — these elevate the chocolate with a smoky or complex salty burst.
Equipment & Tools
- Mixing bowl: To melt and combine ingredients
- Spatula: To stir and smooth mixture
- Microwave-safe bowl: To melt chocolate quickly and evenly
- Loaf pan: To hold and set the chocolate mixture
- Parchment paper: For easy removal and clean slicing
- Knife: To cut into bars
Step-by-step guide to no bake chocolate bars
- Equip your workspace with a medium-sized mixing bowl, a spatula, a microwave-safe bowl, and a loaf pan (20x10cm or 8x4in).
- In the microwave-safe bowl, combine 200g chopped dark chocolate and 50g unsalted butter. Microwave in 30-second bursts, stirring after each, until smooth and glossy — about 1-2 minutes total. Smell that rich cocoa aroma? Perfect.
- Add 1/2 cup sweetened condensed milk to the melted chocolate mixture. Stir until fully incorporated. Watch for a shiny, gooey texture that’s thick but pourable.
- Sift in 1/4 cup unsweetened cocoa powder, then add 1/2 teaspoon vanilla extract. Mix well until smooth and uniform. The mixture should look velvety and dark.
- Fold in 1 cup crushed graham crackers or cookies, ensuring even distribution. It’ll add a satisfying crunch and a bit of nostalgic sweetness.
- Line your loaf pan with parchment paper, leaving some overhang for easy removal. Pour the chocolate mixture in, smoothing the top with your spatula.
- Tap the pan on the counter a few times to settle the mixture and release air bubbles. You’ll see it level out and slightly crackle on top, a good sign.
- Place the pan in the fridge and let it set for at least 3 hours, or until firm. If in a rush, pop it in the freezer for 1 hour — just watch for cracking if it freezes solid.
- Once firm, lift the slab out using the parchment overhang. Use a sharp knife to cut into bars or squares. For clean cuts, wipe the knife with warm water between slices.
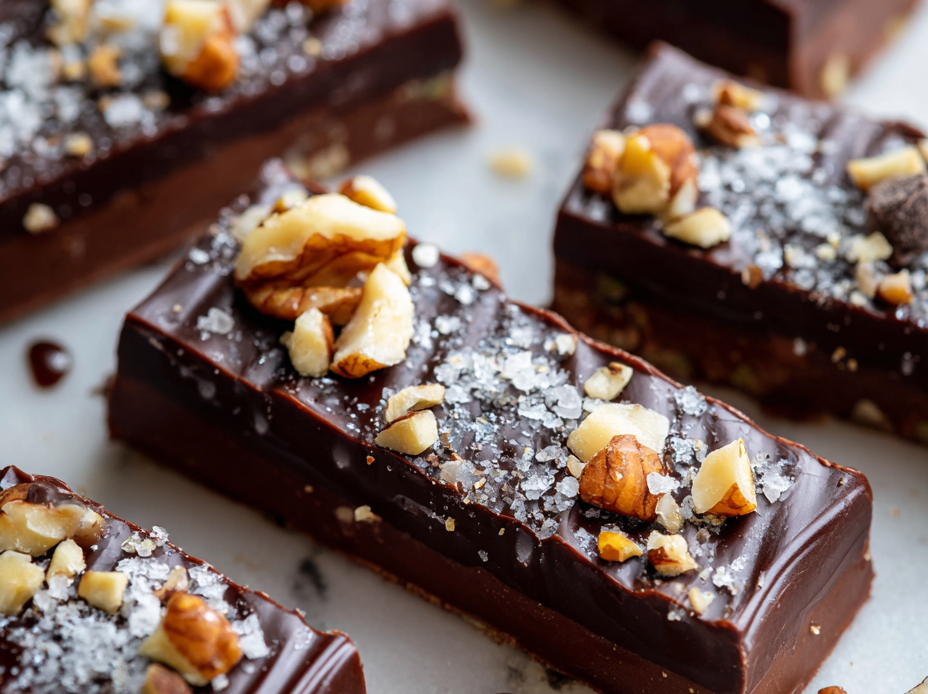
- Optional: sprinkle flaky sea salt or chopped nuts on top immediately after slicing for added flavor and texture. Serve chilled and enjoy the glossy, fudgy bites.
Let the bars rest in the fridge for at least 3 hours until fully set. Lift out using parchment paper, then cut into squares. Sprinkle toppings immediately if desired, and serve chilled.
How to Know It’s Done
- Chocolate mixture is smooth, shiny, and fully melted before pouring.
- The set edges are firm and hold shape when removed from fridge.
- The bars crack slightly when sliced, indicating proper firmness.
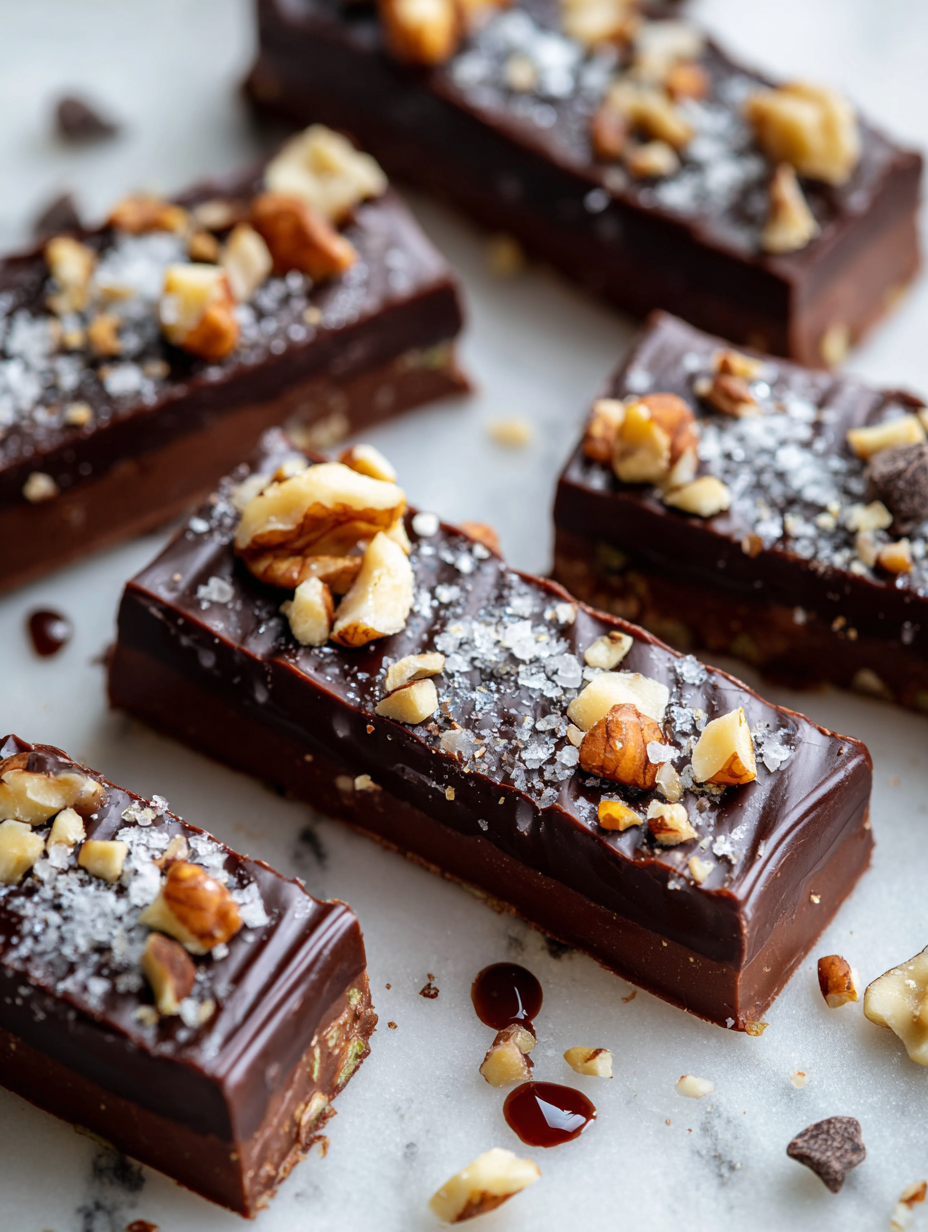
No-Bake Chocolate Bars
Ingredients
Equipment
Method
- Place the chopped dark chocolate and butter in a microwave-safe bowl. Microwave in 30-second bursts, stirring each time, until the mixture is smooth, glossy, and fragrant. This should take about 1-2 minutes in total.
- Add the sweetened condensed milk to the melted chocolate and butter. Stir well until fully combined, creating a thick, shiny mixture that’s easy to pour and spread.
- Sift the cocoa powder into the mixture and add the vanilla extract. Mix thoroughly until the mixture is smooth, dark, and velvety, with no lumps remaining.
- Gently fold in the crushed graham crackers until evenly distributed, giving the bars a satisfying crunch in every bite.
- Line your loaf pan with parchment paper, leaving some overhang for easy removal. Pour the chocolate mixture into the pan and use a spatula to spread it evenly across the surface.
- Tap the pan gently on the counter to settle the mixture and release any trapped air bubbles, ensuring a smooth, even surface.
- Place the pan in the fridge and chill for at least 3 hours, or until the mixture is firm and set. For quicker results, you can freeze it for about 1 hour, but be cautious of cracking.
- Once set, lift the chocolate slab out of the pan using the parchment overhang. Use a sharp knife, wiped with warm water between cuts, to slice into bars or squares of your desired size.
- Optionally, sprinkle flaky sea salt or chopped nuts on top of each bar immediately after slicing for extra flavor and texture.
- Enjoy these glossy, fudgy bars straight from the fridge for the best texture and flavor. Store any leftovers in an airtight container in the fridge for up to a week, or freeze for longer storage.
Tips for Perfect No Bake Bars
- Use high-quality chocolate for a glossy, rich finish.
- Sift the cocoa powder to avoid lumps and ensure smoothness.
- Melt chocolate in short bursts to prevent overheating and seizing.
- Tap the pan gently to release air bubbles and even out the surface.
- Chill completely in the fridge for a firm set, avoiding quick freezer fixes that cause cracking.
- Wipe the knife between cuts for clean, smooth slices.
- Sprinkle toppings immediately after slicing to prevent melting or sinking.
Common mistakes and how to fix them
- FORGOT to evenly spread mixture → Smooth top with spatula to prevent cracking.
- DUMPED ingredients too quickly → Add gradually, stirring to avoid lumps or separation.
- OVER-TORCHED chocolate → Lower microwave power or reduce heating time to prevent burning.
- FAILED to chill long enough → Chill at least 3 hours; shorter times cause soft, runny bars.
Quick fixes and pantry swaps
- If mixture is too stiff, splash in a teaspoon of warm milk to loosen it.
- When chocolate seizes, dump in a tablespoon of vegetable oil and stir until smooth.
- Splash a little hot water on the knife for cleaner slices through sticky bars.
- Patch cracks by pressing a small amount of melted chocolate into the fissure and smoothing over.
- Shield melting chocolate from drafts by covering your workspace with a damp towel for 5 seconds.
Prep, store, and reheat tips
- You can prep the chocolate mixture a day in advance; keep it covered in the fridge to prevent it from drying out, and it will still be glossy and smooth when ready to set.
- Store the finished bars in an airtight container in the fridge for up to 1 week; the chill enhances the chocolate’s firmness and intensifies the flavor, with a slightly fudgier texture.
- For longer storage, freeze the bars in a single layer on a baking sheet, then transfer to a freezer-safe bag; they’ll keep for up to 3 months, but the texture may become more crumbly upon thawing.
- Reheat slices briefly in the microwave at 15-second intervals until just soft enough to bite into; expect a warm, melty chocolate experience, perfect for a quick indulgence.
Top questions about no bake chocolate bars
1. What kind of chocolate works best?
Use high-quality dark chocolate for a glossy, rich finish that melts smoothly in your mouth.
2. Can I make these dairy-free?
Yes, swapping butter with coconut oil keeps it dairy-free, but the texture might be slightly softer.
3. How long should I chill the bars?
Chill the mixture at least 3 hours until firm. If in a rush, freeze for 1 hour, but watch for cracking.
4. Should I add toppings?
Add a pinch of sea salt on top after slicing to enhance chocolate flavor and add contrast.
5. Can I substitute the cookies?
Use crushed cookies or cereal for crunch, but gluten-free options like gluten-free crackers work well too.
6. Can I make this in advance?
Yes, you can prepare the chocolate mixture a day ahead and keep it covered in the fridge.
7. How do I get clean cuts?
Wipe your knife with warm water between cuts for clean slices without sticking or tearing.
8. What if the chocolate seizes?
If the chocolate seizes, stir in a teaspoon of vegetable oil or warm milk to smooth it out.
9. When should I add toppings?
Sprinkle toppings immediately after pouring into the pan for best adhesion and appearance.
10. How should I store the bars?
Store leftovers in an airtight container in the fridge for up to a week or freeze for longer storage.
These no-bake chocolate bars are a reminder that sometimes, the simplest ingredients create the most satisfying treats. They’re perfect for spontaneous moments or when you need a quick, comforting bite that’s rich and glossy. Making them feels like a small act of rebellion, melting chocolate without turning on the oven.
Whenever I reach for one of these bars, I think about how easy it is to turn pantry staples into something special. They’re a no-fuss way to satisfy a sweet craving, and honestly, they’re just as good the next day — if they last that long.

Hi, I’m Madison Lane, the cook, recipe creator, and heart behind this kitchen. Food has been part of my life for as long as I can remember. Some of my earliest memories are of standing beside my dad while he cooked, watching him move comfortably around the kitchen, tasting sauces, and explaining why patience mattered just as much as seasoning.
