Hell’s Kitchen Mac and Cheese isn’t your average comfort food. It’s a wild ride of bold flavors, a bit chaotic, but with a sharp, precise edge that only a seasoned chef can pull off. I love how it captures that high-pressure kitchen vibe—messy, loud, but ultimately controlled and satisfying.
This dish is about embracing the chaos—melting cheeses that stretch like a challenge, spicy kick that sneaks up, and a crispy topping that’s just enough crust to hold everything together. It’s a recipe born from late-night kitchen battles, where perfection and imperfection dance side by side. Every time I make it, I feel like I’m channeling that raw energy, turning it into something delicious and honest.
Focusing on how Hell’s Kitchen Mac and Cheese embodies chaos and precision, blending bold, unpolished flavors with a chef’s meticulous touch, revealing the dish’s personality as a reflection of a high-pressure kitchen experience.
High-Pressure Kitchen Vibes
- This dish reminds me of late-night kitchen chaos, where perfect messes are born from loud, hurried moments.
- Making it feels like channeling the adrenaline of a busy kitchen, with every cheese pull a small victory.
- There’s a strange pride in balancing bold flavors and chaos, turning raw energy into comfort food that’s honest and loud.
- Every spoonful takes me back to those frantic, sweaty shifts—where every ingredient counts and mistakes teach you something new.
The story behind this recipe
- This recipe came from a night in a busy kitchen where chaos reigned but so did the desire for something bold and satisfying. I wanted a mac and cheese that didn’t shy away from flavor or mess—something that felt like a challenge, not just comfort. It’s a dish that’s as much about the energy of a high-stakes kitchen as it is about cheesy, gooey goodness.
- Every time I make it, I think of those frantic moments—where timing is everything and ingredients need to come together fast but perfectly. It’s a reminder that even in chaos, there’s beauty and balance, especially when cheese stretches and crispy bits crackle just right.
- heading: High-Pressure Kitchen Vibes
Trivia and Origins
- This dish gained fame through Gordon Ramsay’s fiery Hell’s Kitchen, where bold flavors and perfect timing collide.
- The name ‘Hell’s Kitchen’ evokes the chaos and pressure of a high-stakes, intense professional kitchen environment.
- Classic mac and cheese has roots in American comfort food, but this version amps up the heat and personality, reflecting the show’s spirit.
- Cheese pulls and crispy tops are not just for presentation—they echo the tension and triumph of a busy kitchen shift.
- Spicy, cheesy, and a little chaotic, this dish embodies the adrenaline rush of working under pressure in a professional kitchen.
Key Ingredients Breakdown
- Cheddar cheese: I love using sharp, aged cheddar for that punch of flavor and gooey stretch—swap for Gruyère if you want nuttier notes that melt just as smoothly.
- Cream: Heavy cream makes the sauce rich and silky, but if you’re out, full-fat milk with a splash of butter can still get you close—just watch the sauce thicken properly.
- Pasta: I prefer cavatappi or elbows—they trap cheese better, giving each bite that satisfying cheesy pull. Whole wheat adds a nutty flavor, but traditional is fine.
- Breadcrumbs: Toasted panko adds crunch and a visual contrast—skip if gluten-free, but consider crushed nuts for a different crunch factor.
- Spices: A dash of smoked paprika adds depth and smoky aroma—skip if you want a milder flavor, but don’t skip the pinch for that subtle kick.
- Hot sauce: A few dashes cut through the richness with a bright, spicy zing—use your favorite, or omit for a milder dish, but it’s worth it.
- Butter: I use unsalted, flavorful butter to finish the topping and sauce—salted works too, just adjust the salt in your cheese sauce accordingly.
Spotlight on key ingredients
Cheddar cheese:
- I love using sharp, aged cheddar for that punch of flavor and gooey stretch—swap for Gruyère if you want nuttier notes that melt just as smoothly.
- Cream: Heavy cream makes the sauce rich and silky, but if you’re out, full-fat milk with a splash of butter can still get you close—just watch the sauce thicken properly.
- Pasta: I prefer cavatappi or elbows—they trap cheese better, giving each bite that satisfying cheesy pull. Whole wheat adds a nutty flavor, but traditional is fine.
Breadcrumbs:
- Toasted panko adds crunch and a visual contrast—skip if gluten-free, but consider crushed nuts for a different crunch factor.
- Spices: A dash of smoked paprika adds depth and smoky aroma—skip if you want a milder flavor, but don’t skip the pinch for that subtle kick.
- Hot sauce: A few dashes cut through the richness with a bright, spicy zing—use your favorite, or omit for a milder dish, but it’s worth it.
Notes for ingredient swaps
- Dairy-Free: Swap milk and cheese with cashew or almond-based alternatives. Expect a slightly nuttier, less gooey result, but still rich and satisfying.
- Gluten-Free: Use gluten-free pasta and panko made from rice or corn. The texture might be a bit different, but it’ll hold the flavors well.
- Cheese Variations: Swap sharp cheddar for Gruyère or smoked gouda for a nuttier, more complex flavor profile. Adjust salt accordingly.
- Cream Substitute: Heavy cream can be replaced with coconut cream for a dairy-free version—adds a subtle coconut aroma and rich texture.
- Breadcrumb Topping: Use crushed tortilla chips or chopped nuts instead of panko for crunch and added flavor; makes it a bit more interesting.
- Spice Level: Add cayenne or hot sauce to dial up the heat, or omit for a milder, kid-friendly version. The smoky paprika can be replaced with smoked chipotle for extra depth.
- Pasta Type: Switch to whole wheat or chickpea pasta for added nutrition and a different bite—note the slightly nuttier or earthier flavor.
Equipment & Tools
- Large saucepan: Boil pasta and prepare cheese sauce
- Deep skillet or ovenproof dish: Assemble and bake the mac and cheese
- Whisk: Combine sauce ingredients smoothly
- Baking tray: Toast or crisp breadcrumb topping
Step-by-step guide to Hell’s Kitchen Mac and Cheese
- Gather your equipment: a large saucepan, a deep skillet or ovenproof dish, a whisk, and a baking tray for topping.
- Cook the pasta: bring a large pot of salted water—about 2 liters—(1 tbsp salt) to a boil at 100°C (212°F). Add pasta and cook until just al dente, about 2 minutes less than package instructions—aim for a firm bite. Drain and set aside.
- Make the cheese sauce: in the saucepan, melt 2 tbsp butter over medium heat (about 160°C/320°F). Whisk in 2 tbsp flour and cook for 1 minute, until slightly golden. Slowly pour in 1 cup heavy cream, whisking constantly, until smooth and slightly thickened, about 3-4 minutes. Add 1 ½ cups shredded sharp cheddar, stirring until melted and smooth. Season with salt, pepper, and a pinch of smoked paprika.
- Combine pasta and sauce: fold the cooked pasta into the cheese sauce until evenly coated. Transfer to your skillet or ovenproof dish. Spread evenly.
- Prepare the topping: in a small bowl, toss ½ cup panko breadcrumbs with 1 tbsp melted butter and a pinch of salt. Spread evenly over the pasta in the dish.
- Bake: preheat your oven to 200°C (392°F). Place the dish on a middle rack and bake for 15-20 minutes, until bubbling hot and the topping is golden brown. If you want extra crispness, broil for an additional 2-3 minutes, watching carefully to prevent burning.
- Check the finish: the sauce should be bubbling around the edges, cheese melted and gooey, and topping crispy. The smell should be rich and cheesy with a hint of smoky spice.
- Rest briefly: let the dish sit for 5 minutes before serving. This helps the sauce set slightly and cools it enough to avoid burning your mouth.
- Serve in portions, with a little extra sprinkle of cheese or herbs if desired. Enjoy the chaos and comfort of this fiery classic.
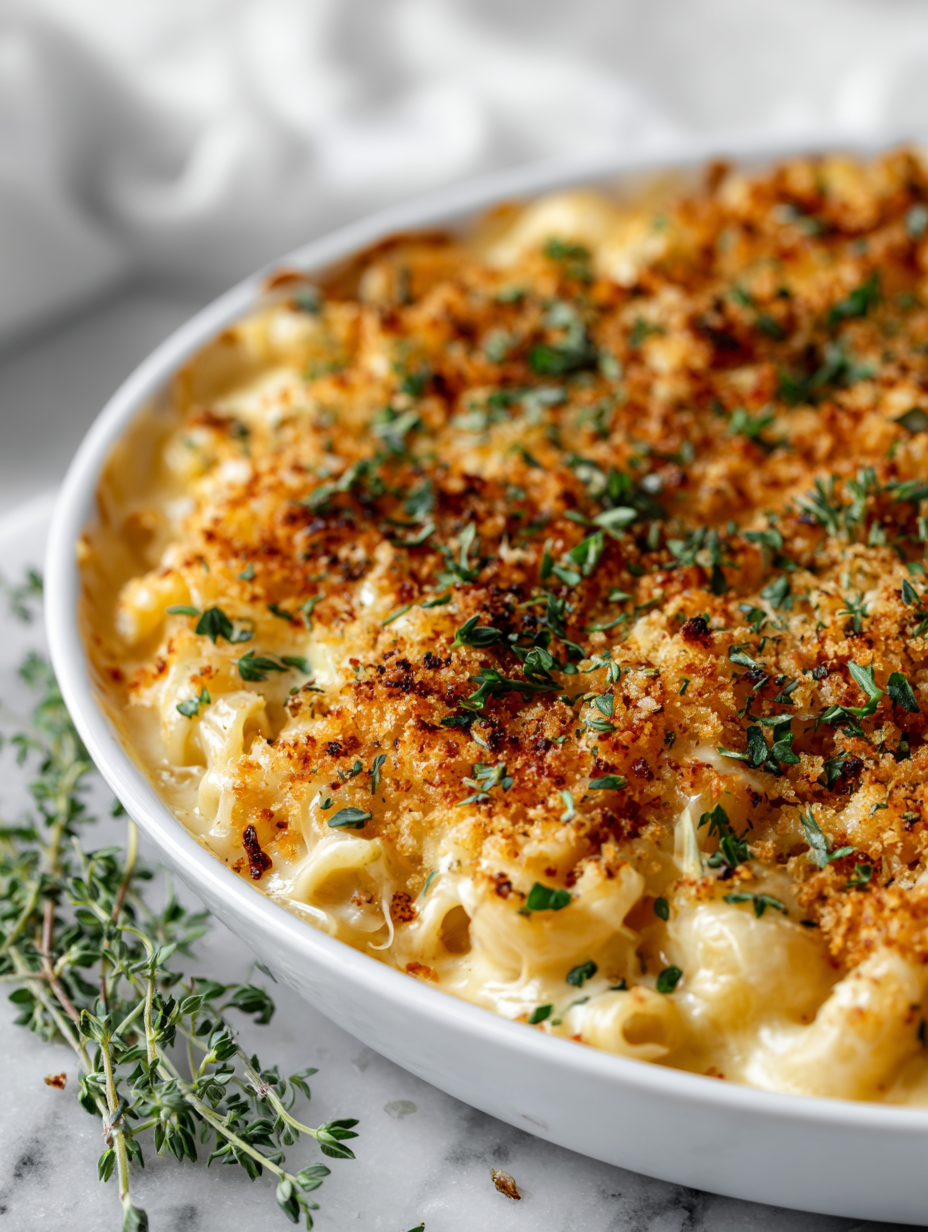
Let the baked mac and cheese rest for 5 minutes. Serve in bowls, with the crispy top crackling and sauce still bubbling. The cheese pulls should be gooey and satisfying, with smoky aroma lingering.
How to Know It’s Done
- Cheese sauce is smooth, bubbling, and slightly thickened but not clumpy.
- Pasta is al dente—firm but cooked through, not mushy.
- Topping is golden, crispy, and crackling when it comes out of the oven.
Hell’s Kitchen Mac and Cheese
Ingredients
Equipment
Method
- Bring a large pot of salted water to a rolling boil, then add the pasta and cook until just al dente—about 2 minutes less than package instructions. Drain and set aside.
- In a deep skillet or ovenproof dish, melt the butter over medium heat. Once it starts to bubble and smell nutty, whisk in the flour and cook for about 1 minute until it turns a light golden color, creating a roux.
- Gradually pour in the heavy cream, whisking constantly until the mixture is smooth and begins to thicken—about 3-4 minutes. The sauce should be glossy and creamy.
- Stir in the shredded cheddar cheese and hot sauce, mixing until the cheese is fully melted and the sauce is smooth. Season with a pinch of salt and smoked paprika for depth.
- Fold the cooked pasta into the cheese sauce, ensuring each piece is generously coated with the cheesy goodness. Transfer everything into your baking dish or skillet.
- In a small bowl, toss the panko breadcrumbs with melted butter and a pinch of salt. Spread this evenly over the top of the pasta mixture.
- Preheat your oven to 200°C (392°F). Place the dish on a middle rack and bake for 15-20 minutes until bubbling and the topping is golden brown.
- For an extra crispy top, broil the dish for an additional 2-3 minutes, keeping a close eye to prevent burning. The breadcrumbs should crackle and turn a perfect golden hue.
- Remove the dish from the oven and let it rest for about 5 minutes. This allows the cheese to set slightly and cool enough to serve.
- Serve hot, with crispy topping crackling and cheese stretching with each bite. Enjoy the bold, chaotic flavors of this high-pressure kitchen-inspired dish.
Pro tips for perfect mac and cheese
- flavor: Use freshly grated cheese for a more vibrant, melty result—pre-grated can be dry and less flavorful.
- Creamy texture: Slowly add the cream to the roux, stirring constantly to prevent lumps and ensure smoothness.
- Cheese stretch: Let the cheese sit at room temperature for 10 minutes before shredding—easier to melt and less stringy.
- Crispy topping: Toast breadcrumbs in butter until golden and fragrant—don’t walk away or they’ll burn quickly.
- Bake for perfection: Broil the dish for 2 minutes at the end for a crackly, golden crust—keep a close eye to avoid burning.
- Flavor balance: Add a pinch of smoked paprika or hot sauce to the cheese sauce—builds depth and a subtle spicy kick.
Common mistakes and how to fix them
- FORGOT to preheat oven → Always preheat to ensure even baking and crisp topping.
- DUMPED cheese directly into hot sauce → Stir cheese in small batches off heat for smoothness.
- OVER-TORCHED breadcrumb topping → Keep a close eye; broil briefly for perfect golden crunch.
- MISSED salt in pasta water → Salt generously; it’s your only chance to flavor the pasta itself.
Quick Fixes for Kitchen Chaos
- When sauce splits, splash in a spoonful of cold milk and whisk vigorously.
- If cheese isn’t melting smoothly, add a pinch of baking soda to stabilize the emulsion.
- Splash a little hot sauce when the sauce is too mild—sharpen the flavor immediately.
- Patch over a burnt topping with a sprinkle of fresh breadcrumbs and a quick broil.
- Shield a bubbling dish with foil if edges brown too quickly—preserves the creamy center.
Prep, store, and reheat tips
- You can prepare the cheese sauce and cook the pasta a day ahead. Store separately in airtight containers in the fridge—sauce will thicken slightly, so a quick reheat with a splash of milk helps loosen it up.
- Assemble the dish beforehand, but don’t add the breadcrumb topping until just before baking. Wrap the unbaked mac and cheese tightly with plastic wrap for up to 24 hours; the flavors meld and deepen overnight.
- Refrigerated mac and cheese is best eaten within 2-3 days. The cheese may firm up, but a gentle reheating with stirring restores its creamy texture and cheesy aroma.
- Reheat in the oven at 180°C (350°F) covered with foil for 20-25 minutes until hot and bubbly. For a crisp topping, uncover and broil for 2-3 minutes—listen for that crackle, smell the smoky breadcrumbs.
Top questions about Hell’s Kitchen Mac and Cheese
1. Can I use different cheeses?
Use sharp cheddar for that punchy, gooey melt. If you want a nuttier flavor, swap in Gruyère—but don’t forget, the texture might be slightly different.
2. Can I make this ahead?
Yes, you can prepare the cheese sauce and cooked pasta a day in advance. Keep them separate, covered, in the fridge, then assemble and bake when ready.
3. How do I know when it’s done?
Bake until bubbling hot, the cheese is melted and slightly golden, and the breadcrumb topping is crispy—about 15-20 minutes at 200°C (392°F).
4. My cheese sauce is grainy, what now?
If your cheese sauce splits or becomes grainy, whisk in a splash of cold milk or add a pinch of baking soda to smooth it out.
5. How can I adjust the spice?
For a spicier kick, add hot sauce or a pinch of smoked paprika to the cheese sauce. For milder flavor, skip the spice or use sweet paprika.
6. What can I use instead of breadcrumbs?
Use panko breadcrumbs for crunch. To make it gluten-free, opt for crushed nuts or gluten-free panko. Toast the topping for extra crispness.
7. How do I reheat leftovers?
When reheating, cover with foil and warm at 180°C (350°F) for about 20 minutes. For crispy topping, uncover and broil for 2-3 minutes, watching carefully.
8. What cheese combination works best?
Use a mix of sharp and mild cheeses for layered flavor. Freshly grated cheese melts better than pre-grated, which can be dry and less flavorful.
9. How should I cook the pasta?
Ensure your pasta is cooked al dente—firm but cooked through. Overcooked pasta will turn mushy when baked.
10. Any tips for the topping?
Watch the breadcrumb topping during broiling; it can burn quickly. Keep a close eye for a golden, crackling crust.
This dish isn’t just about the chaos—it’s where high-pressure moments meet honest, loud flavors. Every bite is a reminder that even in the busiest kitchens, there’s beauty in the mess.
Making Hell’s Kitchen Mac and Cheese feels like a small rebellion against order, a way to channel that frantic energy into something rich, cheesy, and just a little wild. It’s a dish that’s as much about the experience as it is about the flavor, especially right now when comfort meets a spark of chaos.

Hi, I’m Madison Lane, the cook, recipe creator, and heart behind this kitchen. Food has been part of my life for as long as I can remember. Some of my earliest memories are of standing beside my dad while he cooked, watching him move comfortably around the kitchen, tasting sauces, and explaining why patience mattered just as much as seasoning.
