When I first started making green pea curry, I was obsessed with keeping those vibrant little peas just as lively and bright as they are fresh. It’s a challenge—peas tend to dull when cooked too long or at too high a heat. But I found that gentle simmering and quick cooling at the right moment preserves that stunning color, turning what could be a dull dish into something visually striking and almost too pretty to eat.
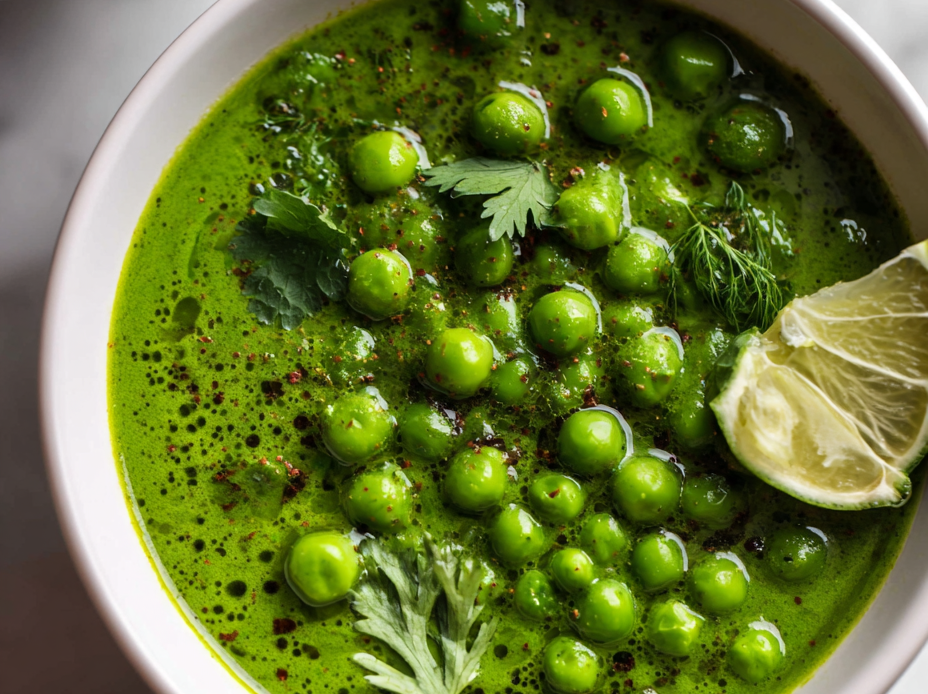
This recipe is my way of celebrating peas—those sweet, tender bites that pack a punch of freshness. The bright green hue isn’t just for looks; it’s a reminder of how simple ingredients can shine with the right care. Plus, I love how this curry looks on a plate—like a splash of spring, even in the middle of winter, making it perfect for brightening up any mealtime.
Focusing on how the vibrant green color of the peas can be preserved and highlighted, making the curry not just delicious but visually striking, even as it cools on the table.
The story behind this recipe
- I stumbled on this recipe during a chaotic week when I needed something quick yet vibrant. The idea of preserving that fresh green color, even after cooking, became my obsession. It reminds me that sometimes, the simplest ingredients—peas in this case—deserve a little extra love and attention.
- Making this curry feels like a small act of rebellion against the dull, overcooked green mush we often settle for. I love how the bright color sparks a sense of freshness, almost like a breath of spring in the middle of winter. It’s become my go-to for when I want a meal that’s both comforting and visually uplifting.
- heading
- story_type
Ingredient breakdown
- Fresh green peas: I love using bright, firm peas—fresh or frozen—because that snap and sweetness really shine through. Skip canned if you can; they tend to be dull and mushy after cooking.
- Coconut milk: I prefer full-fat for richness and a silky texture that coats the peas beautifully. If you want a lighter version, try almond milk, but the flavor won’t be as lush and coconutty.
- Garam masala: This spice blend adds warmth and depth. Toast it lightly in a dry pan first—smells incredible—and then add to intensify the aroma and flavor.
- Onion and garlic: Sauté until soft and fragrant—about 5 minutes at medium heat—until they turn golden. If they brown too quickly, lower the heat to avoid bitterness.
- Turmeric: Just a pinch gives the curry that vibrant, almost neon yellow hue. Be careful not to overdo it, or the flavor turns a bit bitter. Stir well and cook for a minute to release its aroma.
- Fresh cilantro: Added at the end, it brightens the dish with a lemony, herbal note. I often crush it lightly between fingers to release more flavor right before serving.
- Oil: Use a neutral oil like vegetable or canola for sautéing. It helps the spices bloom and prevents sticking. I sometimes add a splash of ghee for extra richness and a nutty aroma.
Spotlight on key ingredients
Green peas:
- Fresh green peas: I love using bright, firm peas—fresh or frozen—because that snap and sweetness really shine through. Skip canned if you can; they tend to be dull and mushy after cooking.
- Coconut milk: I prefer full-fat for richness and a silky texture that coats the peas beautifully. If you want a lighter version, try almond milk, but the flavor won’t be as lush and coconutty.
- Garam masala: This spice blend adds warmth and depth. Toast it lightly in a dry pan first—smells incredible—and then add to intensify the aroma and flavor.
Coconut milk:
- I love the way it adds a velvety richness and a subtle coconut aroma that complements the peas perfectly. Watch out for the thick, oozy texture that can turn cloying if overused.
- Garam masala: This blend is my secret weapon—brings a warm, fragrant depth that makes the curry smell like a cozy kitchen. Be gentle with the toasting to avoid bitterness.
- Fresh cilantro: When chopped and sprinkled at the end, it releases a lemony, herbal brightness that lifts the whole dish. Crush it lightly to unlock more flavor.
Notes for ingredient swaps
- Dairy-Free: Coconut cream instead of coconut milk for thicker, richer curry, though it may be slightly sweeter and creamier.
- Vegetarian: Tofu cubes or paneer can replace peas for a protein boost, but they absorb flavors differently and may need longer cooking.
- Fresh Herbs: Basil or mint instead of cilantro for a different herbal note, but they won’t provide the same brightness and aroma.
- Spice Mix: Curry powder or a homemade blend instead of garam masala, which can alter the depth and complexity of flavors.
- Sweetener: A touch of honey or maple syrup can balance spices, but be cautious—too much can clash with the savory profile.
- Oil: Substitute ghee for a richer, nuttier aroma, but it may be a touch heavier and richer in flavor.
- Peas: Edamame or cooked lentils as a substitute for green peas, changing the texture and flavor profile noticeably.
Equipment & Tools
- Heavy-bottomed pan: Ensures even heat and prevents scorching.
- Wooden spoon: Stirs spices and coconut milk without scratching the pan.
- Measuring spoons: Ensures accurate spice quantities.
- Knife and chopping board: Prepares onion, garlic, and ginger.
- Lid (optional): Helps simmer the peas gently if needed.
Step-by-step guide to green pea curry
- Gather all your ingredients and equipment. Use a heavy-bottomed pan for even heat distribution.
- Heat 2 tbsp oil over medium heat (about 160°C/320°F). Add 1 chopped onion and sauté for 5 minutes until translucent and fragrant.
- Add 3 minced garlic cloves and 1 tsp grated ginger. Cook for another minute, smell should be warm and spicy.
- Stir in 1 tsp turmeric and 1 tbsp garam masala. Toast spices for 30 seconds until fragrant, watching for a slight shimmer in the oil.
- Pour in 1 can (400ml) coconut milk, stirring well to combine. Bring to a gentle simmer, 90°C/194°F, for 5 minutes, until slightly thickened.
- Add 2 cups frozen green peas directly from the freezer. Stir and cook for 3–4 minutes until peas are bright green and tender but still snap when pressed.
- Taste and adjust salt or spice. If the peas start to dull in color, add a pinch of lemon juice to brighten.
- Remove from heat. Let sit for 2 minutes to allow flavors to meld. If desired, garnish with chopped cilantro for extra freshness.
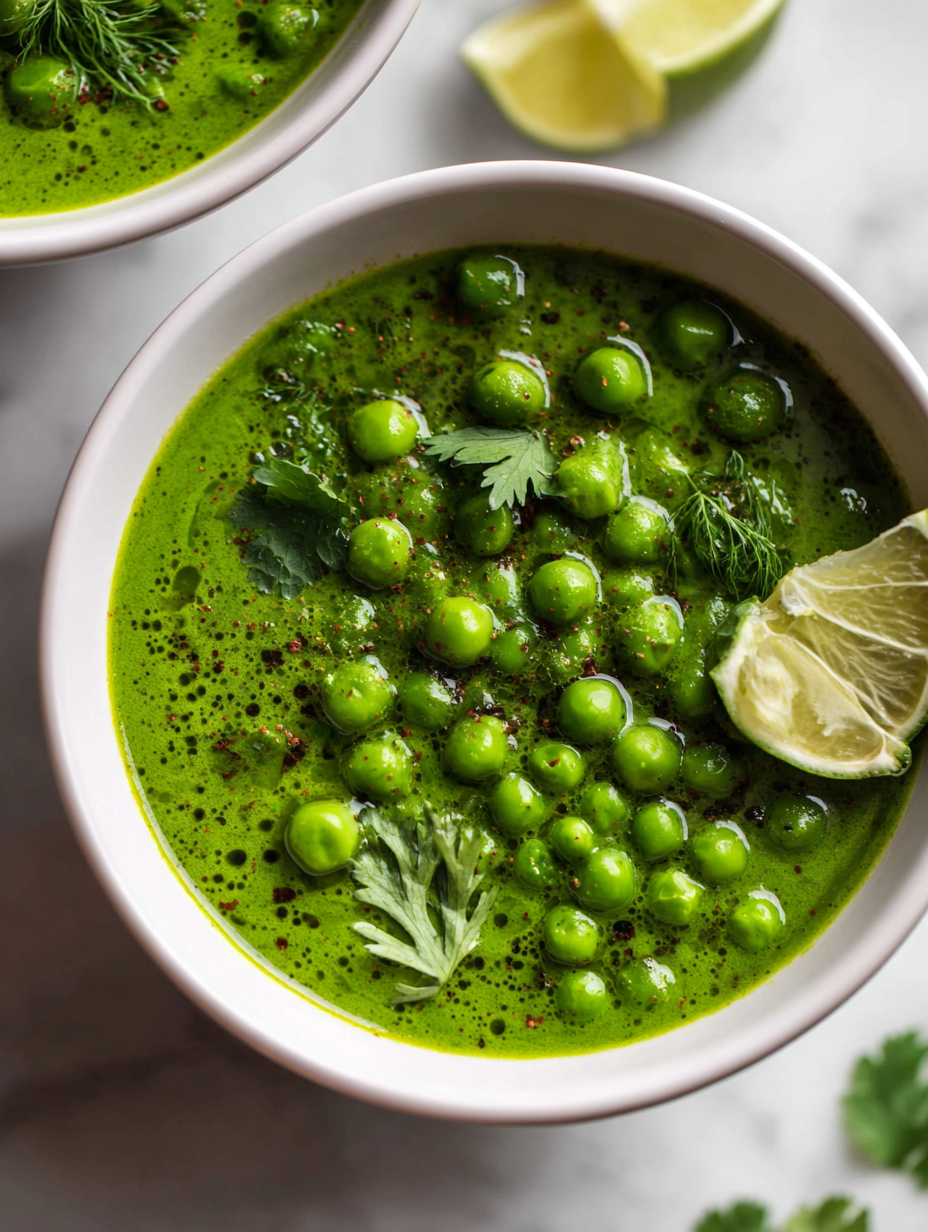
- Serve hot over rice or with warm flatbread. The curry should be velvety, vibrant green, and fragrant with a hint of coconut.
Let the curry rest for 2 minutes off heat. Garnish with cilantro, then serve immediately with rice or bread. This resting period allows flavors to settle and enhances the overall taste.
How to Know It’s Done
- Color: Peas stay bright green without dulling or browning.
- Aroma: Spices should smell warm, fragrant, and slightly toasted.
- Texture: Peas should be tender yet retain a slight snap when pressed.
Bright Green Pea Curry
Ingredients
Equipment
Method
- Heat the oil in a heavy-bottomed pan over medium heat until it shimmers and begins to warm fragrant.
- Add the finely chopped onion and sauté, stirring occasionally, until it becomes translucent and soft, about 5 minutes. The aroma should be warm and slightly sweet.
- Stir in the minced garlic and grated ginger, cooking for another minute until you smell a warm, spicy aroma and the mixture is fragrant.
- Add the ground turmeric and toast it with the spices for about 30 seconds, stirring constantly. This releases the aroma and deepens the flavor.
- Pour in the coconut milk, stirring to combine everything smoothly. Bring the mixture to a gentle simmer, watching for bubbles to form around the edges.
- Sprinkle in the toasted garam masala, stirring well to distribute the spices evenly. Let the curry simmer gently for about 5 minutes, allowing flavors to meld and the sauce to thicken slightly.
- Add the frozen green peas directly from the freezer into the curry. Stir and cook for 3–4 minutes until the peas turn bright green and are tender but still have a slight snap.
- Season with salt to taste. If the color has dulled slightly, squeeze in a little lemon or lime juice to brighten the vibrant green hue.
- Remove the pan from heat and let sit for 2 minutes to allow the flavors to settle and intensify. Chop the fresh cilantro and sprinkle on top for a fresh herbal finish.
- Serve immediately over steamed rice or with warm flatbread. The curry should be velvety, bright green, and fragrant with a delicate coconut aroma.
Pro tips for perfect green pea curry
- Use a wide pan to evenly distribute heat and prevent overcrowding, which can lead to uneven cooking.
- Lightly toast spices in a dry pan to release their essential oils and deepen their aroma before adding liquids.
- Add frozen peas directly from the freezer; avoid thawing first to preserve their vibrant color and snap.
- Cook the curry on low to medium heat; too high can dull the peas’ bright hue and burn delicate spices.
- Stir gently but often once the peas are in, to prevent breaking their shape and to evenly coat them with flavors.
- Finish with a squeeze of lemon or lime just before serving; it brightens the dish and enhances the green vibrancy.
- Keep an eye on the coconut milk; cook just until it slightly thickens to avoid curdling and preserve creaminess.
Common mistakes and how to fix them
- FORGOT to check peas’ color; dull peas mean overcooking — add a splash of lemon to revive.
- DUMPED all spices at once; toast spices first for better aroma and flavor development.
- OVER-TORCHED the coconut milk; cook on gentle heat to prevent curdling and bitterness.
- MISSED the resting step; let curry sit for 2 minutes to deepen flavors and improve texture.
Quick fixes and pantry swaps
- If peas look dull, splash them with lemon juice to brighten their color instantly.
- When the curry shimmers and smells fragrant, it’s ready—don’t overcook the peas past that point.
- Splash cold water on the pan if spices start to burn; it cools and stops the browning.
- Patch over a too-thick curry with a splash of warm water or coconut milk to loosen it up.
- Shield dull peas by stirring in a pinch of vibrant green spinach or cilantro at the end.
Prep, store, and reheat tips
- Prep the onion, garlic, and ginger in advance; store in an airtight container for up to 2 days. Their aroma will be fresh and pungent when you start cooking.
- Freeze measured portions of coconut milk in small jars or ice cube trays; thaw in the fridge overnight for a creamy, oozy texture that’s ready to use.
- Cook the curry up to the final simmer, then let it cool completely; refrigerate for up to 2 days. The color may dull slightly, but the flavor stays vibrant.
- Reheat gently over low heat, stirring often. Expect the aroma of coconut and spices to revive, and the peas to retain their bright color if warmed slowly.
- For longer storage, freeze the cooled curry in portions for up to 3 months. Thaw overnight in the fridge, then reheat with a splash of water or coconut milk to restore creaminess.
Top questions about green pea curry
1. Can I use fresh peas instead of frozen?
Use frozen peas straight from the freezer to keep their color and snap. Fresh peas are best if in season, but frozen works wonders when out of season.
2. How do I keep the peas bright and not mushy?
Cooking on too high heat dulls the vibrant green color and can make peas mushy. Keep it gentle, around medium, and simmer just enough to warm through.
3. My curry is too thick. What can I do?
If the curry gets too thick, stir in a splash of warm water or coconut milk. It loosens the sauce without diluting flavor.
4. How can I make the curry more vibrant in color?
Add a squeeze of lemon or lime just before serving. It enhances the green vibrancy and adds a fresh, zesty note.
5. Spices start to burn. What’s the fix?
If the spices burn or turn bitter, remove the pan from heat immediately and add a splash of water or coconut milk to cool down.
6. When is the peas done?
To preserve color, avoid overcooking the peas. As soon as they turn bright green and are tender, remove from heat.
7. Should I toast the spices beforehand?
For a richer flavor, toast your garam masala lightly in a dry pan before adding to the curry. It releases essential oils and deepens aroma.
8. How long can I keep the curry in the fridge?
Store leftovers in an airtight container in the fridge for up to 2 days. Reheat gently, stirring often to maintain the bright color and creamy texture.
9. Can I freeze the curry?
You can freeze the curry for up to 3 months. Thaw overnight in the fridge and reheat slowly, adding a splash of coconut milk if needed.
10. The curry feels oily. How do I fix it?
If the curry is too oily, add a small pinch of salt or a squeeze of lemon to balance the richness and freshen the flavor.
This green pea curry isn’t just a quick meal; it’s a reminder to look for vibrancy in everyday ingredients. The bright color and fresh flavor make it perfect for these early spring days when everything feels just a little more alive.
Whenever I make this dish, I think about how simple ingredients can turn into something unexpectedly joyful. It’s a little act of celebrating the season, even if that just means brightening a weekday dinner with a splash of green and a burst of flavor.

Hi, I’m Madison Lane, the cook, recipe creator, and heart behind this kitchen. Food has been part of my life for as long as I can remember. Some of my earliest memories are of standing beside my dad while he cooked, watching him move comfortably around the kitchen, tasting sauces, and explaining why patience mattered just as much as seasoning.
