There’s something about the ritual of making this no bake chocolate nut slice that feels like a warm hug. It’s an effortless recipe, but each step is a gentle reminder of childhood afternoons spent in the kitchen, sticky fingers and all. The smell of melting chocolate mingling with toasted nuts takes me right back to simpler times, where comfort was just a slice away.
What I love most is how this recipe turns a handful of pantry staples into something rich and satisfying without turning on the oven. It’s perfect for those moments when you need a quick sweet fix, but also crave that nostalgic, homey flavor that sticks with you. No fuss, no mess—just honest, straightforward ingredients coming together in a way that feels almost meditative.
Focusing on the comfort and nostalgia of childhood treats, this recipe transforms the simple act of no-bake cooking into a mindful, sensory experience that reconnects us with homey flavors and the joy of effortless, honest baking.
The story behind this recipe
- This recipe came about on a rainy afternoon when I was rummaging through my kitchen, looking for something quick and satisfying. I remembered how my grandma used to make similar treats, but with a twist—adding a bit of sea salt and extra nuts for that perfect balance of sweet and salty. It’s funny how simple ingredients can evoke such a flood of memories, like childhood afternoons spent sneaking bites from the mixing bowl.
- One day, I was feeling overwhelmed with work and needed a sweet escape that wouldn’t take hours. Stirring melted chocolate and crunchy nuts together felt like a small act of self-care. I threw it all into a pan, let it set, and discovered that sometimes, the simplest recipes are the most comforting. Now, this no bake slice is my go-to for those hectic days when I crave something homey but don’t want to fuss.
- heading: ‘The story behind this recipe’
Key ingredients and tips
- Dark chocolate: I prefer a rich, 70% cocoa to balance sweetness with depth. If you like it sweeter, go for milk chocolate, but beware—it’ll be less intense.
- Mixed nuts: Toasted almonds and walnuts add a smoky crunch. Skip the nuts or swap with dried fruit if allergies are a concern—just keep the texture lively.
- Butter: I use unsalted for control, but a splash of coconut oil can add a subtle tropical aroma—good for dairy-free tweaks.
- Sweetener: Honey is my go-to for a glossy finish and a slight floral note, but maple syrup works beautifully too—just watch for extra moisture.
- Vanilla extract: A splash brightens everything up with warm, floral notes. If you don’t have it, a pinch of almond extract adds a different kind of warmth.
- Oats (optional): I toss in a handful for a chewy texture, but they’re not essential. If you want more substance, try crushed graham crackers or rice cereal.
- Sea salt: Just a pinch on top or mixed in enhances the chocolate’s richness. Skip if you prefer a sweeter, less savory contrast.
Spotlight on key ingredients
Dark Chocolate:
- I prefer a rich, 70% cocoa to balance sweetness with depth. If you like it sweeter, go for milk chocolate, but beware—it’ll be less intense.
- Mixed nuts: Toasted almonds and walnuts add a smoky crunch. Skip the nuts or swap with dried fruit if allergies are a concern—just keep the texture lively.
- Butter: I use unsalted for control, but a splash of coconut oil can add a subtle tropical aroma—good for dairy-free tweaks.
Nuts & Salt:
- Mixed nuts: Roasted and fragrant, they bring a sturdy crunch that contrasts with the smooth chocolate. Watch for over-toasting—they turn bitter fast.
- Sea salt: Just a pinch enhances the chocolate’s richness and nuts’ aroma. It’s the little spark that makes the flavor pop and balances sweetness.
Notes for ingredient swaps
- Dairy-Free: Use coconut oil or vegan butter instead of regular butter; expect a slightly different richness and aroma.
- Chocolate: Swap dark chocolate for milk chocolate for a sweeter, creamier flavor—less intense cocoa taste, more mellow sweetness.
- Nuts: Almonds or cashews can replace mixed nuts; keep in mind they might soften a bit more during setting.
- Sweetener: Maple syrup adds a caramel note; honey offers floral sweetness—both may slightly alter the final texture.
- Oats: Oat flakes can be replaced with crushed graham crackers or rice cereal for a different crunch and flavor profile.
- Salt: Sea salt can be substituted with Himalayan pink salt for a milder, mineral-rich finish; skip if you prefer sweeter.
- Add-ins: Dried fruits like cranberries or apricots can replace nuts for a chewy, tangy twist—just chop small for even distribution.
Equipment & Tools
- Heatproof bowl: To melt the chocolate gently over simmering water.
- Saucepan: To create a bain-marie for melting chocolate.
- Skillet: To toast nuts evenly and bring out flavor.
- Spatula: To mix and press the mixture into the pan.
- Parchment paper: For easy removal and clean edges.
- Sharp knife: To cut the set slice into pieces.
Step-by-step guide to no bake slice
- Gather all your ingredients and equipment. Line a 20cm (8-inch) square pan with parchment paper, leaving some overhang for easy lifting.
- Chop 200g (7oz) of dark chocolate into small pieces. Melt it gently in a heatproof bowl over a pot of simmering water (bain-marie) at 60°C (140°F), stirring until smooth. Remove from heat and set aside.
- In a large mixing bowl, toast 1 cup of mixed nuts (almonds, walnuts) in a dry skillet over medium heat for about 5 minutes until fragrant and lightly golden. Let cool slightly.
- Add 1/4 cup of honey, 2 tbsp of unsalted butter, and 1 tsp of vanilla extract to the melted chocolate. Mix until well combined and glossy.
- Stir in the toasted nuts and, if using, 1/2 cup of oats or crushed cereal for extra chew. Mix thoroughly so everything is coated evenly.
- Pour the mixture into the prepared pan. Use a spatula or the back of a spoon to press it down firmly and evenly, about 1 inch (2.5cm) thick.
- Place the pan in the fridge for at least 2 hours, or until the slice is set and firm. If in a hurry, freeze for about 1 hour, checking to ensure it’s not too hard.
- Once set, lift the slice out using the parchment overhang. Cut into squares or rectangles with a sharp knife. Serve immediately or keep chilled.
Refrigerate the slice until fully set, at least 2 hours. Keep chilled in an airtight container, and cut just before serving for clean edges.
How to Know It’s Done
- Chocolate is smooth and glossy, not grainy or dull.
- Nuts are toasted and fragrant, with a crunchy bite.
- The slice holds its shape when pressed and cut.
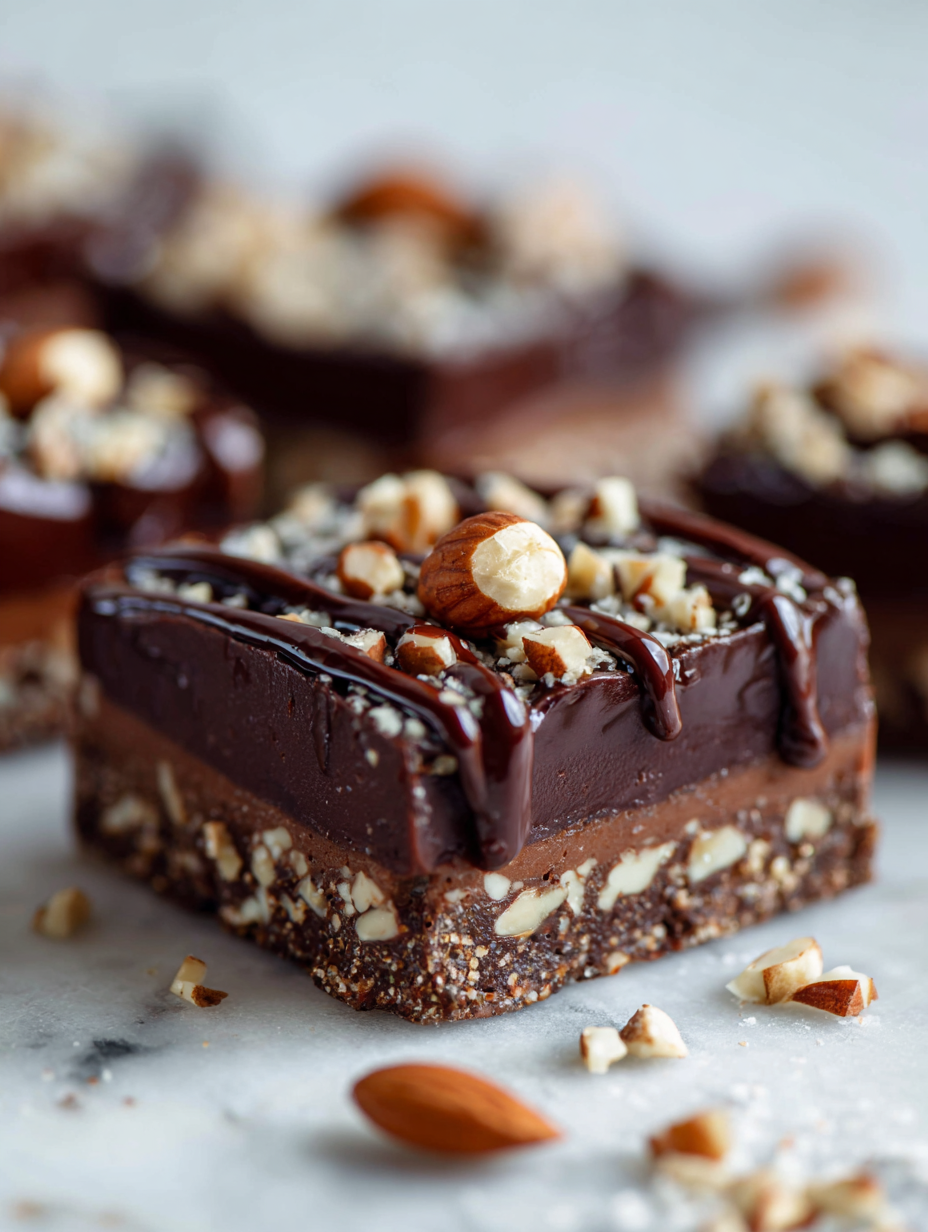
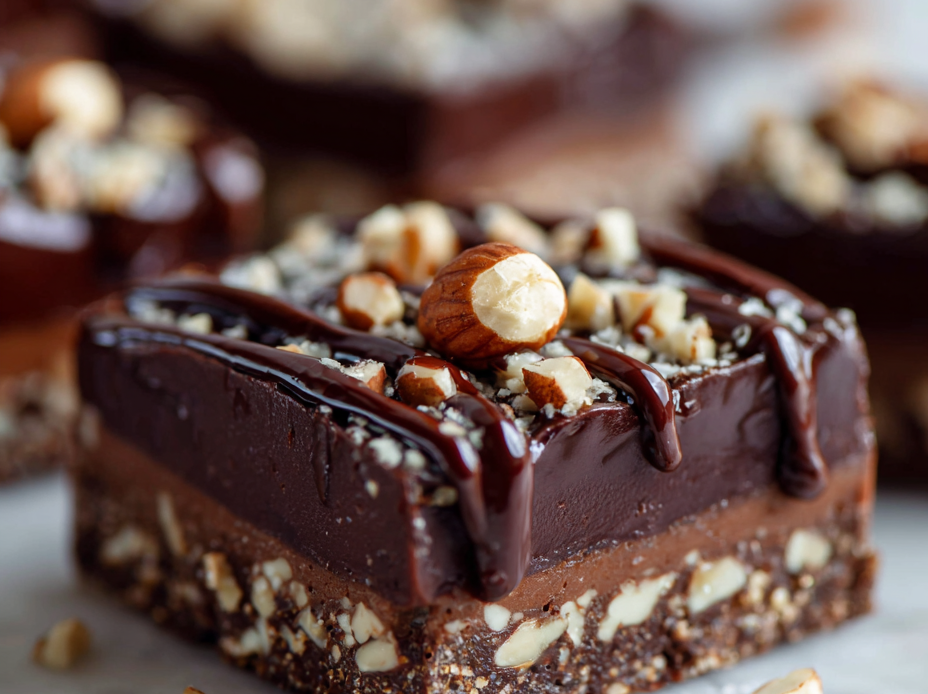
No Bake Chocolate Nut Slice
Ingredients
Equipment
Method
- Line your 20cm (8-inch) square pan with parchment paper, leaving some overhang for easy removal.
- Chop the dark chocolate into small pieces and melt it gently in a heatproof bowl set over a saucepan of simmering water, stirring until smooth and glossy. This creates a fragrant, melted chocolate base.
- In a dry skillet, toast the mixed nuts over medium heat for about 5 minutes until they become fragrant and lightly golden; then, let them cool slightly.
- Pour the melted chocolate into a large mixing bowl. Add the honey, butter, and vanilla extract, then stir until everything is well combined and shiny.
- Stir in the toasted nuts, mixing thoroughly so they are evenly coated with the chocolate mixture.
- Pour the mixture into your prepared pan, then press down firmly with a spatula or the back of a spoon to create an even, compact layer. This helps the slice hold together nicely.
- Place the pan in the refrigerator and chill for at least 2 hours until the slice is firm and set. If you're in a hurry, pop it in the freezer for about an hour, but check frequently to prevent over-hardening.
- Once set, lift the slice out of the pan using the parchment overhang and transfer to a cutting board. Use a sharp knife to cut into squares or rectangles.
- Serve immediately or store in an airtight container in the fridge. The chocolate will be glossy and the nuts crunchy, making each bite satisfyingly rich and nostalgic.
Notes
Pro tips for perfect slice
- Bolded mini-head: Use low heat → Melt chocolate gently over a warm water bath to prevent seizing and keep it glossy.
- Bolded mini-head: Toast nuts → Spread nuts on a baking sheet, toast at 180°C (350°F) for 5–7 minutes until fragrant, then cool before mixing.
- Bolded mini-head: Chill thoroughly → Refrigerate the slice for at least 2 hours until firm and slices cleanly without crumbling.
- Bolded mini-head: Press firmly → Use the back of a spatula or a piece of parchment to press mixture evenly into the pan, ensuring no air gaps.
- Bolded mini-head: Adjust sweetness → Taste melted chocolate before adding honey; add gradually for your preferred sweetness level.
- Bolded mini-head: Watch for overcooking → Remove from heat as soon as chocolate is melted and smooth; residual heat can cause it to burn or seize.
- Bolded mini-head: Use parchment edges → Lift the set slice easily by pulling on parchment overhang, avoiding messy edges.
Common mistakes and how to fix them
- FORGOT to temper the chocolate → Melt gently and do not overheat to prevent seizing.
- DUMPED nuts into hot chocolate → Toast nuts first for better flavor and crunch.
- OVER-TOASTED the nuts → Keep a close eye; remove when fragrant and lightly golden.
- MISSED setting time → Let the slice chill for at least 2 hours to ensure firmness.
Quick fixes and pantry swaps
- If chocolate seizes, splash in a teaspoon of vegetable oil and stir gently.
- When nuts are too soft, toast them longer or add them later in the process.
- Splash cold water on the pan if the chocolate melts unevenly or clumps.
- Patch a cracked slice by pressing it back into shape and chilling briefly.
- Shield delicate toppings with parchment if the slice cracks during cutting.
Prep, store, and reheat tips
- Prep the slice by cutting into portions—wrap each piece individually in parchment for easy grab-and-go treats.
- Store in an airtight container in the fridge for up to a week; the chocolate edges may soften slightly over time.
- For longer storage, freeze slices wrapped well in plastic wrap and foil—best enjoyed within a month for optimal flavor.
- Reheat slices briefly in the microwave (10–15 seconds) until just warm and fragrant, with a slightly melty chocolate texture. Serve with a gentle aroma of cocoa and toasted nuts.
Top questions about no bake slice
1. Can I use milk chocolate instead of dark?
Use good quality dark chocolate for a rich flavor and glossy finish. Cheaper chocolates can seize or become grainy.
2. Will milk chocolate work for this recipe?
Yes, but expect a sweeter, creamier taste. It may also melt differently and result in a softer slice.
3. Should I toast the nuts beforehand?
Toast the nuts in a dry skillet until fragrant, about 5 minutes. It enhances flavor and crunch—don’t skip this step.
4. How long should I chill the slice?
Chill the slice for at least 2 hours until firm. If in a hurry, freeze for about 1 hour, but check so it doesn’t get too hard.
5. How do I cut neat slices?
Use a sharp knife and press down firmly when cutting. Wipe the blade between cuts for clean edges.
6. How should I store leftovers?
Store in an airtight container in the fridge for up to a week. For longer, freeze well-wrapped slices for up to a month.
7. Can I warm slices later?
Reheat briefly in the microwave—about 10 seconds—until just warm and fragrant. Serve with a hint of melted chocolate aroma.
8. What if the chocolate cools and seizes?
If chocolate seizes, add a teaspoon of vegetable oil and stir gently until smooth again.
9. How do I get an even layer?
Use a silicone spatula to press mixture evenly into the pan. Pressing well ensures clean slices and no air pockets.
10. Should I add salt or toppings?
Add a pinch of sea salt on top before chilling to enhance chocolate flavor and add a subtle salty crunch.
This no bake chocolate nut slice feels like a little act of rebellion—no oven, just honest ingredients coming together effortlessly. It’s the kind of treat that’s perfect for when you want something sweet and familiar, but with a touch of homemade pride.
Sharing this slice with friends or family always sparks that warm, quiet moment of connection. It’s unpretentious, a little messy, and deeply satisfying—just like good comfort food should be.

Hi, I’m Madison Lane, the cook, recipe creator, and heart behind this kitchen. Food has been part of my life for as long as I can remember. Some of my earliest memories are of standing beside my dad while he cooked, watching him move comfortably around the kitchen, tasting sauces, and explaining why patience mattered just as much as seasoning.
