Making snacks without turning on the stove or oven might seem limiting, but it’s surprisingly freeing. These no-bake seed bars are a perfect example of how simple, raw ingredients can come together in a way that’s both satisfying and energizing. I love how quick they come together—no fuss, no heat, just mixing, pressing, and waiting.
This recipe is my go-to when I need something wholesome and portable, especially on mornings when I’m rushing out the door or after a workout. It’s a reminder that you don’t have to cook your way to flavor or nutrition; sometimes, a handful of seeds, nuts, and a sticky binder are all you need. Plus, it’s a recipe I keep tweaking, always trying to get that perfect balance of crunch and chew.
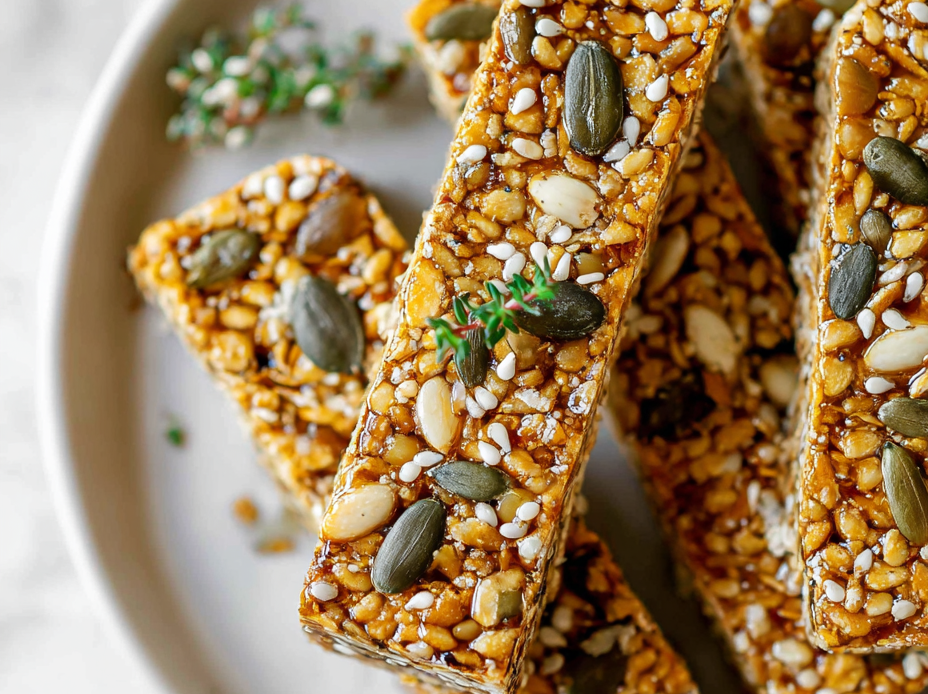
Focusing on the overlooked beauty of making wholesome, energy-boosting snacks without any heat, just mixing and setting, turning simple ingredients into a satisfying treat that fits into busy mornings or post-workout refuels.
The story behind this recipe
This recipe actually came together on a chaotic morning when I realized I was out of my usual granola bars. I started experimenting with whatever seeds and nuts I had in the pantry, trying to make something that would hold together without baking. The first batch was a bit crumbly, but the flavor was there—rich, nutty, with a hint of sweetness from honey. It’s become a staple not just for its simplicity, but because it’s a real reminder that I can whip up something nourishing without much fuss, even when time’s tight. Plus, I love how these bars remind me of childhood trail mixes, but more grown-up and satisfying.
Ingredient breakdown: key components
- Sunflower seeds: I love their nutty, almost buttery flavor and satisfying crunch; you can swap for pumpkin seeds, but the flavor shifts a bit.
- Chia seeds: They gel up and add a chewy, jelly-like texture that binds everything; try flaxseed meal if you want a milder, softer hold.
- Honey: It’s the sticky glue that keeps these bars together with a sweet floral aroma; maple syrup works, but expect a different depth of flavor.
- Rolled oats: They give a hearty chew and texture; if you’re gluten-free, make sure to use certified oats or try buckwheat groats for a nutty crunch.
- Coconut flakes: I love the smoky sweetness they add; for a different flavor, toss in chopped dried apricots or cranberries instead.
- Nuts (almonds/walnuts): For a satisfying crunch and richness; roasted nuts bring out more flavor—toast them lightly if you have time.
- Vanilla extract: Just a touch lifts everything with a warm, fragrant note; you can skip it or try almond extract for a different aroma.
Spotlight on key ingredients
Sunflower seeds:
- I love their nutty, almost buttery flavor and satisfying crunch; you can swap for pumpkin seeds, but the flavor shifts a bit.
- Chia seeds: They gel up and add a chewy, jelly-like texture that binds everything; try flaxseed meal if you want a milder, softer hold.
- Honey: It’s the sticky glue that keeps these bars together with a sweet floral aroma; maple syrup works, but expect a different depth of flavor.
Chia seeds:
- They develop a gelatinous, slightly mucilaginous texture when soaked, adding a pleasant chewiness; flaxseeds can be milder and softer, less noticeable.
- Honey: It melts into a sticky, fragrant syrup that coats everything; when heated, it crackles slightly, releasing a sweet aroma that fills the kitchen.
Notes for ingredient swaps
- Nuts: Almonds, walnuts, or cashews can replace your original choice. Each brings a slightly different crunch and richness, so pick what you love or have on hand.
- Sweetener: Maple syrup or agave nectar can swap honey. They add a different floral or neutral sweetness—just keep in mind they might alter the flavor profile slightly.
- Seeds: Pumpkin seeds or flaxseeds work well instead of sunflower or chia seeds. Keep in mind, pumpkin seeds are a bit softer, and flax adds a nuttier, milder note.
- Coconut: Dried apricots or cranberries can boost fruitiness if you want a chewy, tart contrast. They might change the texture but add a nice pop of flavor.
- Oats: Gluten-free certified oats or buckwheat groats are good alternatives for different textures or dietary needs, keeping the hearty feel but with a twist.
- Binders: If honey isn’t available, try brown rice syrup or date paste. They’re sticky and sweet but bring their own unique flavor and consistency.
- Flavoring: Vanilla extract can be swapped for almond extract or omitted entirely. Almond adds a nutty aroma, while omitting keeps it simple and pure.
Equipment & Tools
- 20×20 cm (8×8 inch) baking dish: To hold and press the mixture into an even layer.
- Mixing bowls: To combine dry ingredients and mix the honey mixture.
- Spatula: To fold ingredients and press the mixture into the dish.
- Parchment paper: To prevent sticking and make removal easier.
- Sharp knife: To cut the set bars into squares or rectangles.
Step-by-step guide to seed bars
- Gather all your equipment: a 20×20 cm (8×8 inch) baking dish, mixing bowls, spatula, and parchment paper. Line the dish with parchment for easy removal.
- Combine 1 cup sunflower seeds, 1/2 cup chia seeds, 1 1/2 cups rolled oats, and 1/2 cup shredded coconut flakes in a large mixing bowl. Mix well to distribute ingredients evenly.
- In a small saucepan, gently heat 1/3 cup honey and 1 teaspoon vanilla extract over low heat (about 30°C/86°F). Stir until just warmed and slightly runny. Be careful not to overheat or burn the honey.
- Pour the warm honey mixture over the dry ingredients. Use a spatula to fold everything together thoroughly, ensuring all seeds and oats are coated. The mixture should feel sticky and cohesive.
- Transfer the mixture into your prepared dish. Press down firmly with the spatula or your hands, working from the center outward to create an even layer. The mixture should feel compact and smooth on top.
- Place the dish in the fridge and let it set for at least 2 hours, or preferably overnight. This resting period allows the bars to firm up and hold together better.
- Once set, lift the mixture out of the dish using the parchment paper. Place on a cutting board and cut into bars or squares with a sharp knife. For cleaner cuts, wipe the knife clean between cuts.
- Finish by storing the bars in an airtight container. Keep in the fridge for up to a week, or freeze for longer storage. Let sit at room temperature for a few minutes before serving for optimal texture.
Refrigerate the pressed mixture for at least 2 hours or overnight until firm. Once set, lift out using the parchment and cut into bars. Store in an airtight container in the fridge or freezer, depending on how soon you want to enjoy them.
How to Know It’s Done
- The mixture is sticky, well-coated, and holds together when pressed.
- The pressed mixture is firm and smooth after refrigeration, not crumbly.
- Bars have a uniform appearance, with no loose seeds or oats falling apart.
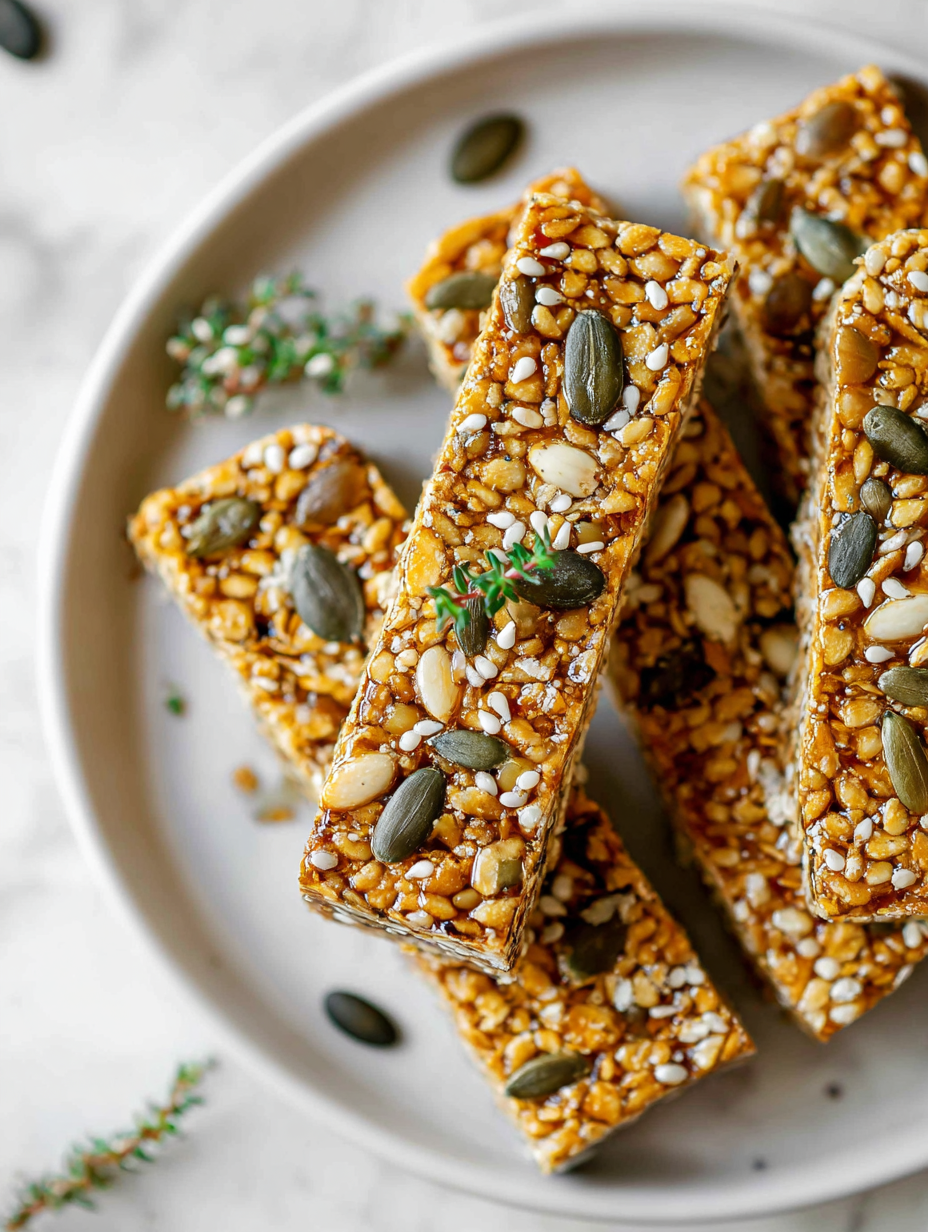
No-Bake Seed Bars
Ingredients
Equipment
Method
- Line your baking dish with parchment paper to prevent sticking and set aside.
- In a large mixing bowl, combine the sunflower seeds, chia seeds, rolled oats, and shredded coconut flakes. Mix thoroughly to distribute all ingredients evenly.
- In a small saucepan, gently warm the honey and vanilla extract over low heat, just until the honey becomes slightly runny and fragrant, about 30 seconds to a minute.
- Pour the warm honey mixture over the dry ingredients in the large bowl. Use a spatula to fold everything together, ensuring all seeds and oats are coated with the sticky honey.
- Transfer the mixture into your prepared dish. Firmly press down with the back of a spatula or your hands to create an even, compact layer. This helps the bars hold together once set.
- Place the dish in the fridge and chill for at least 2 hours or overnight. This allows the mixture to firm up and makes cutting easier.
- Once set, lift out the mixture using the parchment paper and place on a cutting board. Use a sharp knife to cut into 12 even bars, wiping the blade clean between cuts for neat edges.
- Store the bars in an airtight container in the fridge for up to a week, or freeze for longer storage. Let sit at room temperature for a few minutes before enjoying to restore chewiness.
Notes
Pro tips for perfect seed bars
- Use toasted seeds: Toast sunflower and pumpkin seeds lightly until fragrant; it enhances their nutty flavor and adds crunch.
- Chill your mixture: Refrigerate the mixture for 10-15 minutes before pressing; it firms up the sticky ingredients for easier handling.
- Press firmly: Use the back of a spatula or your hands to press down with force; a compact layer helps the bars stay together.
- Cut when cold: Slice the set bars straight from the fridge for clean, neat edges; warm cuts can cause crumbling.
- Adjust sweetness: Taste the honey mixture before pouring; add a touch more honey or maple syrup if you prefer sweeter bars.
- Add flavor layers: Mix in a pinch of cinnamon or a dash of vanilla to deepen the aroma and complexity of the bars.
- Store airtight: Keep the bars in an airtight container in the fridge for up to a week; for longer, freeze and thaw slightly before eating.
Common mistakes and how to fix them
- FORGOT to check texture: mixture should be sticky and cohesive, not runny or crumbly.
- DUMPED too much liquid: reduce honey or syrup for better binding and easier pressing.
- OVER-TORCHED the seeds: toast lightly, watch for a golden hue and nutty aroma, then remove.
- UNDERESTIMATED resting time: let bars set at least 2 hours for firm, clean cuts and proper texture.
Quick fixes and pantry swaps
- When mixture feels dry, splash in a teaspoon of honey to help it bind.
- If seeds stick to hands, dampen fingertips for easier pressing.
- Patch crumbly bars with a drizzle of honey or nut butter before refrigerating.
- When bars crack during slicing, let sit at room temperature for 5 minutes for softer cuts.
- Splash a little water on the mixture if it’s too sticky to press firmly, then chill.
Prep, store, and reheat tips
- Pre-measure and mix dry ingredients the night before to save time and keep everything fresh with a nutty aroma.
- Store the unpressed mixture in an airtight container in the fridge for up to 24 hours; it firms slightly, making pressing easier.
- The bars can be refrigerated in an airtight container for up to a week, retaining their crunch and nutty scent.
- For longer storage, freeze the bars for up to 3 months; thaw at room temperature for 10 minutes and enjoy the crisp texture.
- Refrigerate or freeze before cutting to ensure clean slices; bring to room temperature for optimal chewiness and flavor release.
Top questions about seed bars
1. How do I ensure the bars hold together?
Press the mixture firmly into the dish to prevent crumbling. Use the back of a spatula or your hands with force.
2. Can I skip the chilling step?
Refrigerate the pressed mixture for at least 2 hours or overnight. This helps the bars set and become easier to cut cleanly.
3. What if I don’t have honey?
Yes, you can swap honey for maple syrup or agave nectar. Keep in mind it might slightly change the flavor and texture.
4. How long do seed bars last?
Store the bars in an airtight container in the fridge for up to a week, or freeze for longer storage. Thaw slightly before eating.
5. My mixture is too sticky—what now?
To prevent sticking, chill the mixture before pressing. If it’s too sticky, dampen your hands slightly to make pressing easier.
6. Should I toast the seeds first?
Toast the seeds lightly until fragrant and golden to bring out their nutty flavor and add crunch before mixing.
7. How do I get neat cuts?
Use a sharp knife to cut the set bars for clean edges. Wipe the blade between cuts to prevent sticking.
8. The mixture is crumbly—what can I do?
If the mixture feels dry, splash in a teaspoon of honey or syrup to help it bind better during mixing.
9. Can I add spices or flavorings?
Add a pinch of cinnamon or vanilla extract to boost flavor and aroma before mixing the ingredients.
10. How do I know when the mixture is ready?
When the mixture crackles slightly and the aroma is warm and sweet, it’s ready to pour into the dish.
These no-bake seed bars are a quiet reminder that good things can come from simple mixing and patience. They’re perfect for busy mornings or a quick snack that feels honest and satisfying. Sometimes, the best bites are the ones that don’t require fuss or heat, just a little time to set and a lot of flavor to enjoy.
No matter how many variations I try, I keep coming back to these bars because they’re honest, adaptable, and endlessly customizable. They’re a small, practical treat that fits into real life—no oven, no problem, just pure, crunchy goodness whenever you need it.

Hi, I’m Madison Lane, the cook, recipe creator, and heart behind this kitchen. Food has been part of my life for as long as I can remember. Some of my earliest memories are of standing beside my dad while he cooked, watching him move comfortably around the kitchen, tasting sauces, and explaining why patience mattered just as much as seasoning.
