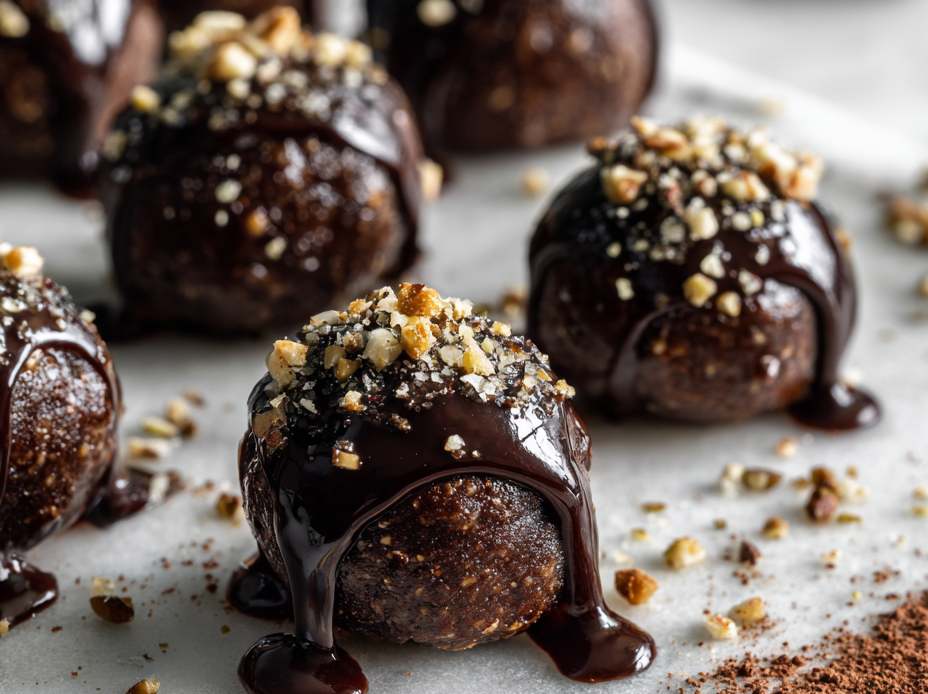
These no bake chocolate date bites are my go-to when I want something sweet but don’t want to mess with a bunch of ingredients or heat up the kitchen. The natural sweetness of dates really shines here, giving these bites a chewy, caramel-like quality that hits just right. Plus, they’re honest-to-goodness easy—no oven, no fuss, just a quick blitz in the food processor and a chill in the fridge.
I love how this recipe feels like a little secret—simple, honest, and deeply satisfying. It’s the kind of treat that makes you pause, savor that first bite, and realize how much flavor can come from just a handful of pantry staples. It’s perfect for times when you want a quick fix that’s both indulgent and a bit more mindful of what’s inside.
Focusing on the natural sweetness and chewy texture of dates as a satisfying alternative to traditional sweeteners in a no-bake chocolate treat.
The Unexpected Joy of Chewy Sweets
- That first chew of these bites always surprises me with how naturally sweet and chewy they are.
- I get a little proud every time I realize how simple ingredients come together into something so satisfying.
- There’s a nostalgic rush in biting into these, like a quick trip back to childhood treats, but with a grown-up depth.
- Sometimes I feel relief knowing I can whip these up in minutes and still satisfy that sweet craving.
- I love how each bite feels like a tiny, rich secret I get to keep for myself.
The inspiration behind these bites
- This recipe grew out of a late-night craving for something sweet that wouldn’t require turning on the oven or digging through a bunch of ingredients. I was digging through my pantry, eyeing the dates and a chunk of dark chocolate, thinking how well they’d work together without fuss. It’s funny how a little impulsive combo can turn into a favorite snack you reach for again and again.
- I remember the first time I made these, I was in a rush, but I still took the time to roll each one carefully. The moment I bit into that chewy, chocolatey bite, I felt a quiet satisfaction—like I’d cracked a little secret of easy indulgence. They’re now my go-to for quick treats, especially when I want something honest, simple, and deeply satisfying.
- heading
- story_type
Historical & Cultural Tidbits
- Dates have been a sweetener for thousands of years, used in Middle Eastern desserts long before modern sugar.
- The idea of no-bake treats gained popularity in the 20th century as a way to simplify dessert making with minimal equipment.
- Using dates for natural sweetness became more widespread in recent years, aligning with trends toward healthier, plant-based snacks.
- In ancient times, dates were valued not just for their sweetness but also for their energy-providing qualities, making them ideal for quick snacks.
Key ingredients and tips
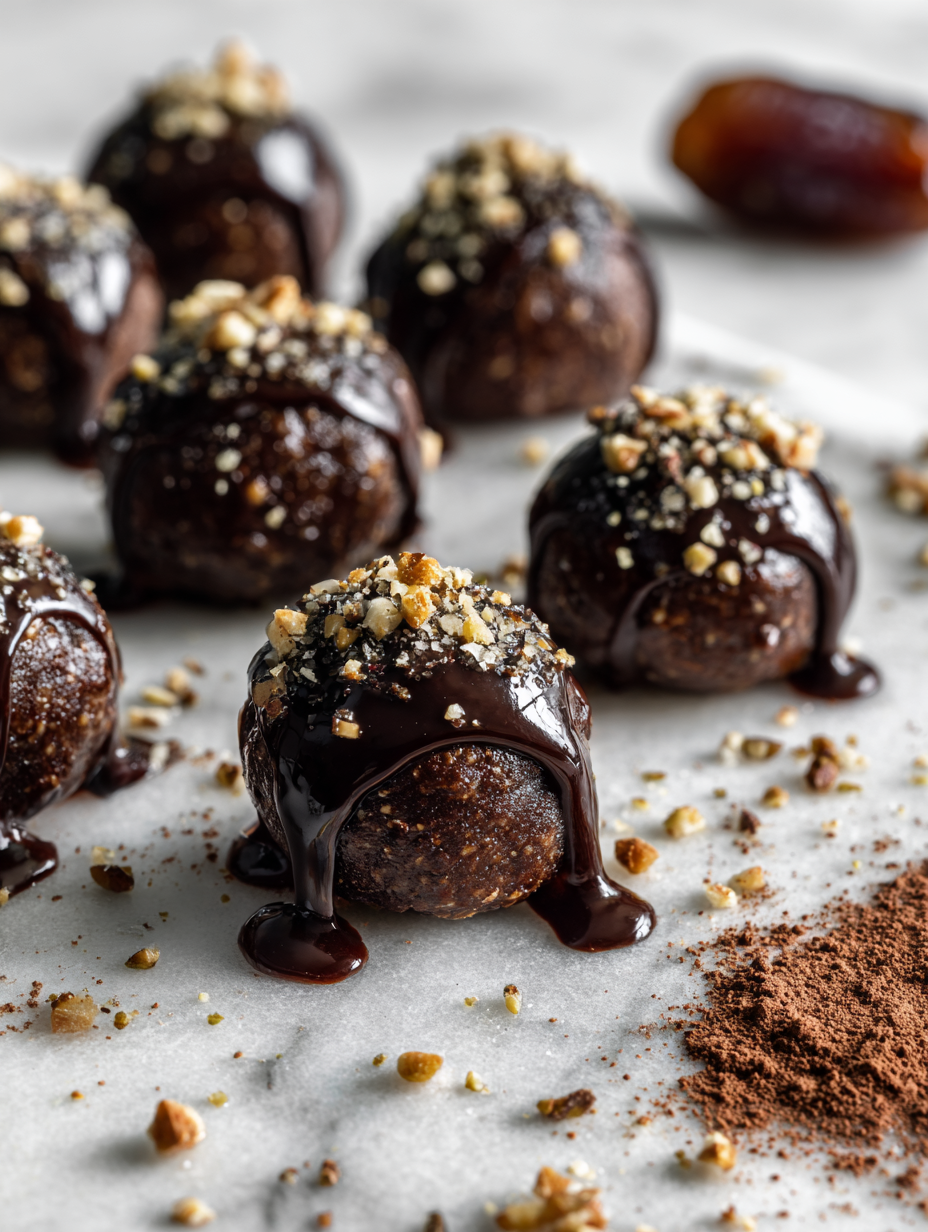
- Dates: They’re my secret weapon—naturally sweet, chewy, with a caramel-like depth that makes these bites sing. Swap with dried apricots if you want a tangy twist, but expect a different texture and flavor.
- Dark chocolate: I prefer a good 70% for that rich, bittersweet punch. If you use milk chocolate, it’ll be sweeter and creamier, softer in the bites, but lose some of that intense cocoa kick.
- Nuts (like almonds or walnuts): I add a handful for crunch—think about toasting them lightly first for extra flavor. Skip if you’re nut-free, but the texture will be less varied.
- Cocoa powder: I use unsweetened for a pure chocolate flavor. You could try cacao nibs for a crunch or a splash of coconut for a tropical note, but keep in mind the flavor shift.
- Vanilla extract: Just a dash brightens everything up and adds warmth. If you don’t have it, a tiny bit of almond extract can add an interesting twist, but don’t overdo it.
- Sea salt: A pinch enhances all the flavors and balances the sweetness. If you omit it, the bites might taste a little flat—trust me, a tiny salt hit makes a difference.
- Coconut oil (optional): I sometimes add a bit for a smoother texture and richer mouthfeel. Skip if you prefer a firmer bite, but it helps everything hold together nicely.
Spotlight on key ingredients
Dates:
- Their sticky, caramel-like sweetness makes these bites naturally rich. When blending, they become a glossy, pliable paste that holds everything together.
- During mixing, dates soften further, releasing a faintly smoky aroma that hints at their deep, natural sugar content. They’re the backbone of this recipe’s chewy texture.
Dark chocolate:
- I love a 70% bar for its bittersweet punch. As it melts, it turns glossy and smooth, adding a rich, velvety coating that balances the chewiness.
- When cooled, the chocolate sets with a firm snap, offering a satisfying crack when bitten. Its intense cocoa aroma fills the air as it melts in your mouth.
Notes for ingredient swaps
- Dates: Dried medjool dates are my go-to for their richness. You can swap with dried apricots for a tangy twist, but expect a softer, less caramel-like result.
- Dark chocolate: I prefer 70% cocoa for depth. Use milk chocolate if you want a sweeter, creamier bite — just know it’ll be softer and less intense.
- Nuts: Almonds or walnuts add crunch. Toast them lightly first for extra flavor. Omit for nut allergies, but the texture will be less varied.
- Cocoa powder: Unsweetened is my choice for pure chocolate flavor. Cocoa nibs or shredded coconut can add crunch or tropical notes but change the flavor profile.
- Vanilla extract: A splash brightens everything. If you don’t have vanilla, almond extract adds a different warmth, but use sparingly.
- Sea salt: A pinch enhances sweetness and chocolate depth. Skip if you prefer a purely sweet bite, but don’t skip the salt entirely—it makes a difference.
- Coconut oil: Adds smoothness and richness. Omit for a firmer texture, but it helps ingredients come together smoothly.
Equipment & Tools
- Food processor: To blend dates into a sticky paste and combine ingredients evenly.
- Spatula: For mixing and folding ingredients smoothly.
- Baking sheet: To hold the bites while they set in the fridge.
- Parchment paper: Prevents sticking and makes cleanup easier.
Step-by-step guide to no-bake bites
- Gather all your equipment: a food processor (for blending), a spatula (for mixing), a baking sheet (for setting), and parchment paper (to prevent sticking).
- Pit the dates if they aren’t already pitted. Measure out about 1 cup for a good chew and sweetness.
- In the food processor, pulse the dates until they break down into a sticky, paste-like consistency. This takes about 30 seconds; scrape down sides as needed.
- Add 1/4 cup of cocoa powder, 1/4 teaspoon of sea salt, and a splash of vanilla extract. Pulse again until smooth and well combined, about 15 seconds.
- If using nuts, roughly chop 1/4 cup of almonds or walnuts. Pulse a few times in the processor to break them up slightly—don’t blitz into crumbs.
- Transfer the mixture to a bowl. Fold in the chopped nuts or any other add-ins if using, with a spatula.
- Scoop out about a tablespoon of the mixture and roll between your palms into a compact ball. Place on a parchment-lined baking sheet.
- Repeat with the remaining mixture, spacing bites apart. Chill in the fridge for at least 30 minutes to firm up.
- Once firm, if desired, roll the bites in extra cocoa powder, shredded coconut, or crushed nuts for a decorative finish.
- Serve directly from the fridge; they should be chewy, rich, and slightly sticky to the touch. Store leftovers in an airtight container in the fridge for up to a week.
Chill the bites in the fridge for at least 30 minutes until firm. Optionally, roll in toppings before serving. Serve chilled for best chewy texture, and store in an airtight container in the fridge for up to a week.
How to Know It’s Done
- Bites feel firm but pliable when pressed; they shouldn’t be sticky or too soft.
- Chocolate coating (if added) is shiny and set, not streaky or dull.
- When bitten, bites have a chewy, dense texture with a rich chocolate flavor.
No Bake Chocolate Date Bites
Ingredients
Equipment
Method
- Place the pitted dates in your food processor and pulse until they break down into a sticky, glossy paste, about 30 seconds. You should see a cohesive mass starting to form.
- Add the cocoa powder, sea salt, and vanilla extract to the food processor. Pulse again until everything is well combined and the mixture is smooth and dark in color, about 15 seconds.
- Transfer the mixture to a bowl and fold in the chopped toasted nuts with a spatula, distributing them evenly throughout the dough.
- Scoop out about a tablespoon of the mixture and roll it between your palms into a compact ball. Place each ball on a parchment-lined baking sheet, spacing them apart.
- Once all the bites are shaped, refrigerate the tray for at least 30 minutes to allow them to firm up and become chewy.
- While they chill, melt the dark chocolate slowly in a microwave-safe bowl, stirring every 20 seconds until glossy and smooth. You can also melt it over a double boiler on the stove.
- Remove the chilled bites from the fridge and dip each one into the melted chocolate, turning to coat completely. Place them back on the parchment paper and let the chocolate set at room temperature or in the fridge for 10–15 minutes.
- Once the chocolate is firm and shiny, transfer the bites to a clean plate or container. Serve them chilled for the best chewy, chocolatey experience.
Notes
Pro tips for perfect bites
- Chill thoroughly: Ensure your mixture is well chilled before shaping for a firm, chewy bite.
- Pulse in bursts: When blending dates and chocolate, pulse in short bursts to avoid overheating and sticking.
- Adjust cocoa: Sift cocoa powder first to prevent clumps, and add gradually to control richness and texture.
- Use cold hands: Shape bites with cold, damp hands to prevent sticking and ensure smooth rolls.
- Freeze briefly: For easier coating or topping application, freeze bites for 10 minutes before final decoration.
- Add a splash: Mix a tiny splash of coconut oil into melted chocolate for a glossy, smooth coating that sets shiny.
Common mistakes and how to fix them
- FORGOT to check the mixture consistency before shaping, do it to avoid cracks.
- DUMPED in too much chocolate, do add gradually for balanced flavor.
- OVER-TORCHED the chocolate, do melt slowly on low heat to prevent burning.
- MISSED the chilling step, do refrigerate until bites are firm for perfect texture.
Quick Fixes for Smooth Bites
- When mixture is too sticky, splash in a little warm water to loosen it up.
- If bites are crumbly, dump in a teaspoon of coconut oil and blend again.
- Over-torched chocolate? Splash in a few drops of warm milk to smooth it out.
- Forgot to chill the mixture? Splash with cold water and knead briefly to firm up.
- When in doubt, patch cracks with a tiny dab of melted chocolate, then chill to set.
Prep, store, and reheat tips
- Prepare the mixture ahead of time by blending the dates and chocolate; it becomes even stickier and easier to shape after chilling for a few hours or overnight.
- Store the bites in an airtight container in the fridge for up to a week, where the chewy texture stays intact and flavors deepen slightly.
- For longer storage, freeze the bites for up to a month; they become firmer and more fudge-like when thawed, with a concentrated sweetness.
- Refrigerate or freeze the bites; allow them to come to room temperature for a few minutes before eating to enhance the chocolate aroma and soften slightly.
- Chilled bites maintain their chew and richness, but if you prefer a softer, warmer experience, let them sit at room temp for 10 minutes before serving.
Top questions about no bake chocolate date bites
1. How do I soften dates for blending?
Dates can be quite sticky and soft; soaking them in warm water for 10 minutes can make blending easier and smoother.
2. My mixture is crumbly, what can I do?
If the mixture feels too dry and crumbly, adding a tiny splash of coconut oil or a few drops of water can help it come together.
3. How do I melt chocolate without burning it?
Chocolate can seize if overheated; melt it slowly on low heat or in short bursts in the microwave, stirring frequently.
4. How should I store these bites?
To prevent bites from sticking together, store them in an airtight container in the fridge, and layer with parchment if stacking.
5. How do I make the bites firmer?
If the bites are too soft, chill in the fridge for at least 30 minutes; for firmer bites, freeze for 10-15 minutes before serving.
6. Can I customize the ingredients?
Adding chopped nuts or shredded coconut before chilling gives extra flavor and texture, but you can skip if you prefer pure chocolate-date bites.
7. What chocolate should I use?
For a richer chocolate flavor, use high-quality dark chocolate and a splash of vanilla; for a milder taste, milk chocolate works fine.
8. How do I shape sticky mixture?
If the mixture is too sticky to handle, wet your hands slightly or dust them with cocoa powder for easier shaping.
9. Can I prepare these in advance?
Chill the mixture overnight if you want a more intense caramel flavor from the dates and a firmer texture.
10. How do I serve these bites at their best?
When the bites are too soft or melting, serve them directly from the fridge and let them sit at room temp for a few minutes before eating.
These bites are a little pocket of sweetness that feels honest and unpretentious. Making them reminds me how simple ingredients can come together into something satisfying without much fuss.
They’re perfect for those moments when you want something quick, rich, and just a little bit indulgent—no oven needed, just a bit of blending and chilling. Sometimes, the best treats are the ones that come together with honest ingredients and a bit of patience in the fridge.

Hi, I’m Madison Lane, the cook, recipe creator, and heart behind this kitchen. Food has been part of my life for as long as I can remember. Some of my earliest memories are of standing beside my dad while he cooked, watching him move comfortably around the kitchen, tasting sauces, and explaining why patience mattered just as much as seasoning.
