Sometimes, I just want a sweet treat that doesn’t require turning on the oven. These no-bake chocolate oat bites are my go-to for those moments—easy, quick, and honestly kind of addictive. There’s something satisfying about mixing up the gooey chocolate with oats and shaping them into little bites that fit perfectly in your hand.
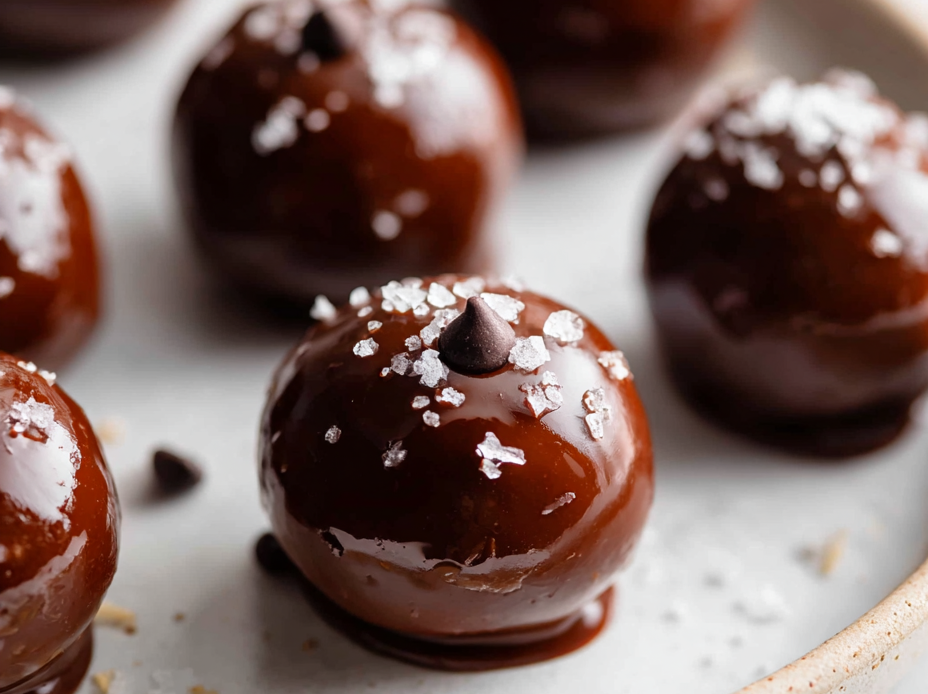
I love how forgiving this recipe is. If I’m low on ingredients or in a rush, I can swap out nuts or add a dash of sea salt on top. It’s a simple, honest snack that feels like a tiny victory—no fuss, just good, honest flavors that come together in minutes. Plus, it’s a great way to use up those odds and ends in the pantry.
Whenever I make these, I find myself craving that rich, chocolatey smell, which somehow makes everything feel a little cozier. They’re perfect for a quick pick-me-up or a small gift for someone who needs a sweet surprise. It’s not fancy, but it’s real, comforting food that you can whip up anytime.
This recipe is inspired by my late-night snack cravings when I wanted something sweet but couldn’t be bothered to turn on the oven. It’s like a no-fuss, bite-sized comfort food that hits the spot without the heat. The process is almost meditative—measuring, mixing, and shaping—perfect for unwinding after a busy day. Plus, it’s a great way to use up those forgotten oats and leftover chocolate bits lurking in the pantry.
A Pantry-Staple Comfort
- These bites remind me of childhood afternoons, the smell of melting chocolate filling the kitchen with nostalgia.
- I find a weird comfort in the mess—spooned chocolate, oats sticking everywhere—it’s honest and real.
- There’s a quiet pride in making something so simple yet satisfying, especially when friends ask for the recipe.
- Nothing beats that moment when the chocolate finally firms up in the fridge, and I get to enjoy that first perfect bite.
- These are my go-to when I need a quick, unobtrusive treat that feels like a little act of kindness.
The inspiration behind these bites
- This recipe came from a late-night craving for something sweet but manageable without turning on the oven. I was tired but wanted that chocolate hit, and honestly, mixing oats and chocolate felt like a small act of rebellion—simple, satisfying, and kind of meditative. It’s become my go-to when I’m craving a quick, honest treat that doesn’t ask for fancy ingredients or fuss.
- There’s a particular charm in the chaos of stirring melted chocolate into oats, watching the mixture turn glossy and thick, then shaping it into bites. It’s a moment of pure, unpretentious joy—no baking, no waiting, just good ingredients coming together in the most straightforward way.
- heading
- story_type
Historical and Cultural Tidbits
- These no-bake chocolate oat bites harken back to traditional energy ball recipes used by explorers and outdoor enthusiasts for quick fuel on the go.
- Originally, people used simple pantry staples like oats and chocolate to craft portable treats before commercial snack bars became popular.
- In some cultures, similar no-cook snacks have been around for generations, blending oats and chocolate into finger-foods that feel both nostalgic and resourceful.
Ingredient breakdown
- Old-fashioned rolled oats: I love their chewy texture and nutty flavor—skip the instant oats for better bite.
- Dark chocolate: Rich and slightly bitter, it melts smoothly—I prefer 70% cacao for depth without overwhelming sweetness.
- Natural peanut butter: Adds creaminess and a hint of salt—try almond butter for a different nutty note.
- Honey or maple syrup: I use honey for its floral aroma, but maple syrup brings a smoky sweetness you might prefer.
- Coconut flakes: They bring a chewy contrast and a tropical scent—unsweetened if you want more control over sweetness.
- Vanilla extract: Just a splash enhances everything—don’t skip it unless you want a more straightforward chocolate flavor.
- Sea salt: A pinch on top makes the chocolate pop—try smoked salt if you’re feeling adventurous.
Spotlight on key ingredients
Rolled oats:
- Old-fashioned rolled oats: I love their chewy texture and nutty flavor—skip the instant oats for better bite.
- They soak up flavors and add a hearty chew, making each bite more satisfying.
Dark chocolate:
- Rich and slightly bitter, it melts smoothly—I prefer 70% cacao for depth without overwhelming sweetness.
- It’s velvety and gooey when melted, with a smoky aroma that intensifies as it warms.
Notes for ingredient swaps
- Dairy-Free: Use coconut oil or coconut butter instead of butter or dairy-based fats. It adds richness and a subtle coconut aroma.
- Nut-Free: Swap peanut or almond butter for sunflower seed or tahini. Keep in mind, these alter the flavor and nutty punch.
- Sweetener: Replace honey with agave syrup or brown rice syrup for a different sweetness profile—slightly less floral, more molasses-like.
- Chocolate: Try carob chips or vegan chocolate for dairy-free options. Expect a different flavor but similar melting qualities.
- Add-ins: Incorporate dried fruits or seeds instead of nuts for texture and bursts of flavor—think chopped dried apricots or pumpkin seeds.
- Oats: Use quick oats if you’re in a rush, but they’ll yield a slightly softer, less chewy bite.
- Flavor Boost: Splash in a bit of espresso powder or cinnamon for a nuanced flavor—less sweet, more layered.
Equipment & Tools
- Mixing bowl: To combine ingredients thoroughly.
- Spatula: Stir and fold the mixture evenly.
- Parchment-lined tray: To set the bites without sticking.
- Small saucepan or microwave-safe bowl: To melt the chocolate gently.
Step-by-step guide to no bake bites
- Gather equipment: a mixing bowl, a spatula, a baking sheet or tray lined with parchment paper, and a small saucepan or microwave-safe bowl for melting chocolate.
- In the saucepan or microwave, gently melt the chocolate. If using a microwave, heat in 20-second bursts, stirring in between, until smooth and glossy, about 1 minute total. Smell that rich cocoa aroma—if it’s burnt or smoky, start over with fresh chocolate.
- In a large mixing bowl, combine the oats, chopped nuts (if using), and a pinch of sea salt. Mix thoroughly.
- Pour the melted chocolate over the dry ingredients. Stir well, ensuring everything gets coated in that velvety chocolate—look for a glossy, sticky mixture that holds together.
- Add honey or maple syrup gradually, mixing as you go. The mixture should be sticky but manageable—if it’s too dry, add a tiny splash more syrup; if too loose, sprinkle in a few more oats.
- Using your hands or a small scoop, portion out about a tablespoon of mixture and roll into a compact ball. Place each bite on the prepared tray. If the mixture feels too sticky to handle, dampen your hands slightly.
- Once all bites are shaped, press lightly to flatten them slightly if you prefer a more uniform shape. Chill in the fridge for at least 30 minutes—this is when the chocolate firms up and the bites set.
- After chilling, they should be firm and slightly shiny on the outside. If they’re still soft, leave them in the fridge a bit longer. They’re ready to enjoy once set.
Chill the bites in the fridge for at least 30 minutes until firm. Serve directly from the fridge or store in an airtight container. For best texture, keep refrigerated; they may soften if left out too long.
How to Know It’s Done
- Chocolate is fully melted and smooth, with a fragrant cocoa smell.
- Mixture holds together when shaped, not too crumbly or sticky.
- Bites are firm and shiny after chilling, with no excess moisture or residue.
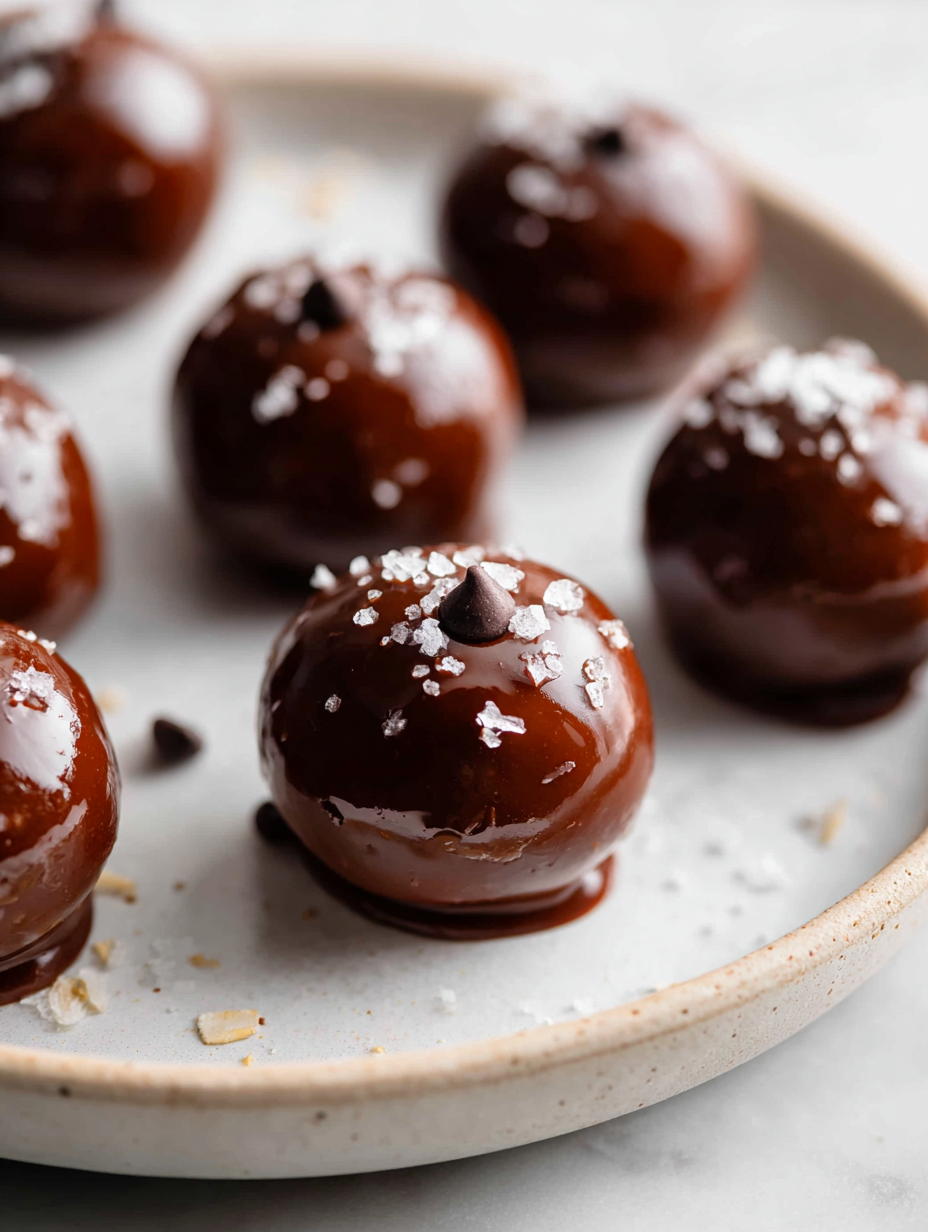
No-Bake Chocolate Oat Bites
Ingredients
Equipment
Method
- Chop the dark chocolate into small pieces and melt it gently in a small saucepan over low heat or in short bursts in the microwave, stirring until smooth and glossy. Smell the rich cocoa aroma filling the air.
- In a large mixing bowl, combine the rolled oats, coconut flakes, and a pinch of sea salt. Mix well with a spatula until evenly distributed.
- Pour the melted chocolate into the dry ingredients, stirring vigorously until everything is coated in that smooth, velvety chocolate. The mixture should be sticky and glossy.
- Add the peanut butter, honey or maple syrup, and vanilla extract, then fold them into the mixture. Continue stirring until the mixture is thick, sticky, and holds together when pressed.
- Using your hands or a small scoop, portion out about a tablespoon of the mixture and roll it into a compact ball. Place each bite on the parchment-lined tray, pressing gently to slightly flatten if desired.
- Once all the bites are shaped, place the tray in the refrigerator and chill for at least 30 minutes until the chocolate firms up and the bites are set. You’ll notice a shiny exterior and a chewy texture inside.
- After chilling, remove the bites from the fridge and enjoy! Store any leftovers in an airtight container in the fridge for up to a week, or freeze for longer storage.
Pro Tips for Perfect Bites
- Melt chocolate gently in short bursts to prevent burning and preserve that rich cocoa aroma.
- Mix the oats into the melted chocolate quickly to achieve an even, sticky coating that holds together.
- Chill the bites on a parchment-lined tray for at least 30 minutes to ensure they set properly and develop a shiny exterior.
- Use damp hands when shaping sticky mixture to prevent it from sticking too much and make rolling easier.
- Add honey gradually and adjust to get a perfect, manageable tackiness—stop before it becomes too loose.
- Incorporate ingredients like nuts or dried fruits after mixing to maintain their texture and prevent crushing.
- Store bites in an airtight container in the fridge to keep them firm and fresh, especially in warm weather.
Common mistakes and how to fix them
- FORGOT to measure ingredients accurately? Use a scale for consistent results.
- DUMPED in too much chocolate? Melt it gradually and stir thoroughly to avoid clumps.
- OVER-TORCHED the chocolate? Use gentle heat and watch closely to prevent burning.
- MISSED chilling time? Chill at least 30 minutes for proper setting and firm bites.
Quick fixes and pantry swaps
- When mixture feels too sticky, splash it with a bit of water or milk to loosen it up.
- If bites are crumbling, chill the mixture longer or add a teaspoon of honey for extra stickiness.
- Splash a tiny bit of hot water on the chocolate if it’s seized or too thick to melt smoothly.
- Patch air bubbles by pressing the mixture back into shape with a spatula before chilling.
- Shield delicate bites from freezer burn by wrapping them tightly in plastic wrap if storing long-term.
Prep, store, and reheat tips
- Prepare the mixture ahead of time and store in the fridge for up to 24 hours; it firms up nicely and makes shaping easier.
- Bites can be stored in an airtight container in the fridge for up to one week. Expect the chocolate to stay glossy and the oats chewy.
- For longer storage, freeze the bites in a single layer, then transfer to a zip-top bag; they keep well for up to three months.
- Refrigerate or thaw in the fridge for 15-20 minutes before serving; they’ll soften slightly but remain rich and chocolatey.
- To reheat, briefly warm in the microwave in 10-second bursts, just until slightly melty—watch for changes in texture and aroma.
Top questions about no bake bites
1. Can I use milk chocolate instead?
Use high-quality dark chocolate for a richer flavor and smoother melt. Lower-quality chocolate can seize or be grainy.
2. How long do I need to chill the mixture?
Chill the mixture for at least 30 minutes to help it firm up, making shaping easier and bites more cohesive.
3. My mixture is too sticky to handle, what do I do?
If the mixture is too sticky, refrigerate it for 10-15 minutes before shaping. Dampen your hands slightly to prevent sticking.
4. How long do these bites last in the fridge?
Store these bites in an airtight container in the fridge for up to a week to keep them fresh and chewy.
5. Can I freeze the bites?
Yes, you can freeze them in a single layer on a tray, then transfer to a bag. They keep well for up to three months.
6. How can I make the bites sweeter or less sweet?
Adjust sweetness by adding more or less honey or maple syrup according to your taste preference. Keep in mind, more syrup makes them softer.
7. How should I melt the chocolate?
Use a microwave-safe bowl and melt in short bursts, stirring between, to prevent burning and ensure smoothness.
8. Can I add other ingredients like nuts or dried fruit?
Add-ins like dried fruit or seeds enhance texture and flavor. Mix them in after the chocolate has been combined with oats.
9. They crack or crumble when shaping—what now?
If your bites crack or crumble, chill the mixture longer or add a tiny splash of honey to improve cohesion.
10. How can I enhance the flavor of the bites?
For an extra flavor boost, stir in a pinch of sea salt or vanilla extract before shaping the bites.
These no-bake chocolate oat bites are a little pocket of comfort that’s perfect for whenever you need a quick fix. The smell of melting chocolate and toasted oats makes the kitchen feel warmer, even on the busiest days. They’re not just a treat—they’re a small act of kindness you can throw together in minutes.
In the end, it’s all about that satisfying chew and the rich, bittersweet flavor that lingers. No matter how many times I make them, I’m always surprised how just a handful of ingredients can turn into something so satisfying. It’s honest, simple food—meant to be enjoyed in those quiet, unpretentious moments.

Hi, I’m Madison Lane, the cook, recipe creator, and heart behind this kitchen. Food has been part of my life for as long as I can remember. Some of my earliest memories are of standing beside my dad while he cooked, watching him move comfortably around the kitchen, tasting sauces, and explaining why patience mattered just as much as seasoning.
