There’s something about individual desserts that feel just right—like they’re made for sharing, but also for pocketing away in a moment of craving. These no-bake cheesecake jars are my go-to, especially when I want something sweet and cool without turning on the oven or fussing with plates. Plus, they’re perfect for grabbing on the go—no mess, no fuss, just a spoon and a little moment of creamy bliss.
I first started making these for a picnic, thinking they’d be simple and portable, but they quickly became a staple for busy mornings and casual get-togethers. The way the creamy filling contrasts with the crunch of a graham cracker base, all in a glass jar, just hits differently. It’s honest, straightforward comfort, packed into tiny, portable cups that feel a little indulgent but are really just easy to throw together.
Focusing on the portability and individual serving aspect of no-bake cheesecakes, making them perfect for busy mornings, picnics, or small gatherings where everyone can grab their own mini dessert without fuss.
The charm of individual desserts
- These jars remind me of summer picnics—light, portable, and just enough sweet to satisfy after a day outdoors.
- I love how making these in advance takes the stress out of dessert; I can prep everything the night before.
- There’s a quiet joy in seeing friends or family eagerly reach for their own little jar, as if it’s their personal treat.
- The creamy tang of the cheese paired with the crunch of the biscuit base brings back memories of lazy weekends in my childhood kitchen.
- Sometimes, I sneak a spoonful straight from the fridge, feeling a bit guilty but mostly just relieved I don’t have to share right away.
The charm of individual desserts
- This recipe was born out of a chaotic summer picnic, where I forgot my dessert fork but still wanted something cool and satisfying. The jars came about as a way to salvage a messy situation—layered, portable, and no utensils needed, really. Turns out, this no-fuss approach makes dessert feel a little more special, even when you’re in a rush or out in the open.
- I remember the first time I tried layering these with a splash of fresh lemon juice—brightened everything up and gave the creamy filling a lively kick. Since then, they’ve become my secret weapon for quick gatherings or just a lazy treat on a Tuesday. There’s a kind of honest comfort in digging into a jar of something that looks fancy but was so easy to assemble.
- heading: “The charm of individual desserts”
Trivia and historical roots
- These no-bake cheesecake jars have roots in the convenience-focused dessert trends of the early 2000s, emphasizing portability and individual servings.
- The concept of layered desserts in jars gained popularity as a practical way to serve elegant-looking treats without fancy plating or utensils.
- Historically, small glass jars were used in old-fashioned canning and preservation, but modern cooks repurposed them as charming dessert containers, blending nostalgia with practicality.
Component notes for your jars
- Cream cheese: I love how it’s silky and tangy, but if you want it lighter, a Greek yogurt swap adds a lively zing without losing creaminess.
- Graham cracker crumbs: They give that classic crunch, but for a nuttier flavor, try crushed digestive biscuits or even graham crackers with a pinch of cinnamon.
- Granulated sugar: It’s the sweet backbone here, though honey or maple syrup can add a more complex, honeyed note—just cut back slightly on liquid if you do.
- Lemon juice: Brightens everything with a zesty punch and keeps the filling from feeling too heavy—skip if you prefer a milder flavor, but don’t skip the zest for extra flair.
- Heavy cream: It whips up into a fluffy cloud that holds the filling together—if you want a lighter feel, try coconut cream or evaporated milk, but you’ll lose some richness.
- Vanilla extract: It’s the whisper of warmth, and a splash of vanilla bean paste makes it even more fragrant—skip if you’re after a more neutral flavor, but I recommend keeping some vanilla in there.
- Optional toppings: Fresh berries or a drizzle of chocolate are my favorites—swap with chopped nuts or caramel sauce for a different twist, but the fresh fruit keeps it lively.
Spotlight on Key Ingredients
Cream cheese:
- I love how it’s silky and tangy, but if you want it lighter, a Greek yogurt swap adds a lively zing without losing creaminess.
- Graham cracker crumbs: They give that classic crunch, but for a nuttier flavor, try crushed digestive biscuits or even graham crackers with a pinch of cinnamon.
- Lemon juice: Brightens everything with a zesty punch and keeps the filling from feeling too heavy—skip if you prefer a milder flavor, but don’t skip the zest for extra flair.
Heavy cream and vanilla extract:
- Heavy cream: It whips into a fluffy cloud that holds the filling together—if you want a lighter feel, try coconut cream or evaporated milk, but you’ll lose some richness.
- Vanilla extract: It’s the whisper of warmth, and a splash of vanilla bean paste makes it even more fragrant—skip if you’re after a more neutral flavor, but I recommend keeping some vanilla in there.
Notes for ingredient swaps
- Dairy-Free: Swap cream cheese for a cashew-based vegan cream cheese. It’s slightly nuttier, but still creamy and tangy.
- Gluten-Free: Use crushed gluten-free cookies or graham crackers. Expect a different texture but still satisfying crunch.
- Sweetener Options: Replace sugar with honey or maple syrup. These add a richer, more complex sweetness, so reduce the liquid slightly.
- Lemon Juice: Use lime juice or a splash of orange juice for a different citrus note that brightens the filling.
- Heavy Cream: Try coconut cream or evaporated milk for a dairy-free, slightly lighter option with a different mouthfeel.
- Vanilla: Substitute with vanilla bean paste or almond extract for a more fragrant or nutty twist; skip if you want a neutral flavor.
- Toppings: Fresh berries or fruit compote are classic, but try chopped nuts or a drizzle of caramel for variety, depending on your mood.
Equipment & Tools
- Small jars or glasses: Portioning and serving individual desserts.
- Zip-top bag and rolling pin: Crushing graham crackers efficiently.
- Mixing bowl: Combining ingredients smoothly.
- Spatula or spoon: Folding ingredients gently.
- Piping bag or spoon: Filling jars neatly.
- Refrigerator: Chilling and setting the desserts.
Step-by-step guide to no bake jars
- Gather your equipment: small jars or glasses, a mixing bowl, a spatula, and a piping bag or spoon.
- Crush the graham crackers: place in a zip-top bag, crush with a rolling pin until fine, about 1 minute.
- Mix the crust: combine 1 cup of crushed graham crackers with 2 tbsp melted butter and a pinch of salt. Press about 2 tbsp into the bottom of each jar, creating a firm base.
- Chill the crust: place jars in the fridge for 10 minutes while preparing the filling.
- Make the filling: beat 8 oz softened cream cheese with 1/4 cup sugar until smooth and fluffy, about 2 minutes.
- Add flavor: mix in 1 tsp vanilla extract and 1 tbsp lemon juice for brightness. Taste and adjust if needed.
- Whip the cream: in a separate bowl, whip 1/2 cup heavy cream until soft peaks form, about 2-3 minutes.
- Combine the mixture: gently fold the whipped cream into the cream cheese mixture until just combined, ensuring lightness.
- Assemble the jars: spoon or pipe the filling over the crust, filling each jar almost to the top.
- Chill again: cover jars with lids or plastic wrap and refrigerate for at least 2 hours, preferably overnight, to set.
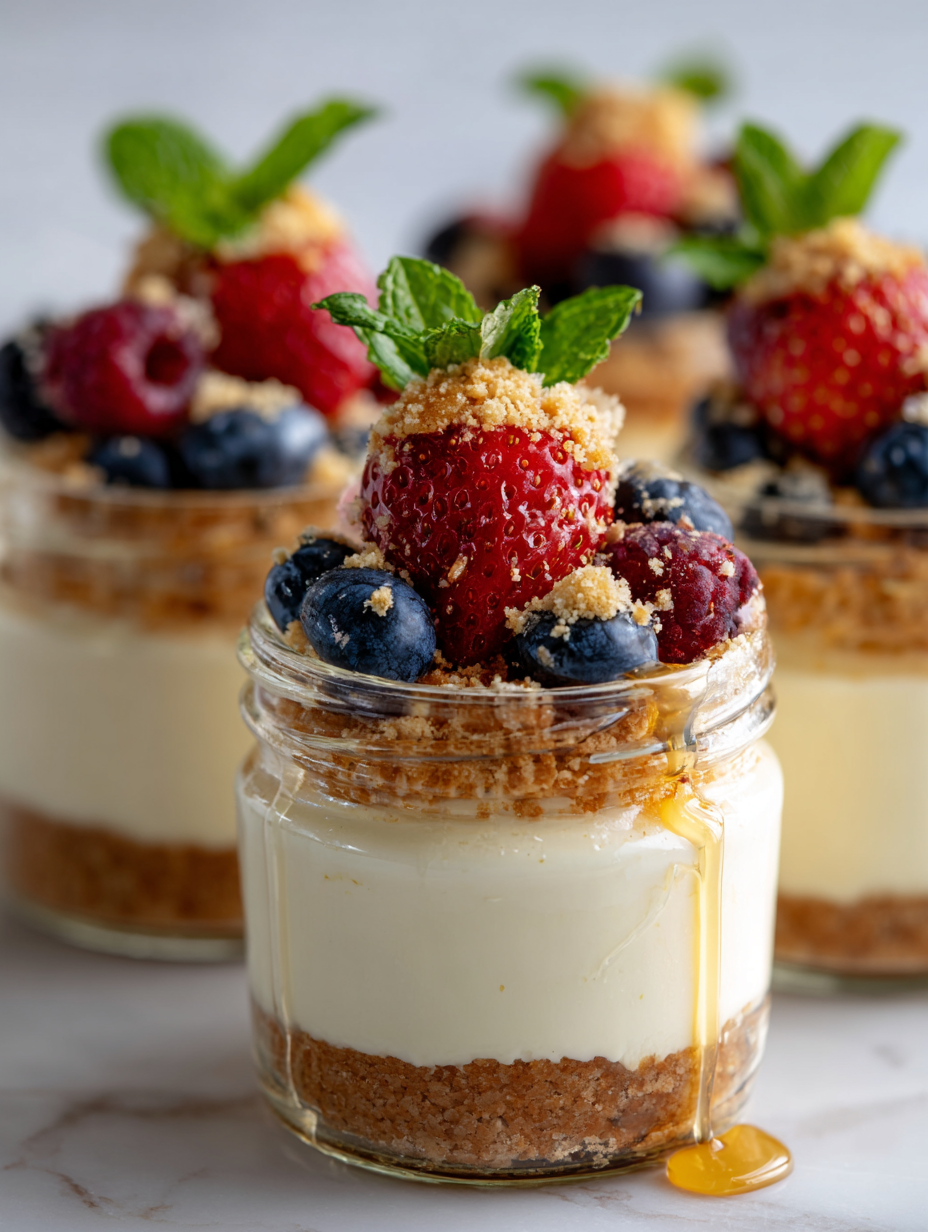
- Finish and serve: before serving, garnish with fresh berries or a sprinkle of crushed graham crackers if desired.
Chill the assembled jars for at least 2 hours or overnight. Before serving, add a topping of fresh berries or crushed graham crackers. Serve straight from the fridge for the best creamy texture and chilled flavor.
How to Know It’s Done
- Filling is smooth, creamy, and holds shape when piped or spooned.
- Crust is firm and slightly crumbly, not soggy or greasy.
- Jars are set and slightly jiggly in the center, indicating proper chilling.
No-Bake Cheesecake Jars
Ingredients
Equipment
Method
- Place graham crackers in a zip-top bag and crush them into fine crumbs using a rolling pin or the back of a spoon.
- Mix the crushed graham crackers with melted butter and a pinch of salt until evenly coated and crumbly.
- Spoon about 2 tablespoons of the crumb mixture into the bottom of each jar, pressing down firmly to form a solid crust.
- Refrigerate the jars for 10 minutes to set the crust while you prepare the filling.
- In a mixing bowl, beat the softened cream cheese with sugar until smooth, creamy, and slightly fluffy—about 2 minutes.
- Add vanilla extract and lemon juice to the cream cheese mixture, stirring until well incorporated and fragrant.
- In a separate bowl, whip the chilled heavy cream until soft peaks form, about 2-3 minutes.
- Gently fold the whipped cream into the cream cheese mixture until smooth and airy, being careful not to deflate the cream.
- Spoon or pipe the creamy filling over the chilled crust in each jar, filling almost to the top.
- Cover the jars with lids or plastic wrap and refrigerate for at least 2 hours or overnight to allow the filling to set fully.
- Before serving, garnish each jar with fresh berries or your favorite toppings for a colorful, inviting look.
Tips & Tricks for Best Results
- Bolded Mini-Head: Chill the filling before piping for a smoother, more cohesive texture.
- Bolded Mini-Head: Use room temperature cream cheese to avoid lumps and ensure a silky consistency.
- Bolded Mini-Head: Gently fold whipped cream into the cheese mixture to keep it light and airy.
- Bolded Mini-Head: Slightly underfill jars; the filling expands slightly as it chills, preventing overflow.
- Bolded Mini-Head: For a glossy finish, lightly torch the tops with a kitchen blowtorch after chilling.
- Bolded Mini-Head: Add a pinch of salt to the crust mixture to enhance sweetness and flavor contrast.
- Bolded Mini-Head: Use a small spoon or piping bag for neat, precise layering that looks professional.
Common mistakes and how to fix them
- FORGOT to keep the cream cheese at room temperature → soften thoroughly before mixing.
- DUMPED in all ingredients at once → add sugar gradually, taste, then adjust sweetness.
- OVER-TORCHED the crust → bake at 180°C (350°F), watch for golden edges, not dark.
- MISSED chilling time → refrigerate jars for at least 2 hours, the filling should be firm and set.
Quick fixes and pantry swaps
- When the filling is runny, splash in a little more whipped cream to thicken it.
- If the crust is soggy, patch it with a quick sprinkle of crushed cookies and re-chill.
- Splash some lemon juice if the filling tastes flat or dull.
- Shield the tops with foil if they start to crack or brown too quickly during chilling.
- Dumped in too much sugar? Balance with a squeeze of fresh lemon for brightness.
Prep, store, and reheat tips
- Prepare the crust and filling up to 24 hours in advance. Keep the jars covered and refrigerated; the creamy texture benefits from resting overnight.
- Store assembled jars in the fridge for up to 3 days. The flavors deepen slightly, and the texture remains creamy and firm, with a refreshing chill.
- For best flavor and texture, serve within 48 hours. After that, the filling may start to soften, and the crust may lose some crunch.
- Reheat by letting the jars sit at room temperature for 10 minutes, then take a quick sniff—if it smells fresh and the filling is still firm, it’s ready to enjoy. Do not microwave, as the texture can become runny.
Top questions about no bake jars
1. How long can I store these jars?
Keep the jars refrigerated for up to 3 days. The filling stays firm and fresh, but avoid freezing as texture can change.
2. Can I make these vegan or dairy-free?
Yes, you can substitute Greek yogurt for cream cheese for a lighter, tangier version. It may be a bit less creamy.
3. What are good crust alternatives?
Use crushed digestive biscuits or gluten-free cookies in place of graham crackers for different textures and flavors.
4. Do I need to chill before serving?
Chill the assembled jars for at least 2 hours, but overnight gives the best set and flavor meld.
5. How can I decorate the jars?
Add fresh berries or fruit on top for a burst of brightness and color. You can also sprinkle crushed cookies or nuts.
6. What if my filling is too loose?
If the filling is too runny, fold in a little more whipped cream or chill longer before serving.
7. How do I fill the jars evenly?
Use a piping bag for neat layers or a small spoon for a more rustic look. Chill first for easier filling.
8. Can I change the citrus flavor?
You can swap lemon juice for lime or orange juice for a different citrus twist that brightens the flavor.
9. Can I omit vanilla?
Yes, adding a splash of vanilla or vanilla bean paste enhances the overall flavor profile and aroma.
10. What if the tops crack or brown?
When the tops crack or brown during chilling, cover with foil or a fresh layer of berries to hide imperfections.
Wrapping these jars up at the end of the day makes it feel like I’ve made something a little special, even in a rush. The cool, creamy filling with that gentle tang just hits the right note after a hectic day. It’s honest, simple comfort, packed into tiny glass cups that are easy to grab and go.
There’s something satisfying about knowing I can pull these out of the fridge and serve them without fuss. No oven, no mess—just a spoon and a moment of quiet indulgence. Right now, that’s exactly what I need, and these little jars deliver every time.

Hi, I’m Madison Lane, the cook, recipe creator, and heart behind this kitchen. Food has been part of my life for as long as I can remember. Some of my earliest memories are of standing beside my dad while he cooked, watching him move comfortably around the kitchen, tasting sauces, and explaining why patience mattered just as much as seasoning.
