On those nights when time feels tight but the craving for something rich and nutty hits hard, this no-bake peanut butter cheesecake really comes through. It’s honestly a lifesaver—no oven, no fuss, just a quick mix and chill. Plus, it’s surprisingly satisfying, with that perfect balance of creamy peanut butter and tangy cream cheese.
What I love most is how adaptable it is; you can swap in your favorite nut butters or add a sprinkle of chocolate or crushed pretzels on top. It’s the kind of dessert that feels indulgent but doesn’t take hours to prep. A true fix for busy weeknights or when you want something sweet that’s ready before you even miss the oven.
Focusing on how this no-bake peanut butter cheesecake offers a quick, satisfying fix for those busy nights when craving something creamy and nutty, without the fuss of baking or long waits.
The unexpected comfort of no-bake desserts
- This dessert saved me during last-minute dinners—creamy, nutty, and no oven needed.
- Nothing beats the nostalgic rush of peanut butter and cream cheese together, especially when quick is key.
- I feel proud pulling this together in under 20 minutes, perfect for busy nights and sweet cravings.
- Cracking into the firm set cheesecake feels like a small victory after a hectic day.
- It’s comforting to know I can whip this up anytime, no matter how chaotic the kitchen feels.
The story behind this recipe
- This recipe came together one lazy afternoon when I realized I was out of patience for baking, but still craving something rich and satisfying. Peanut butter and cream cheese have always been my go-to combo for quick comfort foods, and I wanted to see if I could turn that into a dessert that’s effortless but still special. Turns out, the no-bake approach not only saves time but makes the whole process feel more forgiving, more forgiving, more relaxed.
- A little jar of leftover peanut butter, some cream cheese I always keep on hand, and a quick graham cracker crust later, I had a dessert that felt decadent without the fuss. It’s become my fallback when I need something creamy and nutty without waiting for the oven to warm up, especially during those weeks when time slips away faster than I’d like.
- heading
- Story Behind This Recipe
Trivia and historical tidbits
- This cheesecake variation likely emerged in the mid-20th century, coinciding with the rise of no-bake desserts in home cooking magazines.
- Peanut butter, originally popularized in America in the early 1900s, became a staple in quick, satisfying desserts like this due to its creamy texture and rich flavor.
- The combination of peanut butter and cream cheese was probably born out of a desire for a creamy, indulgent treat that’s easy to assemble, especially during times of rationing or limited oven access.
Ingredient breakdown: key components
- Cream Cheese: I love how it adds that velvety richness, but if you want a lighter version, sour cream works fine—just expect a slightly tangier bite.
- Peanut Butter: The creamy, oozing kind makes blending easy and gives that luscious nutty flavor—try chunky for texture, but watch out for clumps if you’re mixing by hand.
- Graham Cracker Crust: The base should be firm yet crumbly; if it feels too dry, sprinkle a little more melted butter—your fingers will tell you when it’s just right.
- Sweetener: Honey or maple syrup can replace sugar for a more nuanced sweetness—add a tiny splash and taste as you go to avoid overpowering the peanut flavor.
- Lemon Juice: Brightens everything up and cuts the richness—use fresh lemon for that zing, but if you’re out, a dash of vinegar can mimic the acidity.
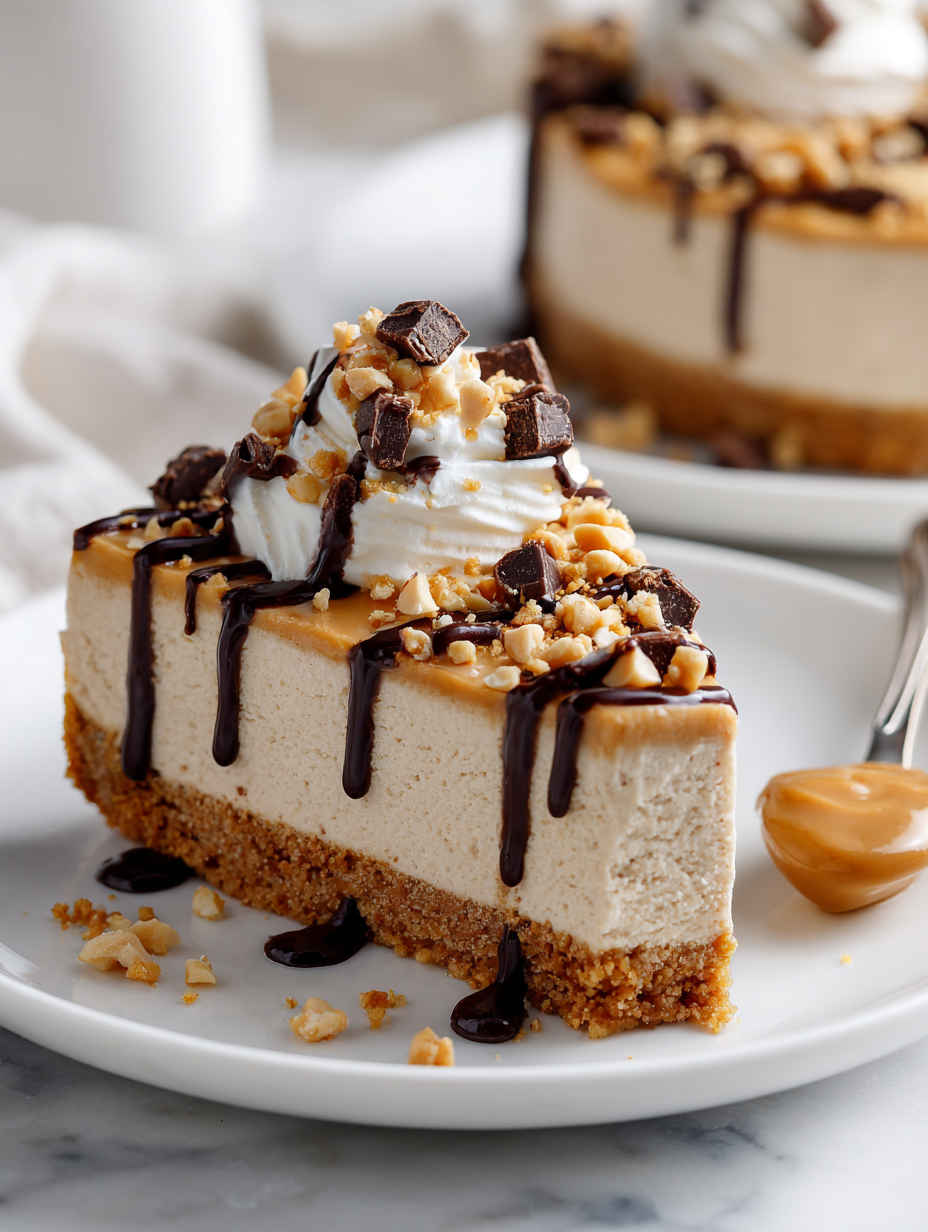
- Optional Toppings: Chopped peanuts, chocolate shavings, or a drizzle of caramel—think of these as your little bursts of surprise that make each slice special.
Spotlight on key ingredients
Cream Cheese:
- I love how it adds that velvety richness, but if you want a lighter version, sour cream works fine—just expect a slightly tangier bite.
- Peanut Butter: The creamy, oozing kind makes blending easy and gives that luscious nutty flavor—try chunky for texture, but watch out for clumps if you’re mixing by hand.
- Graham Cracker Crust: The base should be firm yet crumbly; if it feels too dry, sprinkle a little more melted butter—your fingers will tell you when it’s just right.
Peanut Butter:
- The creamy, oozing kind makes blending easy and gives that luscious nutty flavor—try chunky for texture, but watch out for clumps if you’re mixing by hand.
- Graham Cracker Crust: The base should be firm yet crumbly; if it feels too dry, sprinkle a little more melted butter—your fingers will tell you when it’s just right.
Notes for ingredient swaps
- Dairy-Free: Coconut cream or cashew cream can replace cream cheese for a plant-based, rich texture, but expect a slightly nuttier flavor.
- Nut Butter: Almond or cashew butter can swap peanut butter, offering a different nutty note—try honey-roasted for extra sweetness.
- Crust Base: Digestive biscuits or Oreo cookies (without the filling) can stand in for graham crackers, changing the flavor but keeping the crunch.
- Sweetener: Maple syrup or agave nectar can replace sugar—use a bit less, as these are sweeter and add their own flavor nuances.
- Citrus: Lime juice instead of lemon brightens with a different zing—freshly squeezed makes all the difference in vibrancy.
- Toppings: Chopped roasted nuts, caramel drizzle, or fresh berries—use what you love for a personalized touch.
Equipment & Tools
- Springform pan: To assemble and easily remove the cheesecake without damaging the crust.
- Mixing bowls: For blending the crust and filling ingredients.
- Spatula: To spread and smooth the filling evenly.
- Parchment paper: To prevent sticking and make removal easier.
- Measuring cup and spoons: For precise ingredient measurement.
Step-by-step guide to no-bake cheesecake
- Gather your equipment: 8-inch springform pan, mixing bowls, spatula, parchment paper, and a measuring cup.
- Prepare the crust: Crush 1 ½ cups of graham crackers into fine crumbs using a rolling pin or food processor, then mix with ½ cup melted butter until evenly coated.
- Press the crust: Transfer to the pan, pressing firmly into the bottom and slightly up the sides. Chill in the fridge for 15 minutes to set.
- Make the filling: In a large bowl, blend 16 oz softened cream cheese and ¾ cup smooth peanut butter until smooth and creamy, about 2 minutes on medium speed.
- Add sweetness and tang: Mix in ½ cup powdered sugar, then stir in 2 teaspoons lemon juice to brighten the flavor. Scrape down the sides as needed.
- Fold in whipped topping: Gently fold in 1 cup of whipped heavy cream until just combined, maintaining a light texture. Avoid overmixing.
- Pour the filling: Transfer the creamy mixture onto the chilled crust, smoothing the top with a spatula. Cover loosely with plastic wrap.
- Chill to set: Refrigerate for at least 4 hours, preferably overnight. The filling should be firm, with a slight jiggle in the center.
- Check for doneness: The cheesecake should be firm around the edges, with a slight wobble in the middle. The surface should be smooth and set.
- Finish and serve: Remove from fridge, garnish with extra peanut butter, chopped peanuts, or chocolate shavings if desired. Slice and enjoy!
Chill the assembled cheesecake in the fridge for at least 4 hours or overnight. Once set, remove the sides of the springform pan carefully. Garnish with your favorite toppings, slice with a warm knife, and serve chilled.
How to Know It’s Done
- The crust is firm and holds shape when pressed.
- The filling is smooth, with no lumps, and holds its shape when sliced.
- The cheesecake is chilled and set with a slight jiggle in the middle, not runny.
No-Bake Peanut Butter Cheesecake
Ingredients
Equipment
Method
- Start by crushing the graham crackers into fine crumbs using a food processor or placing them in a zip-top bag and smashing with a rolling pin. Transfer the crumbs to a bowl and pour in the melted butter, mixing until all the crumbs are evenly coated and resemble wet sand.
- Press the crumb mixture firmly into the bottom of a springform pan, spreading it out evenly with your fingers or the back of a spoon. Once coated, place the crust in the fridge for about 15 minutes to firm up.
- In a large bowl, beat the softened cream cheese and peanut butter together with a spatula or hand mixer until smooth, creamy, and free of lumps—this should take about 2 minutes and fill your kitchen with a rich, nutty aroma.
- Add the powdered sugar and gently fold or beat until fully incorporated, then stir in the lemon juice to add a bright, tangy note that balances the richness.
- In a separate bowl, whip the chilled heavy cream until soft peaks form—this creates a light, airy texture that will make the cheesecake irresistibly smooth.
- Gently fold the whipped cream into the cream cheese mixture, doing so carefully to maintain the lightness. Mix until just combined, with no streaks remaining.
- Pour the filling over the chilled crust, spreading it evenly with a spatula. Smooth the top to create a flat, inviting surface.
- Cover the springform pan loosely with plastic wrap and place it in the refrigerator to set for at least 4 hours or overnight. The filling will firm up, turning into a creamy, sliceable cheesecake.
- Once fully chilled and set, carefully remove the sides of the springform pan. Garnish with chopped peanuts or chocolate shavings if desired for extra texture and flavor.
- Slice with a warm, sharp knife, wiping the blade clean between cuts for neat, beautiful slices. Serve chilled and enjoy the rich, nutty goodness!
Notes
Pro tips for perfect cheesecake
- Chill the crust: Press firmly and refrigerate for 15 minutes to prevent crumbling when slicing.
- Room temp ingredients: Soften cream cheese and peanut butter to avoid lumps and ensure smooth filling.
- Use a warm knife: Run your knife under hot water before slicing for clean, neat pieces.
- Fold gently: When adding whipped cream, fold softly to keep the filling light and airy.
- Avoid overmixing: Mix just until combined to prevent the filling from becoming too dense or airy.
- Set overnight: For best texture, let the cheesecake chill at least 8 hours, preferably overnight.
- Decorate last: Add toppings right before serving to keep them fresh and vibrant.
Common mistakes and how to fix them
- FORGOT to chill the crust → Chill for at least 15 minutes to set properly.
- DUMPED too much lemon juice → Use 2 teaspoons, taste, then adjust if needed.
- OVER-TORCHED the crust → Bake until golden, then cool before filling.
- MISSED the setting time → Allow at least 4 hours in fridge for proper firmness.
Quick fixes and pantry swaps
- If/When the crust crumbles, splash in a little more melted butter and press again.
- Patch a runny filling by adding a spoonful of powdered sugar and folding carefully.
- Shield over-torched edges with foil during chilling to prevent burning flavor.
- Rescue a soft set by refrigerating for an extra hour and checking firmness.
- heading
Prep, store, and reheat tips
- Prepare the crust and press it into the pan a day ahead; it firms up better and saves time on serving day.
- The cheesecake can be wrapped tightly and stored in the fridge for up to 3 days, maintaining its creamy texture and nutty aroma.
- For longer storage, freeze slices wrapped individually in plastic wrap; thaw in the fridge for a smoother texture, with a slight chill and nutty scent upon serving.
- Refrigerate the cheesecake for at least 4 hours, preferably overnight, to allow the filling to set completely and develop a richer flavor.
- If reheating a slice slightly, do so briefly in the microwave (10-15 seconds) until just warm—watch for melting edges and a fragrant peanut aroma.
Top questions about peanut butter cheesecake
1. Can I use chunky peanut butter?
Use a smooth, creamy peanut butter to keep the filling silky and easy to blend. Chunky adds texture but might make mixing a bit harder.
2. Is chunky peanut butter okay for this recipe?
Yes, but it may make the mixture a little more difficult to smooth out. For best texture, stick with creamy peanut butter.
3. Should I soften the cream cheese first?
Ensure the cream cheese is softened at room temperature so it blends smoothly without lumps, giving that velvety finish.
4. How long should I chill the cheesecake?
Refrigerate the assembled cheesecake for at least 4 hours, or overnight for the best set and flavor development.
5. My crust is too dry, what can I do?
If your crust feels too dry or crumbly, add a splash of melted butter and press again to help it hold together.
6. Can I make this dairy-free?
Yes, you can substitute with dairy-free options like coconut cream or cashew cream for a similar richness and texture.
7. Can I skip the lemon juice?
Adding a teaspoon of lemon juice brightens the flavor, balancing the richness of peanut butter and cream cheese.
8. How do I get clean slices?
Use a warm, sharp knife to cut the cheesecake. Wipe it clean between slices for neat, smooth pieces.
9. My filling is too soft, what now?
If the filling is too runny, add a bit more powdered sugar or whipped cream and fold gently to thicken.
10. Can I add toppings after chilling?
Yes, toppings like chopped peanuts, chocolate shavings, or a drizzle of caramel add flavor and visual appeal just before serving.
This no-bake peanut butter cheesecake is the kind of dessert that sneaks up on you with its simplicity and rich flavor. It’s perfect for those nights when time is tight but you still want something indulgent and satisfying. Plus, the creamy, nutty aroma filling the kitchen makes every bite feel like a small celebration.
In a world that moves fast, this recipe offers a moment of calm—an easy, honest treat that doesn’t ask for much but delivers plenty. It’s a reminder that sometimes, the best desserts are the ones you can pull together in minutes and still feel proud of. No fuss, just good, honest comfort.

Hi, I’m Madison Lane, the cook, recipe creator, and heart behind this kitchen. Food has been part of my life for as long as I can remember. Some of my earliest memories are of standing beside my dad while he cooked, watching him move comfortably around the kitchen, tasting sauces, and explaining why patience mattered just as much as seasoning.
