This no-bake strawberry cheesecake is my secret weapon during hot summer days. No oven heat, no fuss—just creamy, fresh, and cool in every bite. It’s like a little celebration that comes together in minutes, perfect for spontaneous get-togethers or when I want something sweet without the hassle.
I love how forgiving this recipe is, especially when I’m short on time or energy. The combination of ripe strawberries and tangy cream cheese feels like summer on a plate. Plus, it’s a kid-friendly project—my little ones get excited helping me layer and decorate, turning dessert into a bit of a family affair.
This recipe is my go-to for when I want something impressive but don’t want to turn on the oven, especially in the heat of summer. It’s like a shortcut to celebration without the fuss, perfect for spontaneous gatherings or last-minute cravings. The best part? It’s so simple, I can make it with my kids and still feel proud of the result.
Summer’s Cool Cheesecake Shortcut
- This recipe feels like a sweet victory, especially when I pull it out of the fridge and see those vibrant strawberries peek through.
- I get nostalgic every time I make this, recalling summer afternoons spent picking berries with my family, mess and all.
- There’s a quiet pride in how effortlessly this comes together, especially when I want something impressive without the chaos.
- Honestly, the best part is slicing into it and catching that perfect, creamy center with just the right amount of fruit on top.
- It’s become my go-to for last-minute dinners; everyone’s surprised how something so simple can taste so indulgent.
The story behind this recipe
- This recipe actually sprouted from a lazy summer afternoon. I was craving something sweet but didn’t want to turn on the oven in the blazing heat. Then I remembered all those cheesecake layers I used to make with my grandma—no bake, simple, and fresh. It’s funny how a moment of wanting can lead to a recipe that becomes a family staple, especially when strawberries are in season and bursting with juice.
- One summer, I decided to experiment with a dessert that felt indulgent but didn’t require much fuss. I threw together a quick crust, whipped some cream cheese with strawberries, and layered it all. The result was a creamy, tangy, fruity treat that I kept coming back to during peak berry season. It’s not fancy, but it’s honest, and that’s what keeps me making it again and again.
- heading: Short personal story behind this dish
Historical and Cultural Tidbits
- This no-bake strawberry cheesecake has roots in 1960s American dessert trends, emphasizing simplicity and convenience.
- It gained popularity in the 1980s with the rise of chilled desserts, especially in warm climates where oven use was less desirable.
- Strawberries, being seasonal and vibrant, inspired many regional variations of fruit-topped, no-bake cheesecakes worldwide.
- The technique of using crushed cookies or graham crackers as crust dates back to early 20th-century American baking traditions.
Ingredient breakdown: key components
- Cream cheese: I love how easily it whips into a smooth, velvety texture. Make sure it’s softened so it blends without lumps, or you’ll have a slightly grainy filling.
- Strawberries: When ripe, they smell like summer and burst with juice. Use fresh, bright red berries for the best sweetness and color—frozen work in a pinch, but fresh tastes sharper.
- Graham cracker crust: I prefer a buttery, slightly salty base that contrasts the tangy filling. Toast the crumbs lightly for extra flavor or swap in digestive biscuits if you like a different crunch.
- Sweetener (sugar or honey): I keep it minimal, just enough to enhance the strawberries’ natural brightness. Adjust based on your fruit’s sweetness—less is more for a fresh taste.
- Whipped cream: Adds fluff and lightness, but don’t overwhip—look for soft peaks that hold their shape without becoming stiff or grainy. It’s the secret to a creamy bite.
- Lemon juice: Brightens the flavor and cuts through the richness, giving a zesty lift. If you don’t have fresh, a splash of bottled lemon works fine—just avoid the bottled stuff with added sugar.
- Gelatin (optional): I use just a touch if I want extra stability, especially when I know the cheesecake will sit out for a bit. Dissolve it carefully, avoiding clumps, or skip if you prefer a softer set.
Spotlight on key ingredients
Cream cheese & Strawberries:
- Cream cheese: I love how easily it whips into a smooth, velvety texture. Make sure it’s softened so it blends without lumps, or you’ll have a slightly grainy filling.
- Strawberries: When ripe, they smell like summer and burst with juice. Use fresh, bright red berries for the best sweetness and color—frozen work in a pinch, but fresh tastes sharper.
Notes for ingredient swaps
- Dairy-Free: Use coconut cream or cashew-based cream cheese. It won’t be as tangy but still creamy and rich.
- Sugar Alternatives: Swap regular sugar for maple syrup or agave nectar. Expect a slightly different sweetness profile and moisture level.
- Crust Base: Replace graham crackers with digestive biscuits or almond cookies. They add a different flavor and texture, so adjust sugar slightly.
- Fresh Strawberries: Use frozen strawberries in a pinch. Thaw and drain well; they’ll be a little less vibrant but still sweet and juicy.
- Whipped Cream: Substitute with coconut whipped cream or stabilized whipped topping. It might be a bit denser but still light and fluffy.
- Lemon Juice: Swap fresh lemon with bottled lemon juice for convenience. It’s less bright but still adds a citrus kick.
- Gelatin: Use agar-agar or skip entirely for a softer, less set cheesecake. Keep in mind, it will be creamier and less firm.
Equipment & Tools
- Springform pan: For assembling and easy removal of the cheesecake.
- Food processor: Crushing cookies into fine crumbs.
- Mixing bowls: Combining ingredients and folding whipped cream.
- Spatula: Spreading and smoothing the filling evenly.
- Small saucepan: Melting butter for crust.
Step-by-step guide to no bake cheesecake
- Gather your equipment: a 20cm (8-inch) springform pan, a food processor, mixing bowls, spatula, and a small saucepan. The pan is for assembling, processor for crust, bowls for mixing, spatula for folding.
- Crush the cookies: place graham crackers in a zip-top bag, crush with a rolling pin until fine. Alternatively, pulse in a food processor for about 30 seconds. Aim for crumbs that stick together when pressed.
- Make the crust: melt 50g (4 tbsp) butter in a small saucepan over low heat (about 2 minutes). Pour over crumbs, stir until evenly coated. Press into the base of the springform pan with the back of a spoon, creating an even layer. Chill in the fridge for 15 minutes to set.
- Prepare the filling: in a large bowl, beat softened cream cheese with a hand mixer on medium speed until smooth—about 2 minutes. Add 1/2 cup (60g) powdered sugar and mix until combined. Gently fold in 1 cup (240ml) whipped cream and 1 tbsp lemon juice until smooth and fluffy.
- Slice strawberries: hull and slice about 300g (10 oz) of ripe strawberries. Mix half into the filling for a fruity burst, and set aside the rest for topping.
- Assemble the cheesecake: spread the strawberry-filling evenly over the chilled crust. Use an offset spatula to smooth the top. Decorate with remaining strawberries, pressing them gently into the surface for a natural look.
- Chill and set: cover with plastic wrap and refrigerate for at least 4 hours, ideally overnight. This helps the flavors meld and the filling to firm up.
- Finish and serve: remove the sides of the springform pan carefully. Slice with a sharp knife dipped in hot water for clean cuts. Serve chilled, with extra strawberries if desired.
Chill the assembled cheesecake in the fridge for at least 4 hours, preferably overnight. Before serving, run a warm knife around the edges for clean slices. Garnish with extra strawberries or mint leaves if you like.
How to Know It’s Done
- Crust is firm and holds shape when pressed.
- Filling is creamy, no lumps, and slightly jiggles in the center.
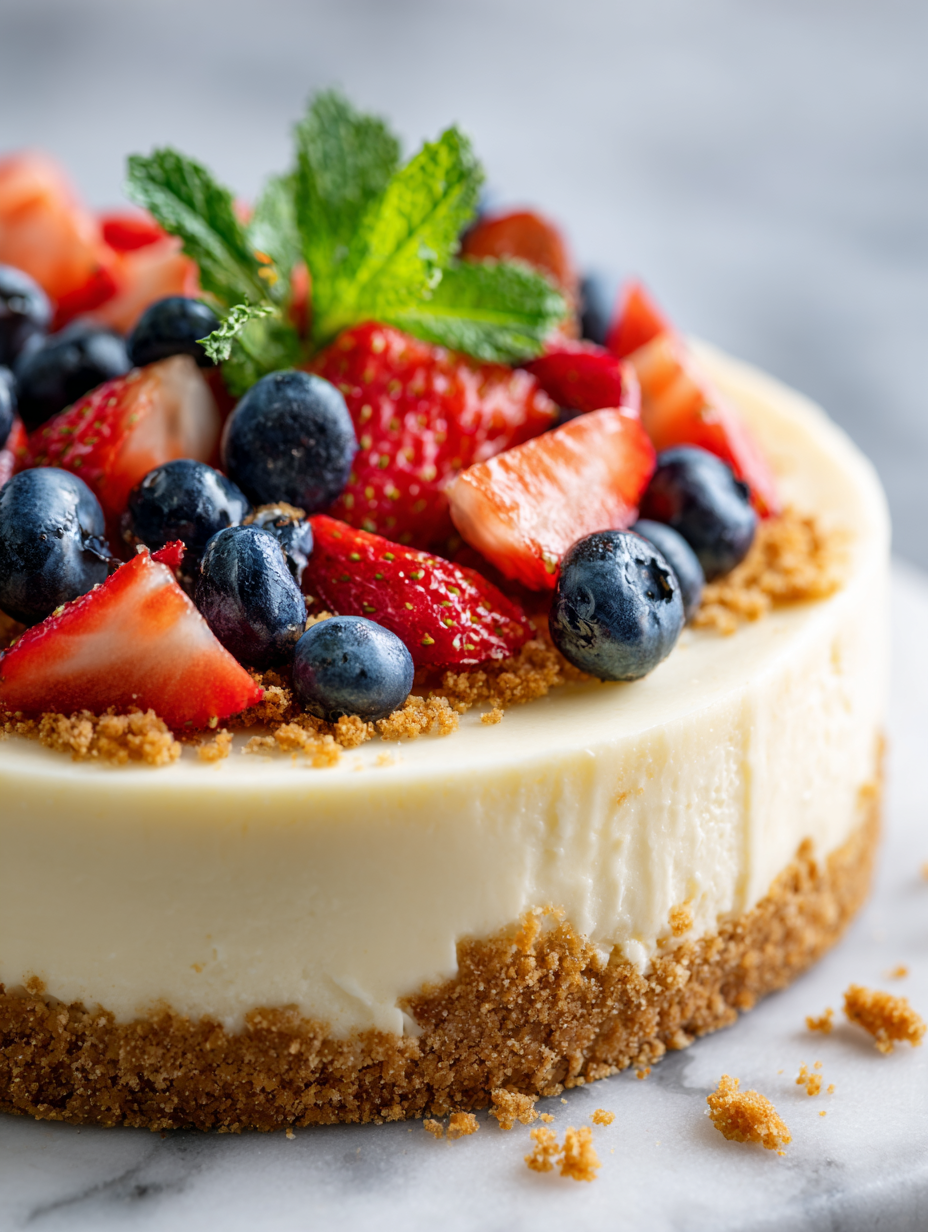
- Strawberries on top are vibrant and slightly shiny, not mushy.
Summer's Cool Cheesecake Shortcut
Ingredients
Equipment
Method
- Place graham crackers in a food processor and pulse until you get fine crumbs. Pour the crumbs into a bowl.
- Melt the butter in a small saucepan over low heat until just liquid. Pour the melted butter over the graham cracker crumbs and stir until evenly coated and crumbly.
- Press the crumb mixture firmly into the bottom of a springform pan, creating an even layer. Chill the crust in the fridge for 15 minutes to set.
- While the crust chills, hull and thinly slice about 200g of strawberries. Set aside the remaining strawberries for topping.
- In a large bowl, beat softened cream cheese with a hand mixer until smooth and creamy, about 2 minutes. Add the powdered sugar and continue mixing until well combined.
- In a separate bowl, whip the chilled heavy cream until soft peaks form. Gently fold the whipped cream into the cream cheese mixture, combining carefully to keep it light and airy.
- Add the lemon juice and sliced strawberries to the filling, gently folding them in until evenly distributed.
- Pour the strawberry filling over the chilled crust, smoothing the top with a spatula for an even surface.
- Arrange the remaining sliced strawberries on top of the filling for a vibrant, fresh look. Press them gently into the surface.
- Cover the cheesecake with plastic wrap and refrigerate for at least 4 hours or overnight, allowing it to set and flavors to meld.
- Once set, carefully remove the sides of the springform pan. Slice with a hot, damp knife for clean cuts and serve chilled, garnished with extra strawberries if desired.
Pro tips for perfect cheesecake
- Chill your crust: Keep it cold in the fridge before adding filling to ensure it stays crisp and holds shape.
- Gently fold whipped cream: Use a spatula to fold, not stir, to keep the filling light and airy with delicate bubbles.
- Use ripe strawberries: Bright red and fragrant strawberries make a sweeter, juicier topping—don’t skimp on quality.
- Warm the knife: Dip your knife in hot water and wipe dry between slices for clean, smooth cuts.
- Adjust sweetness: Taste your strawberries and cheese mixture before setting; a little extra sugar can brighten the flavor.
- Don’t overmix: When combining ingredients, mix just until smooth to avoid a dense, heavy texture.
- Use a springform pan: It makes removing the cheesecake easier and prevents breaking when slicing.
Common mistakes and how to fix them
- FORGOT to check the crust’s firmness → Press gently; it should feel firm and hold shape.
- DUMPED filling into pan before crust set → Chill crust at least 15 minutes before adding filling.
- OVER-TORCHED strawberries → Use gentle heat for toppings; avoid cooking to preserve bright flavor.
- MISSED folding whipped cream properly → Gently fold to keep the filling light and airy.
Quick fixes and pantry swaps
- If strawberries look dull, splash them with lemon juice to brighten their color.
- When the crust is crumbly, patch with a quick press of melted butter and refrigerate briefly.
- Splash a little hot water on the knife for clean slices, especially if filling is firm.
- When filling is too runny, dump it back in the bowl, add a touch more whipped cream, and fold gently.
- Shield the cheesecake from excess moisture by wrapping tightly if you won’t serve immediately.
Prep, store, and reheat tips
- Prepare the crust and press it into the pan ahead of time; keep it in the fridge for up to 24 hours for extra firmness.
- Assemble the cheesecake (filling and topping) up to 24 hours in advance; cover tightly and store in the fridge to keep the flavors fresh.
- The cheesecake will keep well for 2-3 days; the strawberries may soften slightly, but the overall freshness remains.
- Refrigerate leftovers in an airtight container; for best texture, consume within 3 days, noticing that the filling stays creamy and the berries retain their shine.
- To reheat or soften slightly, let the cheesecake sit at room temperature for 10-15 minutes; avoid microwave to prevent melting or breaking the crust.
Top questions about no bake strawberry cheesecake
1. Can I use cold cream cheese?
Use softened cream cheese to avoid lumps and ensure a smooth filling. Cold cheese can make mixing tough.
2. Can I substitute frozen strawberries?
Frozen strawberries work if thawed and drained well. They can make the topping a little less vibrant but still tasty.
3. How long should I chill it?
Chill the assembled cheesecake for at least 4 hours, preferably overnight, for the best set and flavor melding.
4. Do I need a special pan?
Use a springform pan for easy removal and neat slices. It helps keep the edges clean and presentation nice.
5. What if my filling is too soft?
If the filling feels too runny, gently fold in extra whipped cream or refrigerate longer to firm up.
6. Can I make it less sweet?
Adjust the sweetness by tasting the strawberries and cream cheese mixture before setting. Less sugar for a tangy flavor.
7. How do I make it gluten-free?
For a gluten-free version, use gluten-free graham crackers or digestive biscuits for the crust.
8. My crust is crumbly, what do I do?
If the crust is crumbly, press it firmly into the pan and refrigerate briefly before adding the filling.
9. How do I get clean slices?
Use a hot, damp knife to slice through the cheesecake for clean, smooth cuts.
10. How long does it keep?
Store leftovers covered in the fridge for up to 3 days; the strawberries may soften slightly but stay flavorful.
Making this no-bake strawberry cheesecake feels like a small act of summer rebellion. It’s simple, honest, and keeps the kitchen cool when the heat is relentless. Every slice brings a little moment of celebration, no fuss needed.
And honestly, it’s one of those desserts that feels like a secret shared among friends—rich, bright, and just a little chaotic in the best way. No matter the occasion, it’s a reminder that sometimes, the easiest recipes turn out to be the most memorable.

Hi, I’m Madison Lane, the cook, recipe creator, and heart behind this kitchen. Food has been part of my life for as long as I can remember. Some of my earliest memories are of standing beside my dad while he cooked, watching him move comfortably around the kitchen, tasting sauces, and explaining why patience mattered just as much as seasoning.
