This no-bake classic cheesecake is my answer to summer heat and busy weekends. It’s surprisingly simple, yet delivers that rich, velvety texture we crave from a good cheesecake. I love how the no-oven approach keeps everything cool and fresh, especially when I want dessert without the fuss or the sweat in the kitchen.
There’s something deeply satisfying about mixing this kind of dessert with just a few basic ingredients and no baking time. It feels like a little victory—no stress, just creamy, tangy goodness that sets perfectly in the fridge. Plus, it’s so adaptable; you can top it with anything from fresh berries to caramel sauce, depending on the mood.
Over the years, I’ve realized that the best cheesecakes aren’t about perfection but about the feeling of sharing something homemade and honest. This recipe has become my go-to for last-minute dinners or when I want a cool treat that’s both nostalgic and fresh. It’s a reminder that sometimes, simplicity makes for the best moments.
This recipe appeals to those who love the idea of a decadent dessert but dread the fuss of baking, especially in a hot kitchen or on a busy day. It’s about the comforting, familiar flavors of cheesecake without the oven, making it perfect for summer heat, small kitchens, or last-minute gatherings. I’ve found that this no-bake method not only simplifies the process but also heightens the creamy, tangy essence that makes cheesecake irresistible.
A No-Bake Summer Classic
- This cheesecake reminds me of lazy Sunday afternoons, the kind where everything feels just a bit slower and sweeter.
- I used to think no-bake meant compromise, but this recipe proved me wrong—it’s rich, smooth, and dangerously easy to make.
- Sharing this dessert has saved me more times than I can count—especially when I forget to plan ahead but still want something special.
- There’s a quiet pride in whipping up something that looks fancy but takes minimal effort, especially when it turns out perfect every time.
The story behind this recipe
- This recipe was born out of a kitchen experiment during a sweltering summer. I needed something cool, quick, and utterly satisfying without turning on the oven. The idea of a creamy, tangy cheesecake that sets in the fridge just clicked, and I haven’t looked back since.
- It’s a recipe that’s traveled through memories of family gatherings and lazy weekends. I love how it turns a simple pantry of cream cheese, cookies, and a few extras into a showstopper that feels fancy but is really just honest, straightforward comfort food.
- Every time I make it, I remember how sometimes the simplest things—crushed cookies, a splash of lemon, and patience—bring the most joy. It’s become my fallback when I want something sweet and satisfying, no fuss, no oven required.
Historical & Cultural Tidbits
- The first recorded no-bake cheesecakes date back to the early 20th century, embraced for their simplicity during wartime shortages.
- This type of cheesecake gained popularity in the 1970s with the rise of easy, instant dessert recipes in home kitchens.
- In some regions, no-bake cheesecakes are considered a symbol of summer gatherings—light, cool, and perfect for warm evenings.
- Modern variations often incorporate health trends, like using Greek yogurt or plant-based substitutes, but the classic remains a creamy, tangy staple.
Key Ingredients Breakdown
- Cream cheese: I love how it becomes luxuriously smooth when softened, giving that velvety texture. If it’s too cold, it won’t blend well—let it sit out for 30 minutes before mixing.
- Graham cracker crumbs: These add a buttery crunch that contrasts the creamy filling. Toast them lightly if you want a richer aroma, but skip if you prefer a softer crust.
- Unsalted butter: Melts into the crumbs, binding everything together. Use salted for a slightly more savory crust, or skip the salt for pure sweetness.
- Sugar: I use superfine because it dissolves quicker, leaving no grainy texture. If you only have regular granulated, give it a quick pulse in the food processor.
- Lemon juice: Brightens the filling with a fresh, zingy note. Fresh lemon zest can be a game-changer if you want a more intense citrus punch.
- Heavy cream: Whipped just right, it makes the filling light and airy. Overwhipping will turn it into butter, so keep an eye on that soft peak stage.
- Vanilla extract: Adds a warm, fragrant depth. Use pure vanilla bean paste if you want more complexity and specks of tiny seeds for visual appeal.
Spotlight on key ingredients
Cream cheese:
- I love how it becomes luxuriously smooth when softened, giving that velvety texture. If it’s too cold, it won’t blend well—let it sit out for 30 minutes before mixing.
- Graham cracker crumbs: These add a buttery crunch that contrasts the creamy filling. Toast them lightly if you want a richer aroma, but skip if you prefer a softer crust.
Heavy cream:
- Whipped just right, it makes the filling light and airy. Overwhipping will turn it into butter, so keep an eye on that soft peak stage.
- Lemon juice: Brightens the filling with a fresh, zingy note. Fresh lemon zest can be a game-changer if you want a more intense citrus punch.
Notes for ingredient swaps
- Dairy-Free: Use coconut cream or cashew-based cream cheese. It won’t be as tangy but still creamy.
- Gluten-Free: Swap graham cracker crumbs for crushed gluten-free cookies or toasted nuts. Expect a nuttier flavor.
- Sweetener Options: Maple syrup or honey can replace sugar, adding a different depth and slight moisture to the crust.
- Lemon Juice: Use bottled lemon juice if fresh isn’t available—just make sure it’s bright and not dull or metallic.
- Heavy Cream: Substitute with full-fat coconut milk or almond whipped cream for a dairy-free, lighter texture.
- Crust Base: Oreo cookies (without filling) work well, or for a nutty twist, try crushed roasted almonds or pecans.
- Flavor Boost: Mix in a tablespoon of matcha powder or cocoa powder into the crust or filling for a different vibe.
Equipment & Tools
- 20cm (8-inch) springform pan: To hold the crust and filling, allowing easy removal and presentation.
- Food processor or plastic bag + rolling pin: To crush graham crackers finely for the crust.
- Microwave or saucepan: To melt butter gently and evenly.
- Mixing bowls: To combine and beat the cream cheese, sugar, and whipped cream.
- Hand mixer or whisk: To fluff the heavy cream and mix the filling thoroughly.
- Spatula or offset spatula: To smooth the filling and crust surface.
- Plastic wrap: To cover and chill the cheesecake in the fridge.
Step-by-step guide to cheesecake
- Gather all equipment and ingredients before starting — this keeps things smooth. Use a 20cm (8-inch) springform pan for the crust and filling.
- Crush the graham crackers finely — about 1 1/2 cups of crumbs. You can do this in a plastic bag with a rolling pin or a food processor. Set aside.
- Melt 100g (7 tbsp) unsalted butter gently in a small saucepan or microwave — just until melted and warm. Mix into the crumbs until evenly coated.
- Press the crumb mixture into the bottom of the springform pan. Use the back of a spoon or a flat-bottomed glass to press it down firmly and evenly. Chill in the fridge for 15 minutes.
- In a large bowl, soften 400g (14 oz) cream cheese at room temperature for about 30 minutes. It should be soft and smooth with no lumps.
- Add 1/2 cup sugar and 1 tsp vanilla extract to the cream cheese. Beat with a hand mixer or whisk until fluffy, about 2-3 minutes.
- Pour in 1/4 cup lemon juice and mix until combined. The mixture should be smooth and slightly glossy.
- In a separate bowl, whip 1 cup heavy cream until soft peaks form. This takes about 3-4 minutes with a hand mixer on medium-high speed.
- Gently fold the whipped cream into the cream cheese mixture in thirds, using a spatula. Be careful not to deflate the fluff.
- Pour the filling over the chilled crust. Smooth the top with a spatula or the back of a spoon.
- Cover with plastic wrap and refrigerate for at least 4 hours, ideally overnight, until set and firm. The filling should jiggle slightly when gently shaken.
- Before serving, run a knife around the edge of the pan to loosen the cheesecake. Remove the sides of the springform carefully.
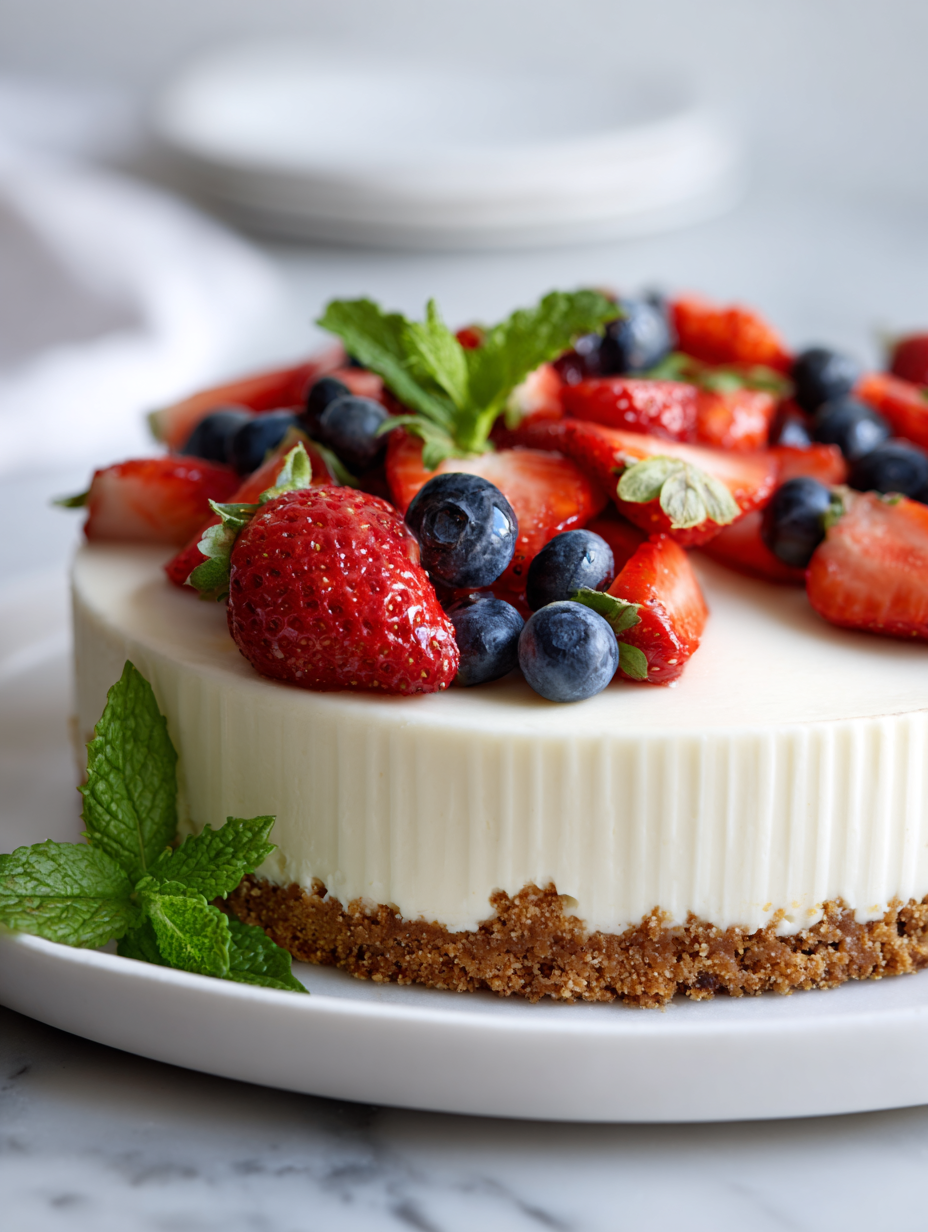
- Decorate with fresh berries, lemon zest, or your favorite topping. Serve chilled and enjoy the creamy, tangy bite.
Chill the cheesecake in the fridge for at least 4 hours or overnight. When ready to serve, run a knife around the edge to loosen, then remove the sides of the springform pan. Decorate as desired and slice with a hot, clean knife for clean cuts.
How to Know It’s Done
- Crust is golden and firm when pressed; edges are clean and crumbly.
- Filling is smooth, no lumps, with a slight jiggle in the center when gently shaken.
- Top is lightly golden and set, not sticky or runny, after the chilling time.
No-Bake Summer Classic Cheesecake
Ingredients
Equipment
Method
- Crush the graham crackers finely in a food processor or place them in a plastic bag and crush with a rolling pin until you have about 1 1/2 cups of crumbs. Transfer to a bowl.
- Gently melt the butter in a microwave or saucepan until warm and fully liquid. Pour the melted butter over the graham cracker crumbs and stir until the crumbs are evenly coated and resemble wet sand.
- Press the crumb mixture firmly into the bottom of a springform pan, using the back of a spoon or a flat-bottomed glass to create an even, compact crust. Chill in the refrigerator for about 15 minutes to set.
- In a large bowl, beat the softened cream cheese with sugar and vanilla extract using a hand mixer or whisk until smooth, fluffy, and free of lumps. This takes about 2-3 minutes, and the mixture should be light and creamy.
- Add the lemon juice to the cream cheese mixture and beat until well incorporated, giving the filling a bright, tangy flavor. The mixture should look glossy and smooth.
- In a separate bowl, whip the heavy cream with a hand mixer until soft peaks form, about 3-4 minutes. It should be fluffy and hold gentle peaks when lifted.
- Gently fold the whipped cream into the cream cheese mixture in thirds, using a spatula to keep the mixture light and airy. Take your time to avoid deflating the whipped cream.
- Pour the filling over the chilled crust, smoothing the top with a spatula or offset spatula for an even surface. Cover the pan with plastic wrap.
- Refrigerate for at least 4 hours, or preferably overnight, until the cheesecake is set and firm. The filling will jiggle slightly when gently shaken but should hold its shape.
- Before serving, run a knife around the edge of the springform pan to loosen the cheesecake. Carefully remove the sides of the pan, then decorate with fresh berries, lemon zest, or your favorite topping. Slice with a sharp knife and enjoy the creamy, tangy goodness.
Pro tips for perfect cheesecake
- Bolded Mini-Head: Chill your cream cheese thoroughly—cold cheese blends more smoothly without lumps.
- Bolded Mini-Head: Use room temperature ingredients—warmth helps everything incorporate evenly, avoiding grainy textures.
- Bolded Mini-Head: Gently fold whipped cream into the filling—this keeps it light and airy, not deflated or dense.
- Bolded Mini-Head: Press the crust firmly—use the bottom of a glass to ensure a compact, even base that won’t crumble.
- Bolded Mini-Head: Watch the cheesecake’s jiggle—just a slight wobble in the center means it’s perfectly set, not runny.
- Bolded Mini-Head: Chill for at least 4 hours—this allows flavors to meld and the texture to firm up, making slicing easier.
- Bolded Mini-Head: Decorate just before serving—fresh berries or zest add a bright, fresh contrast to the rich filling.
Common mistakes and how to fix them
- FORGOT to chill the crust? Repress and refrigerate for 15 minutes before filling.
- DUMPED the whipped cream? Gently fold it in, avoiding deflation for a fluffy texture.
- OVER-TORCHED the cheesecake? Cover with foil and lower oven temp to prevent burning.
- MISSED the jiggle test? Gently shake—center should wobble slightly, then set firm.
Quick fixes and pantry swaps
- When the crust is crumbly, splash a teaspoon of hot water into the crumbs and press again.
- If the filling is too runny, dump it back in the fridge for 15 minutes before pouring.
- Over-torched edges? Shield with foil and lower oven temp for a gentler bake next time.
- Forgot to chill the cream cheese? Rescue by softening it in warm water for 10 minutes.
- heading
Prepping and storing tips
- Prepare the crust and crumb mixture a day in advance; keep refrigerated to maintain freshness and crispness.
- The assembled cheesecake can be made up to 24 hours ahead; keep it covered tightly in the fridge to preserve its texture.
- Allow the cheesecake to sit at room temperature for 10-15 minutes before serving to enhance creaminess and flavor.
- Store leftovers in an airtight container in the fridge for up to 3 days; the texture may soften slightly over time.
- Reheat slices briefly in the microwave at 50% power for about 10 seconds if you prefer a slightly warmer, softer bite—watch for melting or cracking.
Top questions about no bake cheesecake
1. Should I soften the cream cheese first?
Use softened cream cheese; it mixes smoothly and avoids lumps. If it’s cold, let it sit out for 30 minutes.
2. How long should I chill the cheesecake?
Chill the assembled cheesecake for at least 4 hours, preferably overnight, so it firms up and the flavors meld.
3. Can I substitute the crust ingredients?
Replace graham crackers with digestive biscuits or Oreo cookies (without filling) for different textures and flavors.
4. Can I use bottled lemon juice?
Use fresh lemon juice for brightness and zing, but bottled lemon juice works in a pinch. Fresh adds a more vibrant flavor.
5. How do I know when the whipped cream is ready?
Whip heavy cream until soft peaks form, about 3-4 minutes. Overwhipping turns it into butter, so keep a close eye.
6. My filling is too liquid, what do I do?
If the filling is too runny, chill it for 15 minutes before pouring into the crust. It helps set the right texture.
7. What toppings work best for this cheesecake?
Decorate with fresh berries, lemon zest, or chocolate shavings just before serving for a beautiful presentation.
8. Can I prepare parts of this in advance?
You can make the crust a day ahead, keep refrigerated, and assemble the cheesecake when ready to serve.
9. The surface cracked, how do I fix it?
If the top cracks, gently smooth with a spatula and cover with fruit or sauce to hide imperfections.
10. How long does the cheesecake last in the fridge?
Store leftovers covered in the fridge for up to 3 days. Let sit at room temp for 10 minutes before slicing.
Making this no-bake cheesecake is like capturing a moment of summer in every slice—cool, creamy, and just a little rebellious against the heat. It’s a recipe that’s as honest as it is forgiving, perfect for those times when you want dessert without the fuss and a little bit of that nostalgic tang.
Sharing it always feels like a small celebration—simple, satisfying, and genuinely homemade. No matter the occasion, it’s a reminder that sometimes, the best desserts are the ones that come together with honest ingredients and a little patience.

Hi, I’m Madison Lane, the cook, recipe creator, and heart behind this kitchen. Food has been part of my life for as long as I can remember. Some of my earliest memories are of standing beside my dad while he cooked, watching him move comfortably around the kitchen, tasting sauces, and explaining why patience mattered just as much as seasoning.
