Getting that perfect crispy skin on salmon isn’t just about high heat or a hot pan; it’s about respect for the fish’s skin and patience. I used to rush it, ending up with flabby, soggy patches instead of that satisfying crackle. Now, I focus on thorough skin drying and the right pan technique, and the difference is like night and day.
This recipe is my go-to when I want a straightforward, nearly foolproof way to elevate a simple piece of fish. It’s honest, no fancy tricks—just a few steps to coax out that golden, crackly finish that makes every bite feel special. Plus, the process makes the kitchen smell like a crispy dream—salmon skin, a hint of butter, and a little citrus zest.
Honestly, mastering crispy skin salmon changed how I see home cooking. It’s a reminder that with patience and care, you can turn something basic into a small celebration. Whether it’s a weeknight dinner or a weekend treat, this method always delivers that satisfying crunch and tender, flaky flesh underneath.
Focusing on achieving the perfect crispy skin on salmon, this recipe emphasizes the importance of skin preparation and pan technique, making it nearly foolproof even for home cooks who struggle with getting that crackly, golden finish.
The secret to perfect crackly skin
- Getting that crispy skin feels like a small victory—every single time, I get a little giddy.
- There’s a weird pride in hearing that first crack when you flip the fillet—like the fish is giving a nod of approval.
- I used to get frustrated with flabby skin, but now I see it as a lesson in patience and prep.
- Nothing beats the smell of salmon skin crackling in the pan—it’s pure comfort, honestly.
- Crispy skin salmon reminds me of lazy weekend mornings, where the simple things bring the biggest joy.
The story behind this recipe
- I remember the first time I tried to make crispy skin salmon and failed miserably. The skin was soggy, and I felt like giving up for a while. Then I realized it’s all about patience and the skin’s dryness—once I nailed that, everything changed.
- This recipe came out of those early kitchen frustrations—learning to respect the skin’s need for a good, thorough dry and a hot pan. It’s simple, honest, and honestly, it’s become my favorite way to cook salmon when I want a bit of a crispy celebration.
- heading
- The story behind this recipe
Crispy Skin Salmon Trivia
- Crispy skin salmon gained popularity in Scandinavian cuisine, where fish skin is highly prized for its texture and flavor.
- Historically, fish skin has been considered a delicacy in many cultures, often used in traditional dishes or preserved as snacks.
- The technique of crisping fish skin dates back centuries, originally done over open flames before modern pans made it more accessible.
Ingredient breakdown
- Salmon skin: I always pat it dry thoroughly—any moisture is the enemy of crispiness. Use a paper towel and be patient.
- Salt: I sprinkle generous salt on the skin ahead of cooking; it draws out moisture and enhances that crackly texture.
- Oil: I lean towards a neutral oil with a high smoke point—like grapeseed or canola—just enough to shimmer without smoking.
- Lemon: I zest it fresh right before serving—brightens the richness and adds a zingy contrast to the crispy skin.
- Butter: I add a small knob towards the end for gloss and flavor—just enough to melt and mingle without sogginess.
- Herbs: Fresh thyme or dill—sprinkle on at the end for herbal freshness that balances the savory richness.
- Pepper: I prefer freshly cracked black pepper—adds a subtle heat and aroma that complements the fish’s natural flavor.
Spotlight on key ingredients
Salmon skin:
- I always pat it dry thoroughly—any moisture is the enemy of crispiness. Use a paper towel and be patient.
- Salt: I sprinkle generous salt on the skin ahead of cooking; it draws out moisture and enhances that crackly texture.
- Oil: I lean towards a neutral oil with a high smoke point—like grapeseed or canola—just enough to shimmer without smoking.
Lemon and herbs:
- Lemon: I zest it fresh right before serving—brightens the richness and adds a zingy contrast to the crispy skin.
- Butter: I add a small knob towards the end for gloss and flavor—just enough to melt and mingle without sogginess.
- Herbs: Fresh thyme or dill—sprinkle on at the end for herbal freshness that balances the savory richness.
Notes for ingredient swaps
- Dairy-Free: Olive oil instead of butter for finishing—won’t add creaminess but keeps it light.
- Low-Sodium: Sea salt or Himalayan pink salt—adds mineral complexity, less processed than table salt.
- Gluten-Free: Tamari or coconut aminos instead of soy sauce—savoury, with a different umami kick.
- Herb Variations: Fresh basil or tarragon—alters the flavor profile but still brightens the dish.
- Citrus Swap: Lime or orange zest—brings a different zing and aroma, especially in warmer months.
- Oil Choice: Avocado oil—has a high smoke point and a buttery feel, good for searing.
- Herb Garnish: Chives or parsley—adds freshness, and a pop of color, if dill isn’t your thing.
Equipment & Tools
- Pan (non-stick or cast iron): To sear the salmon evenly and develop crispy skin.
- Spatula (fish spatula preferred): To flip the delicate fillet without breaking it.
- Paper towels: To thoroughly dry the skin for crispiness.
- Tongs or spoon: To handle the fish gently during flipping and basting.
- Lemon and zester: To add brightness and flavor at the end.
Step-by-step guide to pan searing
- Prepare your workspace: clear a clean surface and gather all tools and ingredients. Pat the salmon skin dry with paper towels—no moisture is your enemy here.
- Heat a non-stick or cast iron pan over medium-high heat until hot, about 2–3 minutes. Add a thin layer of neutral oil, just enough to shimmer but not smoke.
- While the pan heats, season the salmon generously with salt on the skin side. Let it sit for 10 minutes to draw out excess moisture, then pat dry again if needed.
- Place the salmon skin-side down in the hot pan. Press gently with a spatula for 10 seconds to prevent curling. Cook undisturbed for 4–5 minutes, until the skin is deeply golden and crispy.
- Flip the fillet carefully using a fish spatula. Cook for another 2–3 minutes on the flesh side, watching for just opaque flesh and a slight jiggle in the center.
- If the skin isn’t as crackly as you’d like, increase the heat slightly for 30 seconds, but be careful not to burn. If the skin is sticking, lift gently and adjust your heat.
- Towards the end, add a small knob of butter and fresh herbs like thyme or dill if desired. Baste the fish for extra flavor and a glossy finish.
- Remove the salmon from the pan and transfer to a plate. Rest for 2 minutes—this helps the juices redistribute and keeps the flesh tender.
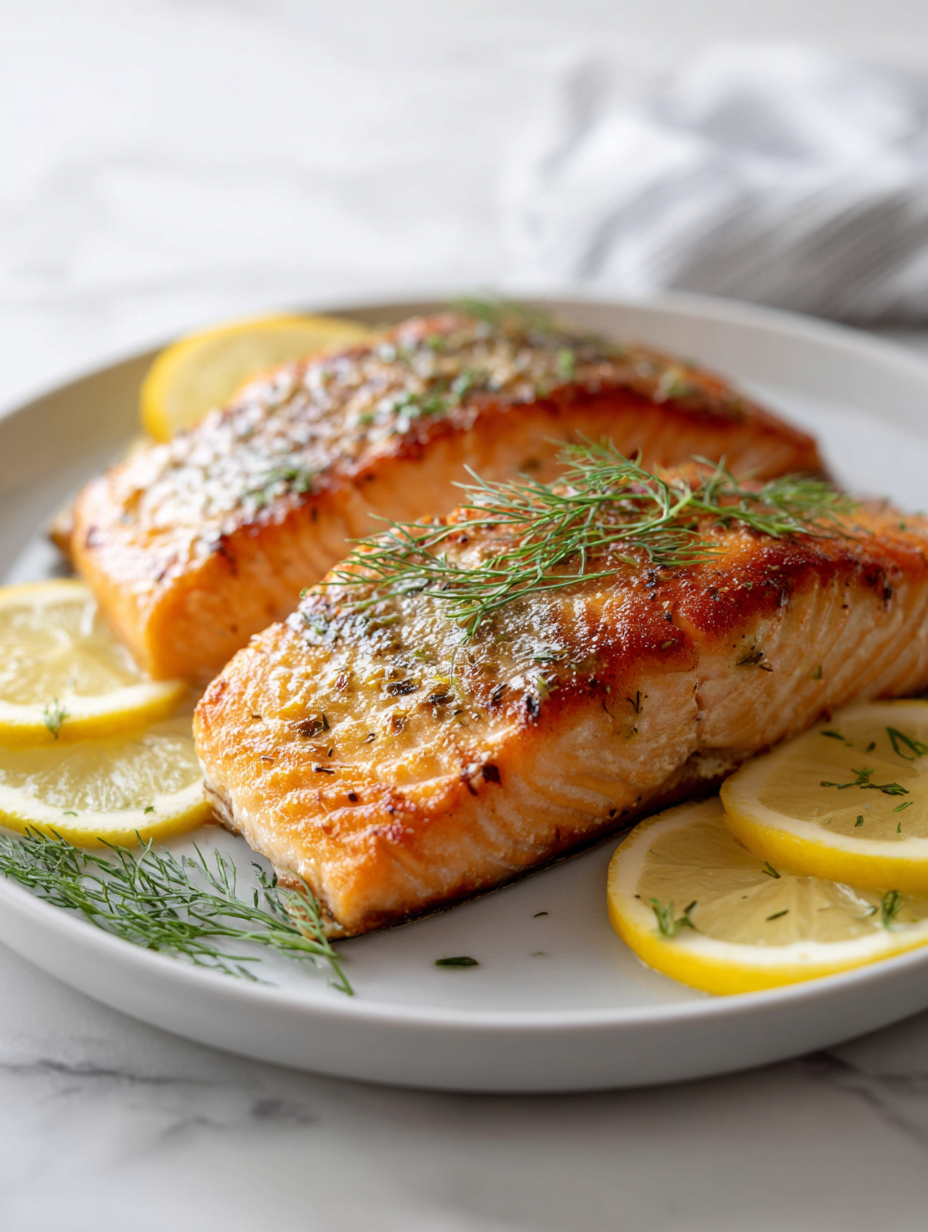
- Finish with a squeeze of lemon or lemon zest for brightness. Plate the fish skin-up to preserve its crispiness.
Let the salmon rest for 2 minutes on a plate. Finish with lemon zest or a squeeze of lemon juice, then serve skin-side up to keep that crispy finish intact.
How to Know It’s Done
- The skin is deeply golden and crackly without sticking.
- The flesh is opaque and flakes easily with gentle pressure.
- The internal temperature reaches about 125°F (52°C) for medium doneness.
Crispy Skin Salmon
Ingredients
Equipment
Method
- Start by patting the salmon fillets thoroughly dry with paper towels, especially the skin, until no moisture remains. This step is crucial for crispy skin.
- Sprinkle a generous teaspoon of sea salt evenly over the skin of each fillet. Let sit for about 10 minutes to help draw out excess moisture, then gently pat dry again with paper towels if needed.
- Heat a pan over medium-high heat until hot, about 2-3 minutes. Add a tablespoon of neutral oil and swirl to coat the bottom. Look for the shimmer of the oil, indicating it's ready.
- Carefully place the salmon fillets skin-side down in the hot pan. Gently press down with a spatula for about 10 seconds to prevent curling. You should hear a gentle sizzle and see the skin start to turn a golden brown.
- Cook undisturbed for 4–5 minutes, watching for the skin to become deeply golden and crispy. The fish flesh should start to turn opaque around the edges.
- Carefully flip the fillets using a fish spatula. Cook the flesh side for another 2–3 minutes, until the fish is just opaque and flakes easily when tested with a fork.
- Once flipped, add a small knob of butter and sprinkle fresh thyme or dill on top. Baste the fish gently with the melted butter for extra shine and flavor.
- Remove the salmon from the pan and transfer to a plate. Let rest for 2 minutes, allowing the juices to redistribute for tender, flaky flesh.
- Zest the lemon over the fish and squeeze a little juice on top for brightness. Serve skin-side up to keep the crispy skin intact and enjoy the satisfying crunch with tender, flavorful flesh.
Pro tips for crispy skin salmon
- Dry thoroughly: Pat the salmon skin completely dry with paper towels—moisture is the enemy of crispiness.
- Use high heat: Start with a hot pan—around 200°C (390°F)—to achieve that golden, crackly skin quickly.
- Apply salt early: Salt the skin generously 10 minutes before cooking; it draws out excess moisture for better crisping.
- Don’t overcrowd: Cook in a single layer without crowding the pan—this ensures even heat and crackling.
- Press down: Gently press the fillet with a spatula for the first 10 seconds—helps prevent curling and promotes crispness.
- Baste with butter: Near the end, add a small knob of butter and herbs—gives shine and flavor without sogginess.
- Rest before serving: Let the fish rest 2 minutes after cooking—this keeps the flesh tender and juices in.
Common crispy skin mistakes and how to fix
- FORGOT to dry the skin thoroughly → Pat dry with paper towels before cooking.
- DUMPED oil in the pan → Use just enough oil to shimmer, avoid excess dripping.
- OVER-TORCHED the skin → Keep an eye on heat; reduce if it smokes or darkens too quickly.
- SKIPPED resting time → Let the salmon rest 2 minutes to keep flesh tender and juices in.
Quick fixes and pantry swaps
- WHEN skin isn’t crispy enough → Splash pan with hot oil and sear a bit longer.
- IF skin sticks → Gently lift and increase heat slightly for better release.
- WHEN fish is overcooked → Remove immediately, rest to stop cooking and keep moisture.
- FORGOT to dry the skin thoroughly → Pat dry with paper towels before cooking.
- DUMPED too much oil → Use just enough to shimmer; avoid excess dripping.
Prep, store, and reheat tips
- Pat the salmon skin dry thoroughly with paper towels before storing; excess moisture hampers crispiness.
- Store the fillet uncovered in the fridge for up to 24 hours to maintain dryness and freshness.
- You can season the salmon with salt a few hours ahead; it helps draw out moisture, enhancing the crackle.
- Refrigerated cooked salmon can be kept for up to 2 days; reheat gently to preserve moisture and texture.
- Reheat in a hot skillet for a few seconds on each side until the skin crisps up again, with a crackling sound and fragrant aroma.
Top questions about crispy skin salmon
1. Can I skip drying the salmon skin?
Yes, dry skin thoroughly with paper towels before cooking. Moisture prevents crispiness and leads to soggy patches.
2. How hot should the pan be?
Use a hot pan—around 200°C (390°F)—and don’t overcrowd. Press the fish down initially to prevent curling.
3. Should I salt the skin beforehand?
Salt the skin generously 10 minutes before cooking, then pat dry again. This draws out moisture for better crackle.
4. When is the right time to flip?
Flip carefully with a fish spatula once the skin is golden and crackly, about 4-5 minutes. Look for deep color and aroma.
5. Should I rest the salmon after cooking?
Rest the fish for 2 minutes after cooking—this keeps the flesh tender and juices inside. Serve skin-up immediately.
6. How do I reheat crispy salmon?
To reheat, gently warm in a hot skillet for a few seconds each side until the skin crackles again. Avoid microwave reheating.
7. My skin is sticking to the pan—what now?
If the skin sticks, gently lift the fish and turn down the heat slightly. Using enough oil helps prevent sticking.
8. Can I add butter during cooking?
Using a small knob of butter and fresh herbs at the end adds shine and flavor without sogginess.
9. How do I make the skin extra crispy?
For extra crispness, increase heat slightly at the end, but watch carefully to avoid burning.
10. Can I prep the salmon ahead?
Pat dry again if necessary before storing or cooking. Moisture is the enemy of a crackly finish.
Mastering crispy skin salmon is a simple pleasure that keeps surprising me. Each crackle and flaky bite reminds me that patience and attention to detail pay off.
In a season when quick, satisfying meals matter more than ever, this dish offers a little moment of pride and comfort. It’s honest, straightforward, and always delivers that perfect crunch.

Hi, I’m Madison Lane, the cook, recipe creator, and heart behind this kitchen. Food has been part of my life for as long as I can remember. Some of my earliest memories are of standing beside my dad while he cooked, watching him move comfortably around the kitchen, tasting sauces, and explaining why patience mattered just as much as seasoning.
